
 |
|
#51
|
||||
|
||||
|
Even working out the correct cylinder size doesn't always work . Had someone work them out for us and went .7 front and back . Had to stamp on the brakes , changed the front to a .625 and awesomeness was found
__________________
Eat, Sleep, Race , Repeat |
|
#52
|
|||
|
|||
|
Well............
Got the old girl running. BUT its never as simple as that is it. After ordering the new seal and a couple of other bits off of RCM I got around to getting the beast running. As I wasn't 100% where to start looking given the injectors had a pulse signal. SO I pulled them out and ran them through the injector cleaner. Remade some of the earthing points on the chassis and engine. Re checked earths on the ECU and AEM unit along with power supplies. Changed the battery for a new larger item. Refitted it all and pressed the button. She tried so hard to fire it was agitating. So. Swapped the plugs from 8's to 6's. And turn the fuel pressure down on the FPR. Pressed the button again and she fired up a treat  Happy days. Having had the car the fired it was time to replace the oil seal. Personally I find it quicker to pull the motor than drop the gearbox. Undo the bolts unplug the wiring harness and bosch, out. Anyway before that, oil out. Aweful lot of debris. Turns out the crank ate the rear thrust bearing. Long story short when the 2.1 engine let go the crank went off to a specialist to be analysed, checked and all that. It came back with the ok to be reused in the new build. Cranking the motor over and running it proved other wise. Absolutely everything has been scrutinised at the end of which a new EJ257 crank/big end and main bearings has been ordered from RCM and should be with me in the next couple of days so I can rebuild the old girl again. Hopefully this time to a more positive out come. On we go..... |
|
#53
|
||||
|
||||
|
That's a bitch - any comeback on the engineering firm that checked the tolerances for you?
__________________
2005 Spec B 6MT - KiDO tuned (~270Bhp)
Custom exhaust - Cosworth filter - Samco Intake - Tints - Bilstein B8/B6 & STI springs - SuperPro ALK - Whiteline positive shift kit, rack mounts, rear adjustable camber bushes, front ARB mounts & strut brace, 20mm rear ARB with AVO mounts, - Hardrace Gearbox and pitch mounts - Prodrive PFF7's - Front Brembos - Kenwood CarPlay - 1/2 carbon grille - STI front splitter |
|
#54
|
|||
|
|||
|
I'll have a chat with them and see what happens but im not going to go nuts at them. You can't do 100% maths test every day of the week.
|
|
#55
|
|||
|
|||
|
|
|
#56
|
||||
|
||||
|
I hope that wasn't to expensive to buy .
__________________
Maintained by Hypertech and Mapped by Andy Forrest 1998 UK Turbo , 1998 Terzo , 1997 JDM Type R the money pit , 2004 black WRX STI Type UK , 2004 blue FSTI |
|
#57
|
|||
|
|||
|
I wouldnt say it was cheap dude
 but very much needed . but very much needed .
|
|
#58
|
||||
|
||||
|
If you can't be £250 for a brand new one then you got robbed

__________________
Maintained by Hypertech and Mapped by Andy Forrest 1998 UK Turbo , 1998 Terzo , 1997 JDM Type R the money pit , 2004 black WRX STI Type UK , 2004 blue FSTI |
|
#59
|
|||
|
|||
|
Was considerably more than that dude. It's a genuine niterated ej257 crank.
|
|
#60
|
||||
|
||||
|
that's the price of a half decent second hand one
__________________
Somewhere drinking Coffee Mapped and maintained by FBTuning 07595 493581. |
|
#61
|
||||
|
||||
|
Unless you buy from the states
__________________
Eat, Sleep, Race , Repeat |
|
#62
|
|||
|
|||
|
Yeah. There was no way after the damaged caused that I was going to buy a second one. That's a brand new niterated item. Hopefully that will be hidden away back in the cases where it belongs
|
|
#63
|
||||
|
||||
|
Not for me it's not a friend is selling me his brand new one for that price don't know where he got it from so I check how much they where and I had to buy it .
__________________
Maintained by Hypertech and Mapped by Andy Forrest 1998 UK Turbo , 1998 Terzo , 1997 JDM Type R the money pit , 2004 black WRX STI Type UK , 2004 blue FSTI |
|
#64
|
|||
|
|||
|
Don't blame you for that money dude. Nicely done
|
|
#65
|
||||
|
||||
|
Thanks don't know what I'm going to do with it yet .
__________________
Maintained by Hypertech and Mapped by Andy Forrest 1998 UK Turbo , 1998 Terzo , 1997 JDM Type R the money pit , 2004 black WRX STI Type UK , 2004 blue FSTI |
|
#66
|
|||
|
|||
|
|
|
#67
|
|||
|
|||
|
|
|
#68
|
|||
|
|||
|
|
|
#69
|
|||
|
|||
|
Well the motor is now 100% built and ready to go back in. I have been even more scrupulous with checking and re checking everything to avoid the crank issue happening again. There was no obvious cause for the crank mashing the rear face of the thrust bearings.
First big thing to change was the piston to head clearance. With the new crank the piston where 20 thou higher than previously. At lowest tilt they where .013" above deck and on full tilt at their highest .031". With the 1.5mm ( .059") head gasket there was no real room to allow for rod stretch. In the turbo bike we allow .040" rod stretch so I took some meet off the top of the pistons to gain the extra clearance. Crank then the new nitrated crank got clearance, re clearance and clearanced again on both main and big ends. End float was checked I don't know how many times which I just right ;D There was one other concern that I had come across before. This invovled the hydraulic clutch bearing. I've seen it before where the spacer behind the bearing has been too thick and when the engine is installed the sits butt up against the clutch cover. Not only not having and air gap as it should but actually being forced up into the clutch cover and also taking up the end float in the crank and mashing thrust bearings. That also being a concern the heights where check over again and on both the engine and gearbox side and was all fine as I had hoped with the required 2.4mm air gap. With every thing checked it ready to go back in. Plan is for Monday. |
|
#70
|
|||
|
|||
|
|
|
#71
|
||||
|
||||
|
Just read through this and good read - amazing job you've done there, and be good to see it running again - a lot of time and effort gone into that

__________________
Subaru Impreza WRX STi Prodrive Type UK 2002:  "Tinkered With!" Maintained and Modified by Super Jules  & RM Performance http://www.rmperformance.co.uk |
|
#72
|
|||
|
|||
|
Yeah getting over the last hurdle and actually getting the car back on the road has been really hard. Crank issue initially. Then the electrical issue with the stock loom (will explain more when I get a chance).
Want to get a few bits on the body done this week. Then I can finish getting the last few mechanical bits sorted and we're there. |
|
#73
|
||||
|
||||
|
Really really looking forward to seeing this beast in the flesh
__________________
Somewhere drinking Coffee Mapped and maintained by FBTuning 07595 493581. |
|
#74
|
|||
|
|||
|
Few more weeks hopefully then mapping for running in
|
|
#75
|
|||
|
|||
|
So then. Electrical gremlins are a real pig. But ever cloud has a silver lining. As you know the car is fitted it an AlcaTek ECU. I have been trying to get them to talk to me about making some changes to the ecu for absolutely months. Eventually I decided to not have any changes made to the ecu and just buy a proper one buy in the mean time just get it mapped for the current mods. Anyway reinstalling the loom and engine this time has unearthed an underlying electrical issue. It's started with sensor ground wires carrying 8volt live feeds. Which I traced back into the loom then the ecu. Once that was sorted other singles appeared to be incorrect. The loom that had seen far better days before I had even got into looking for the faults. After finding bare wires, doggy taped up and crimped connections I was time to start fresh. Given the lack of contact and lack of support from AlcaTek I decided that if I was building a new loom it wouldn't be for that ecu. So I bought this instead
Nice Syvecs S6 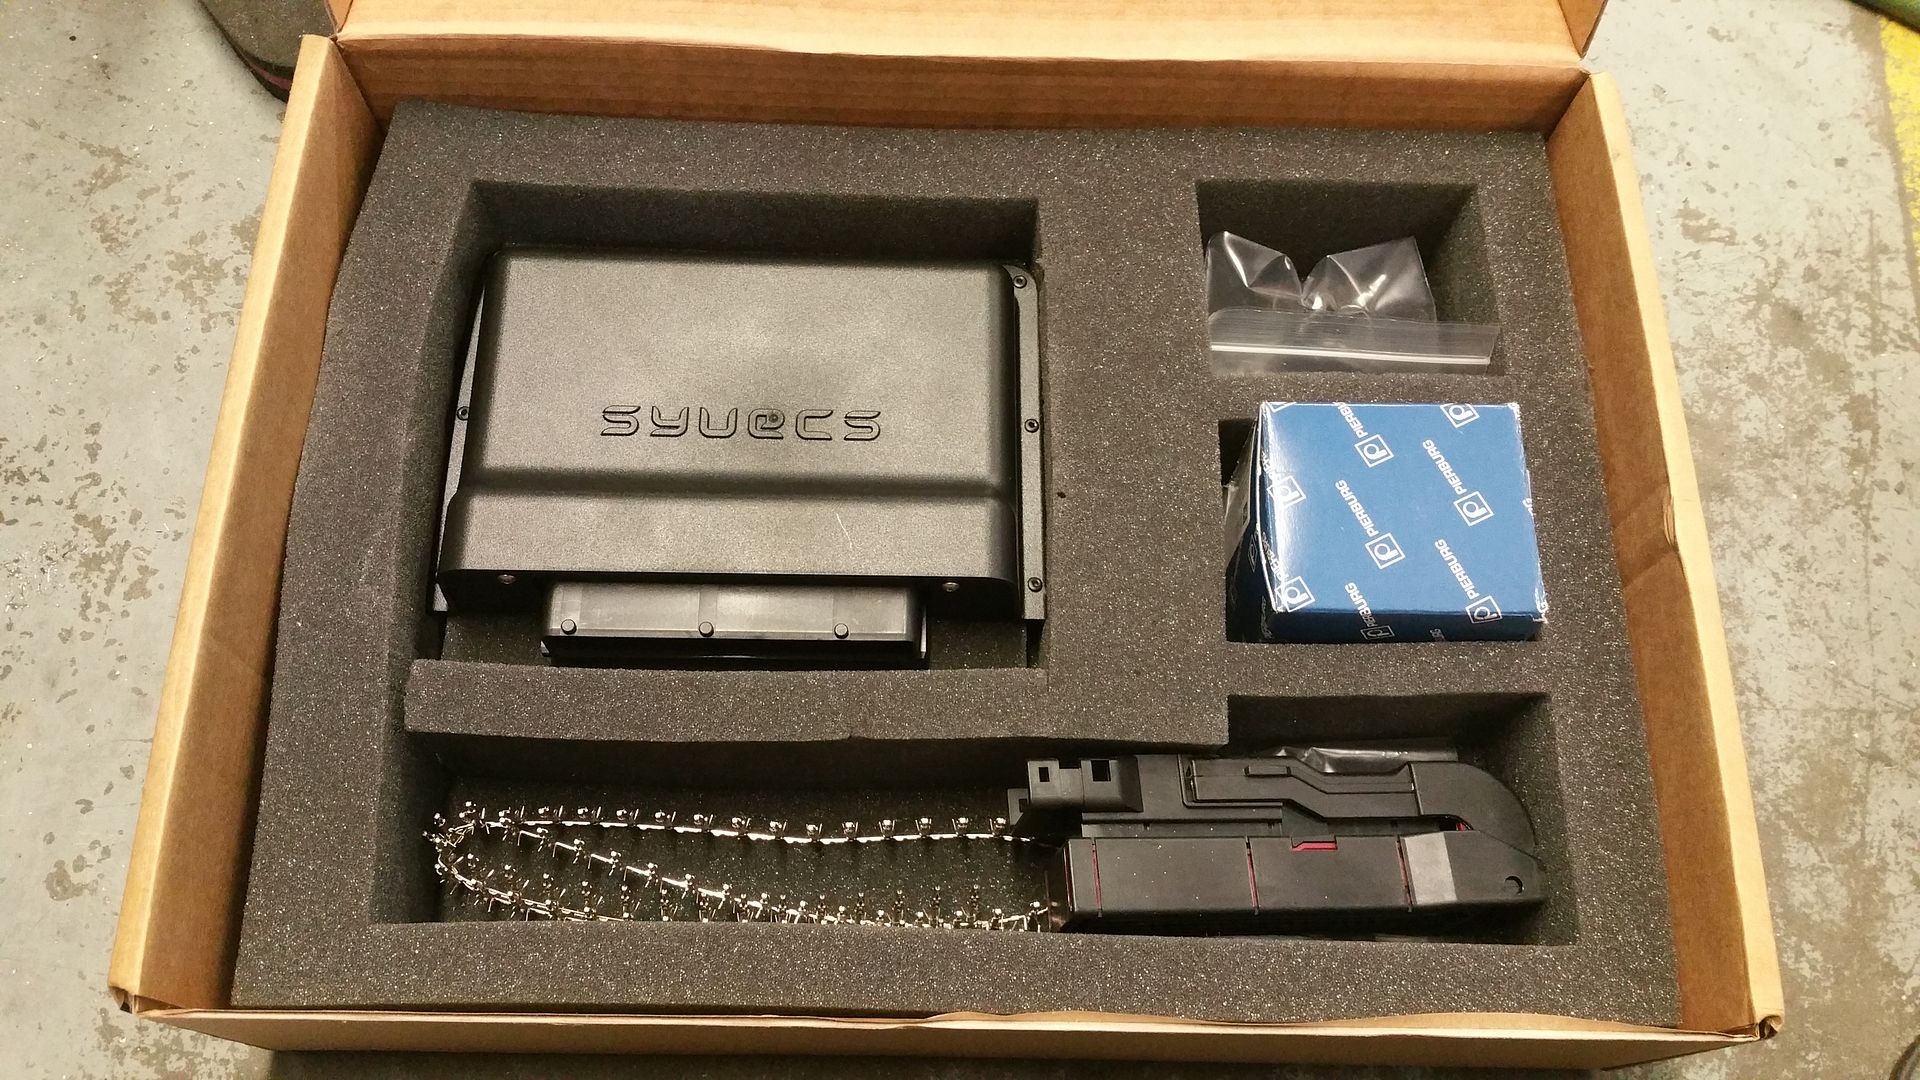 Few other little bits got done whilst I was waiting for the Syvecs. Bonnet is now finished and ready for paint 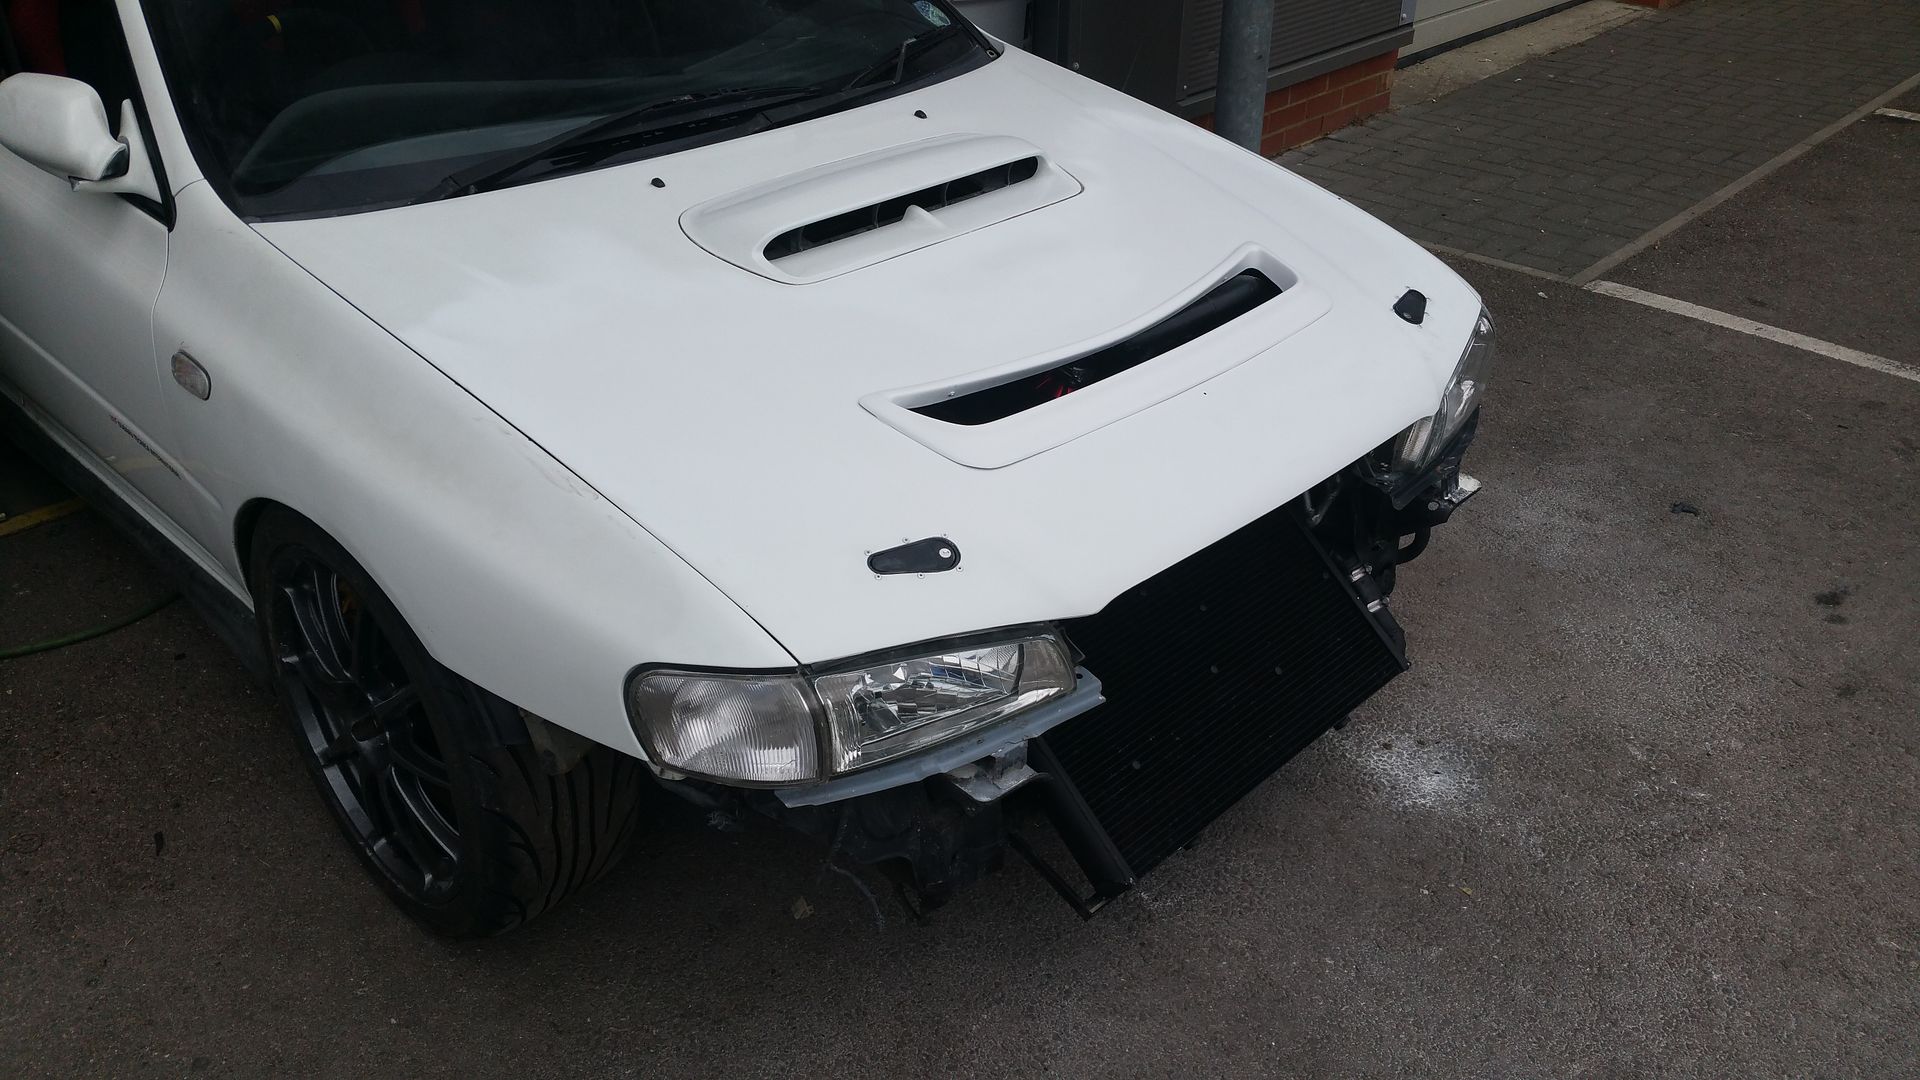 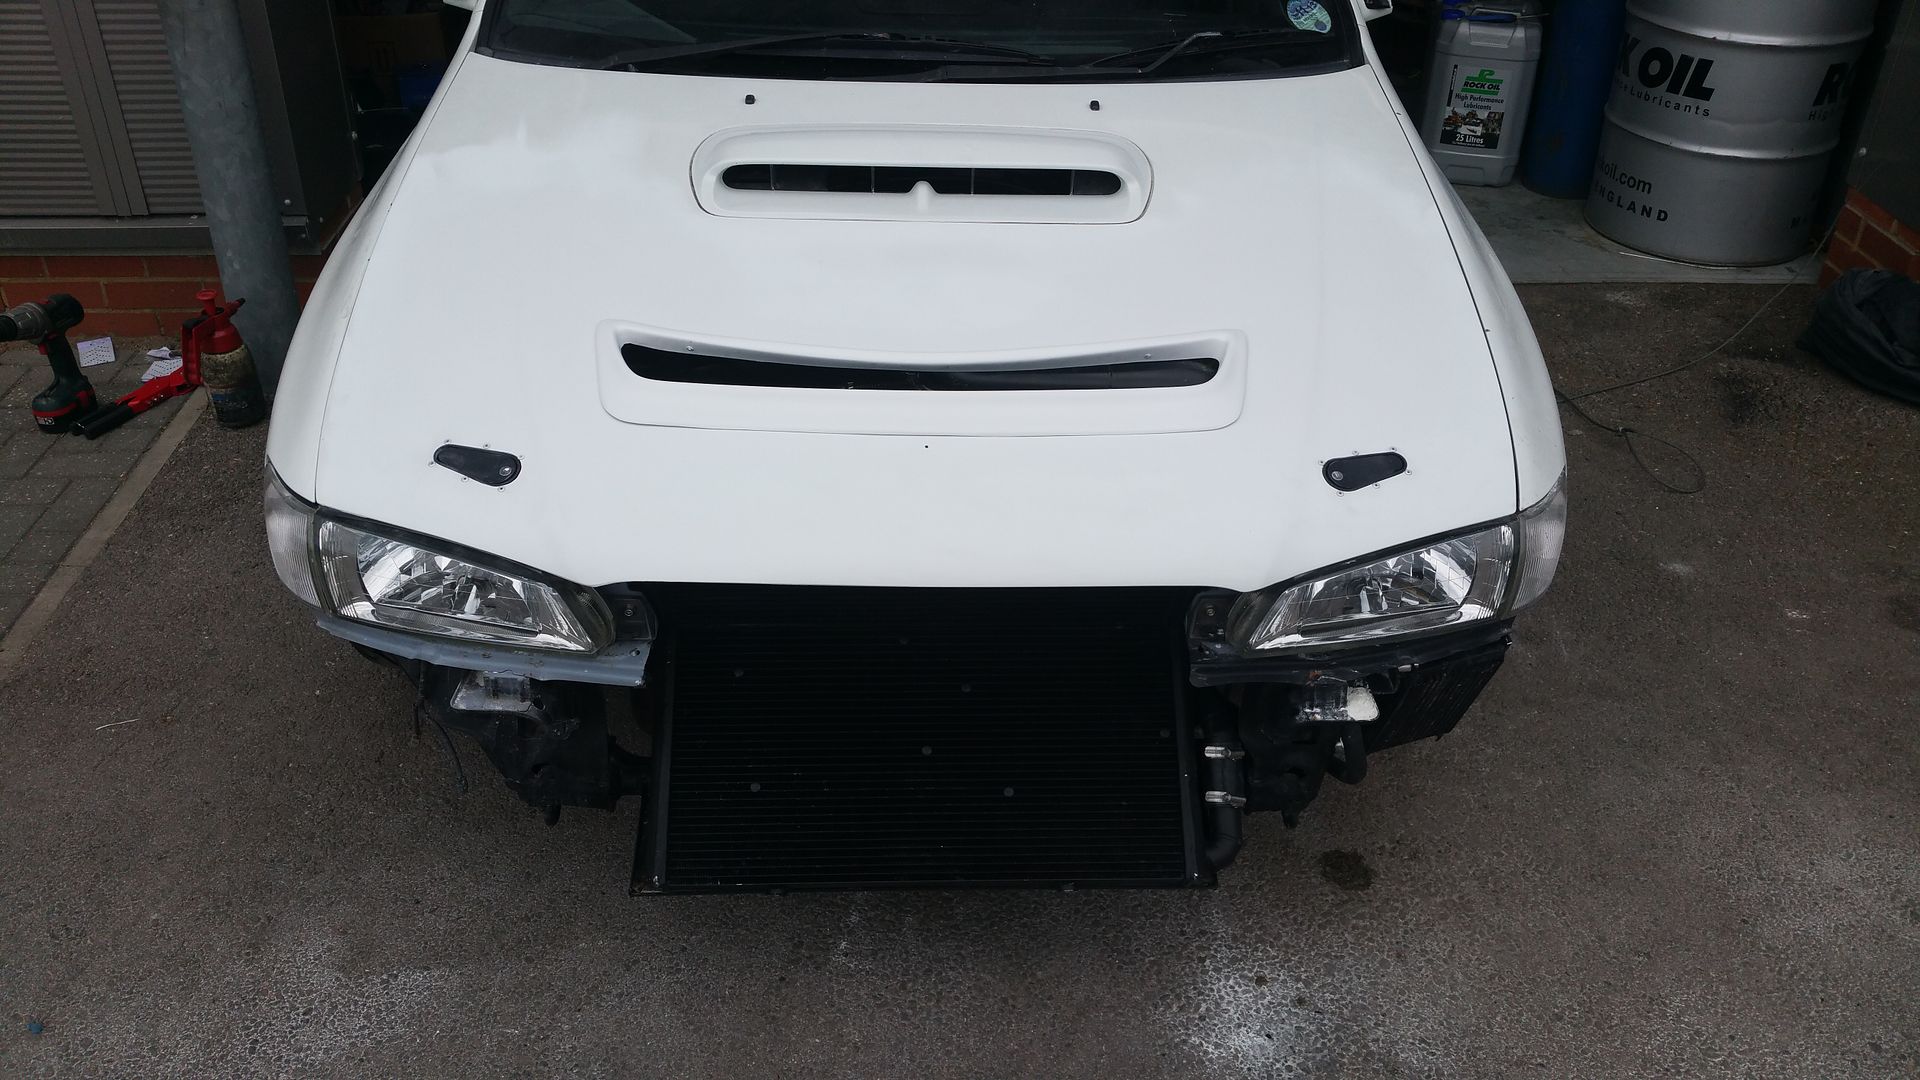 Finally got around to painting and fitting the STI 6 spoiler. I was hoping to paint the front bumper today but the weather is looking a bit bad. 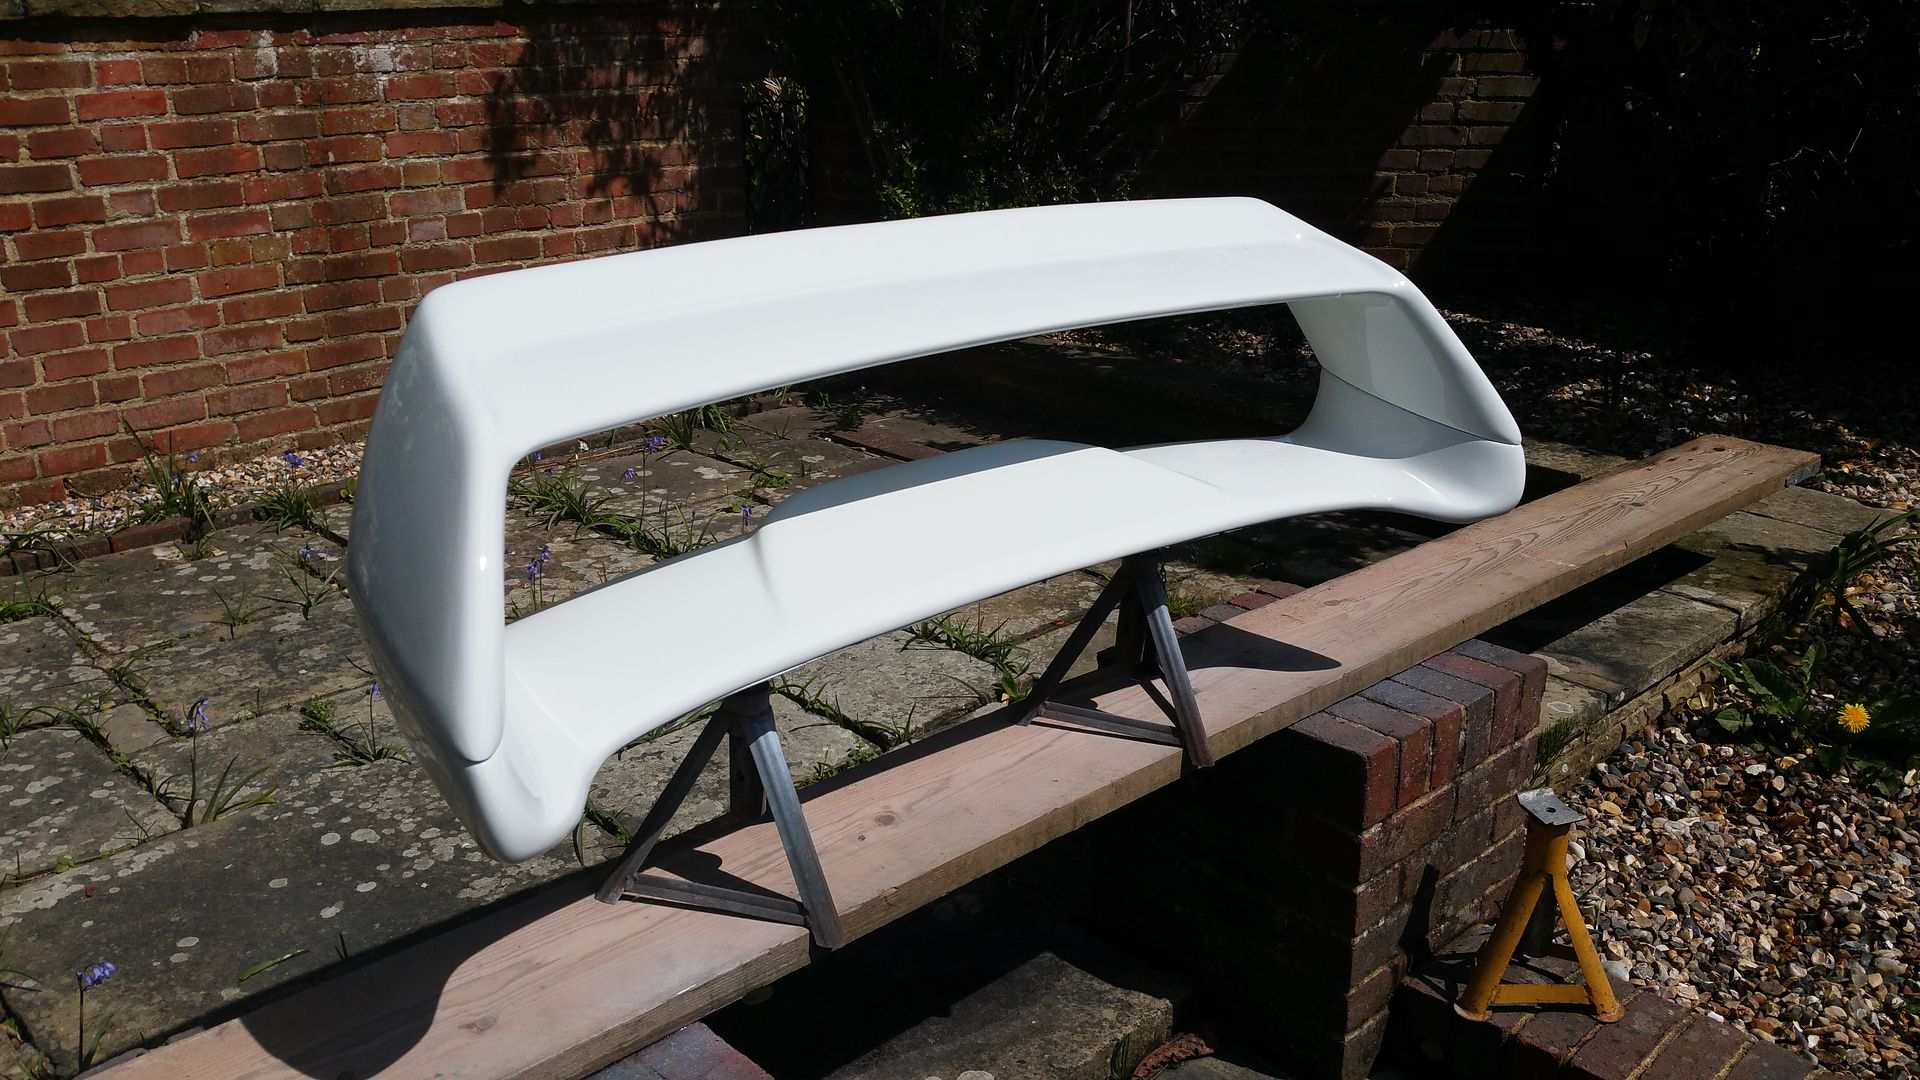 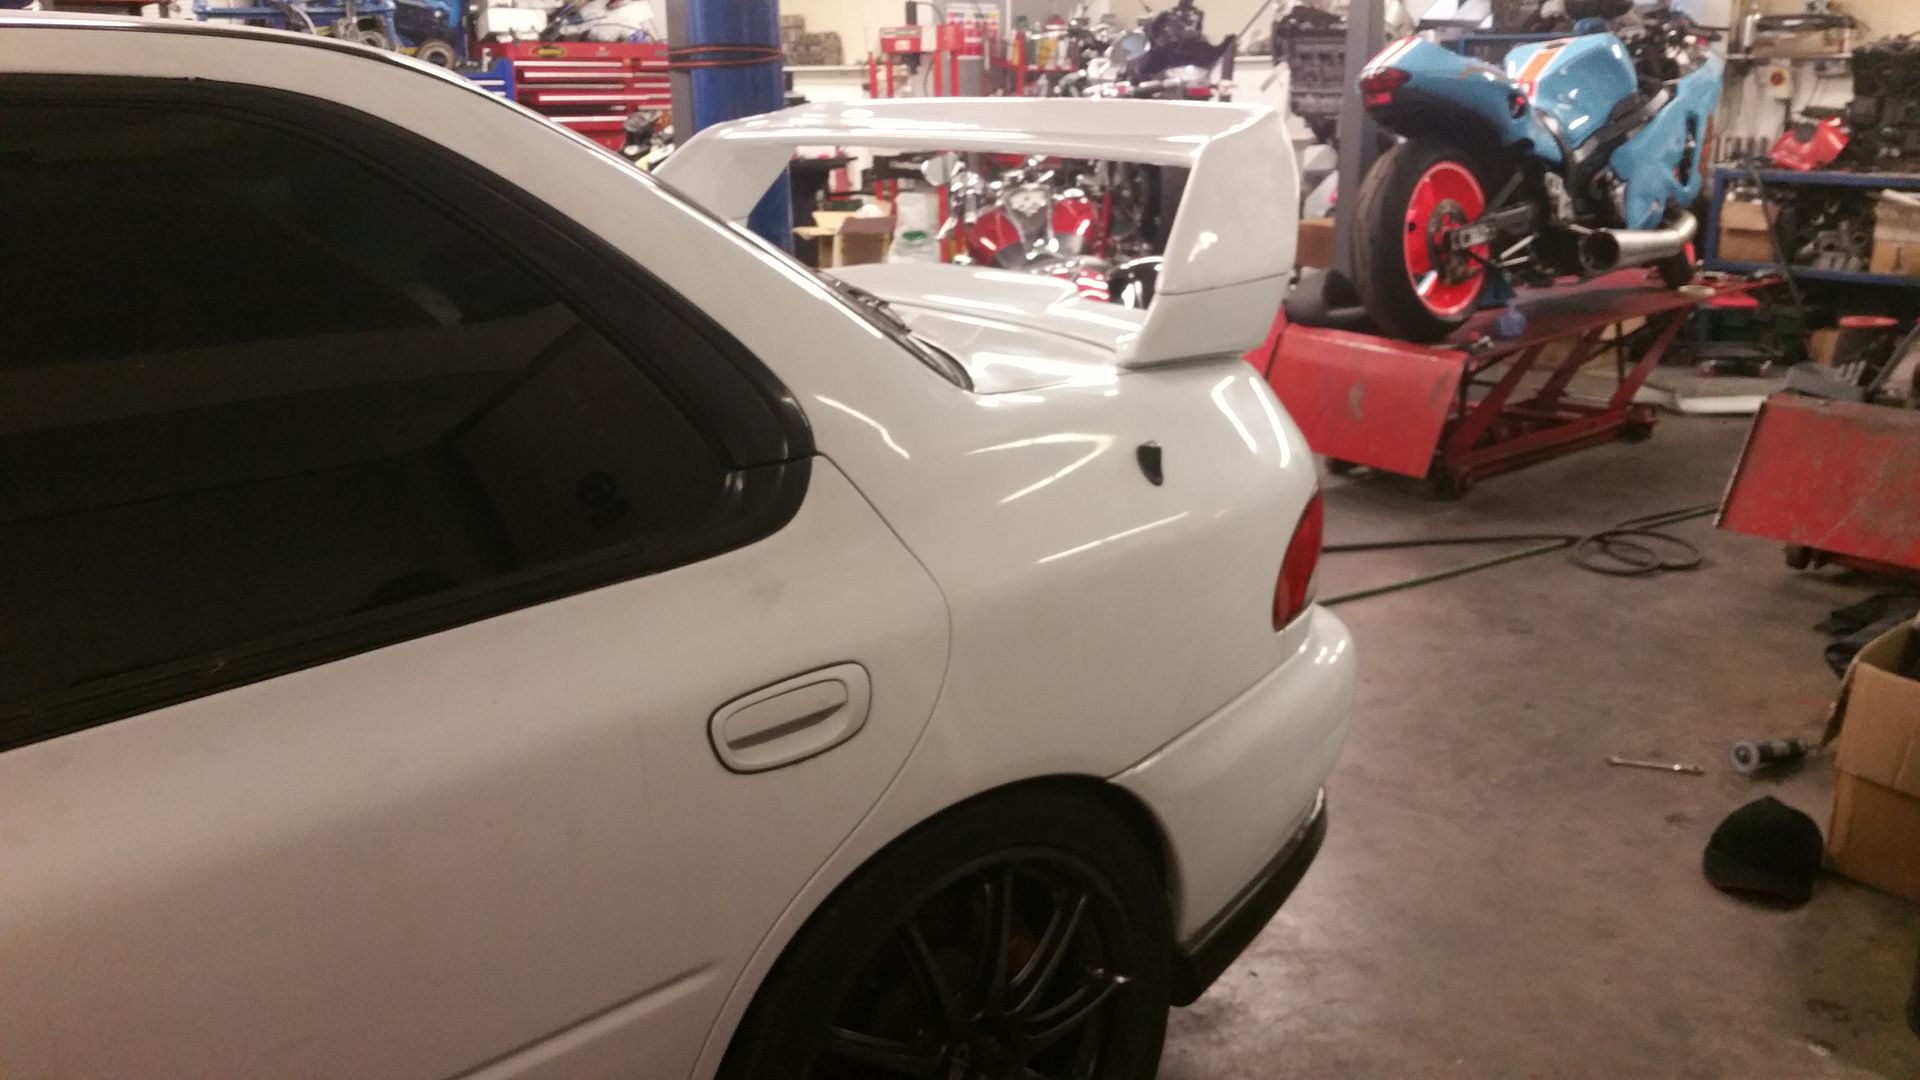 Also got all the water system back in the bay and thought I'd treat the turbo to a cozy blanket 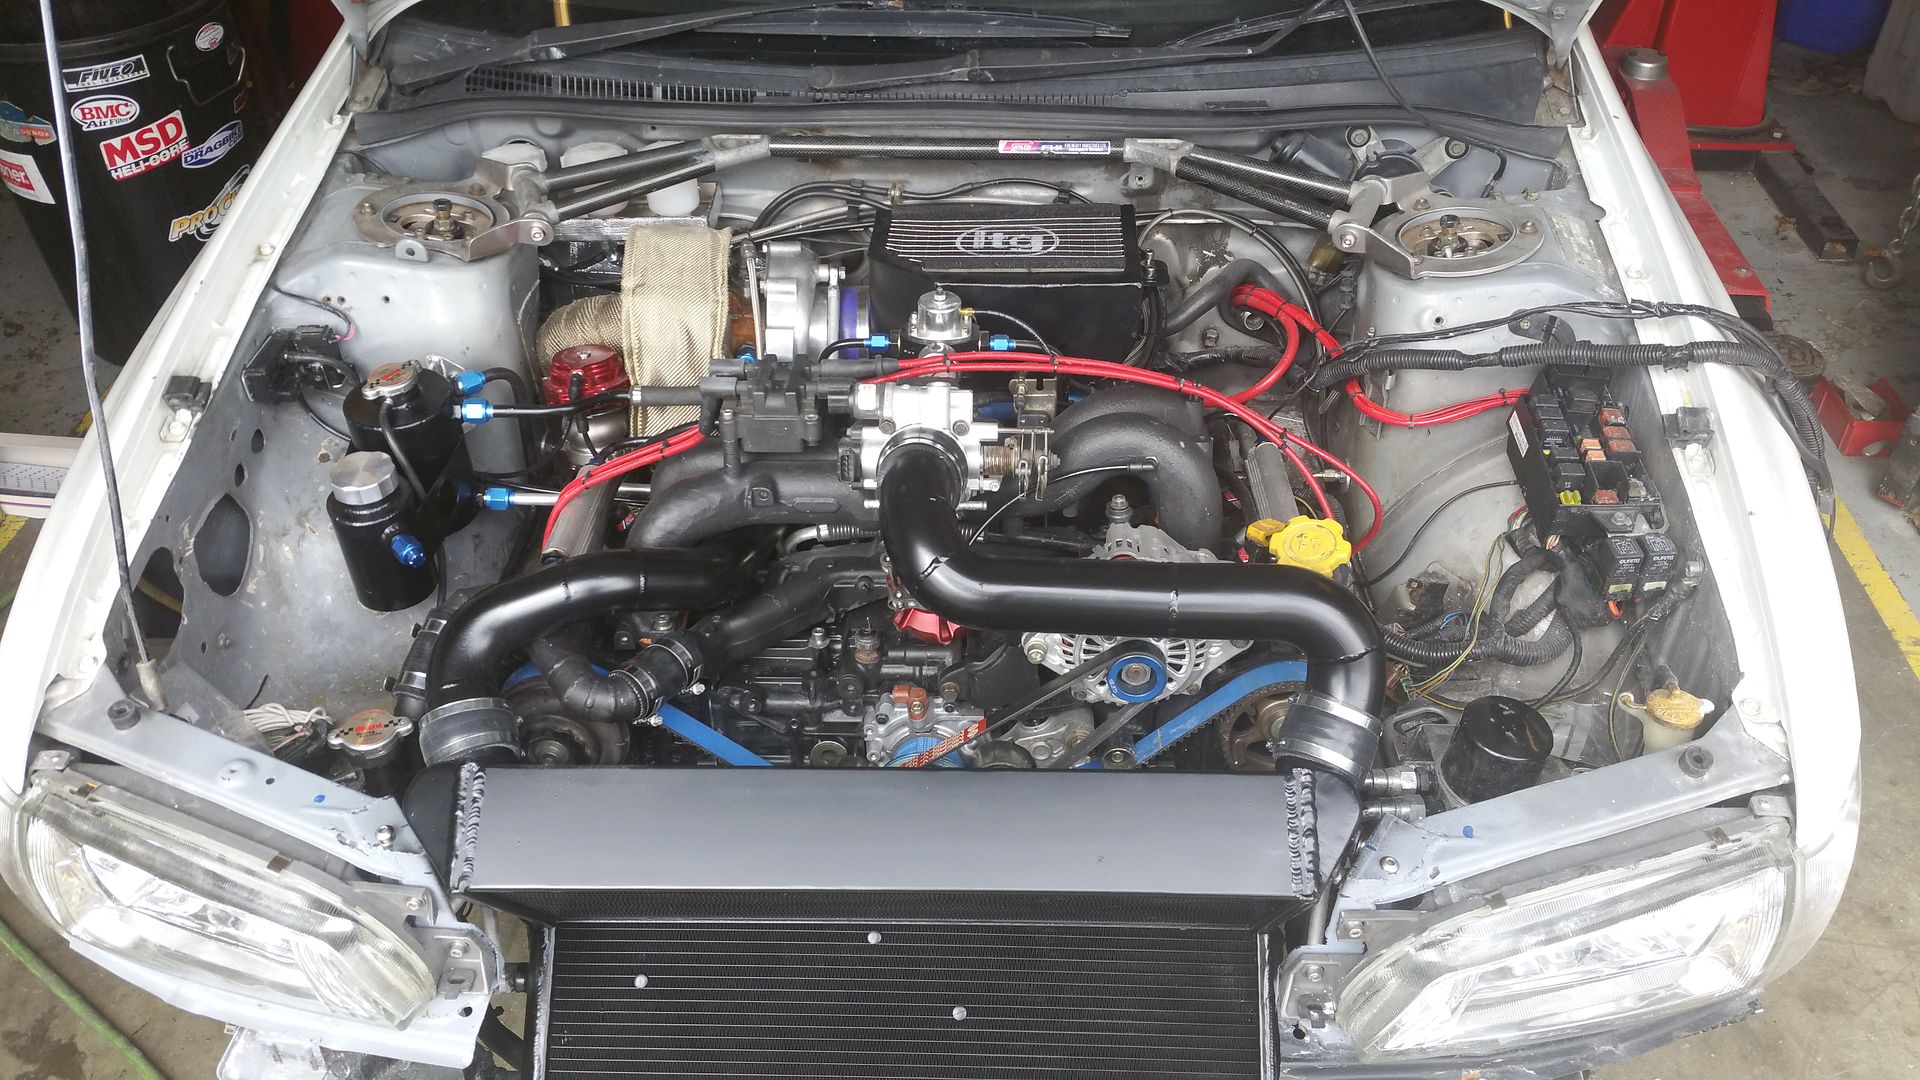 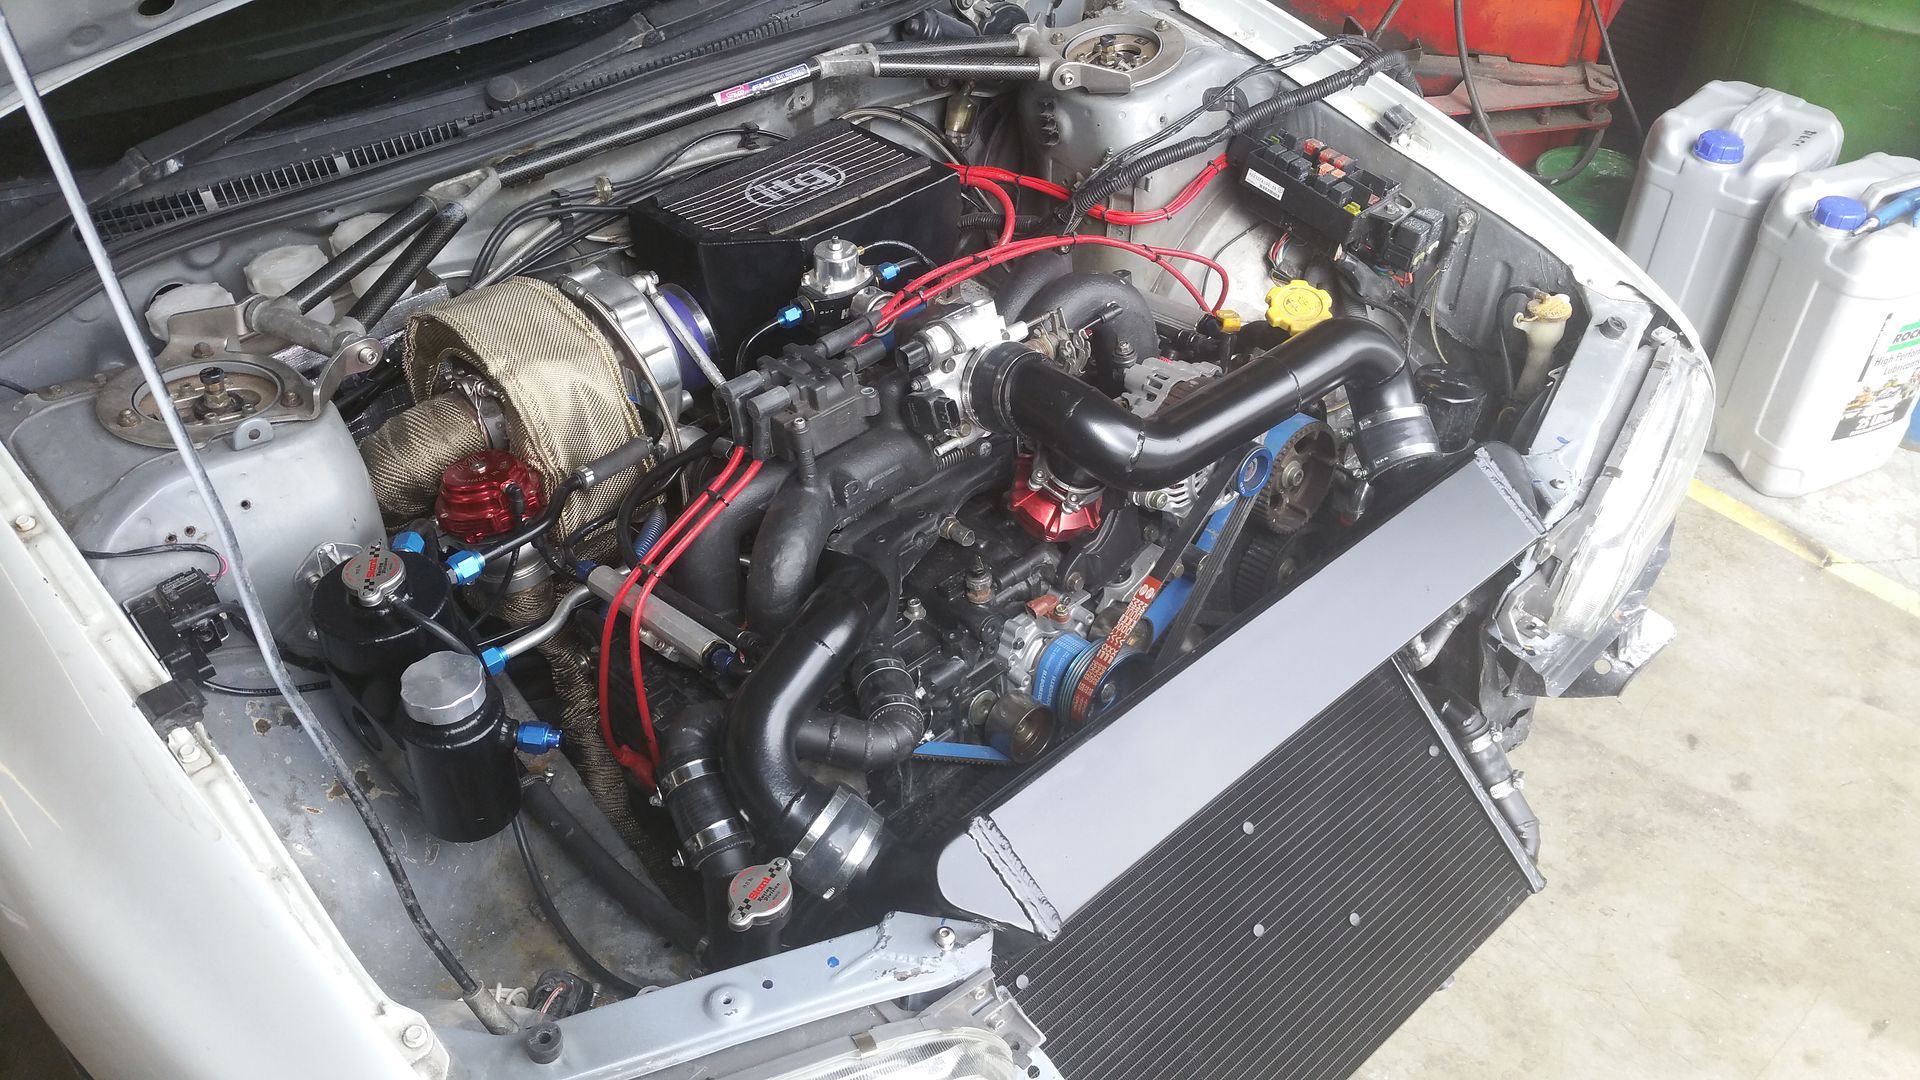 All the bits for the loom are ordered. Hopefully all be with me next week and I can look towards actually driving the old girl |
|
#76
|
||||
|
||||
|
that's one mean looking beast
 Awesome work...
__________________
Subaru Impreza WRX STi Prodrive Type UK 2002:  "Tinkered With!" Maintained and Modified by Super Jules  & RM Performance http://www.rmperformance.co.uk |
|
#77
|
||||
|
||||
|
Making the loom is not too bad , just take your time thinking about it 👍
__________________
Eat, Sleep, Race , Repeat |
|
#78
|
|||
|
|||
|
Thanks guys
|
|
#79
|
|||
|
|||
|
Started getting the power steering in.
Buried it in behind the front bumper on the drivers side. Its an electric MR2 pump. Will be interested to see how it works. I also found some grot under there so sorted that out too while I was there. need to add to the bracket and some extra support as its a heavy pump. Grot: 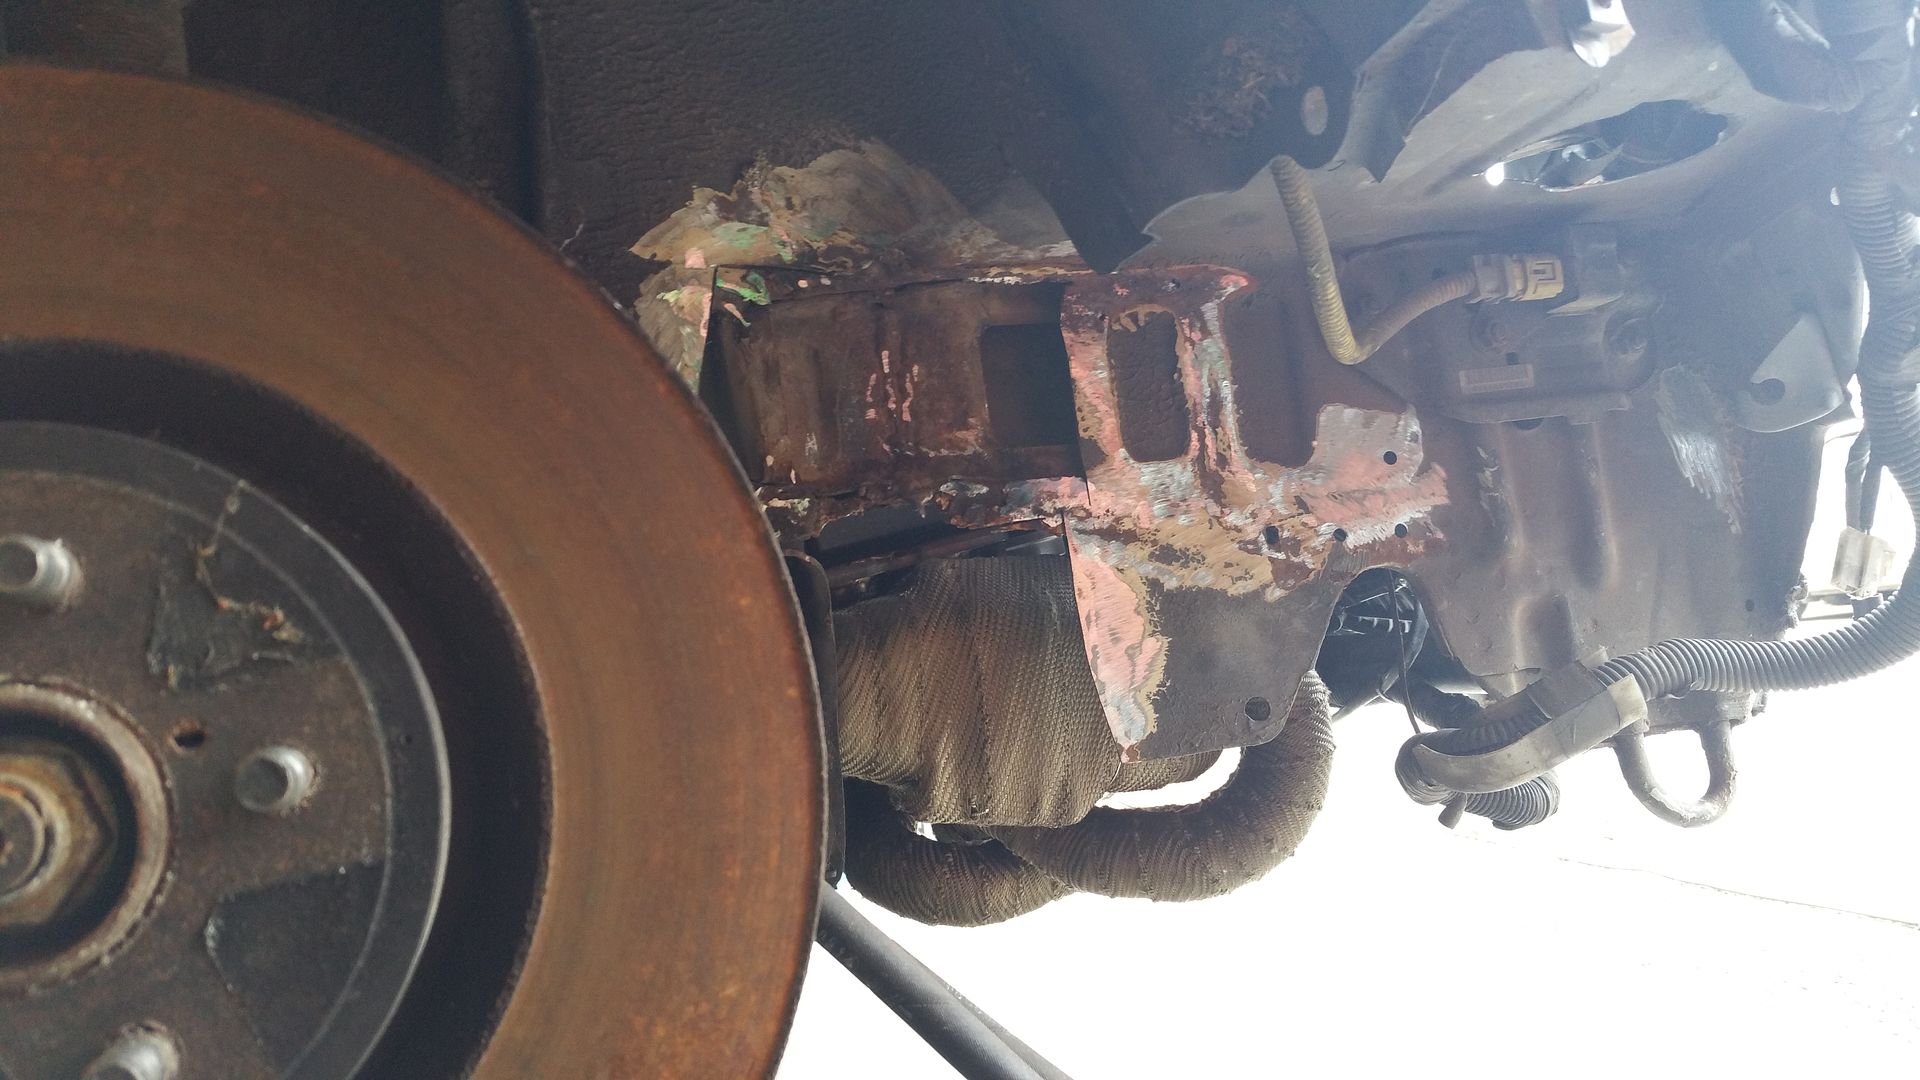 Pump: 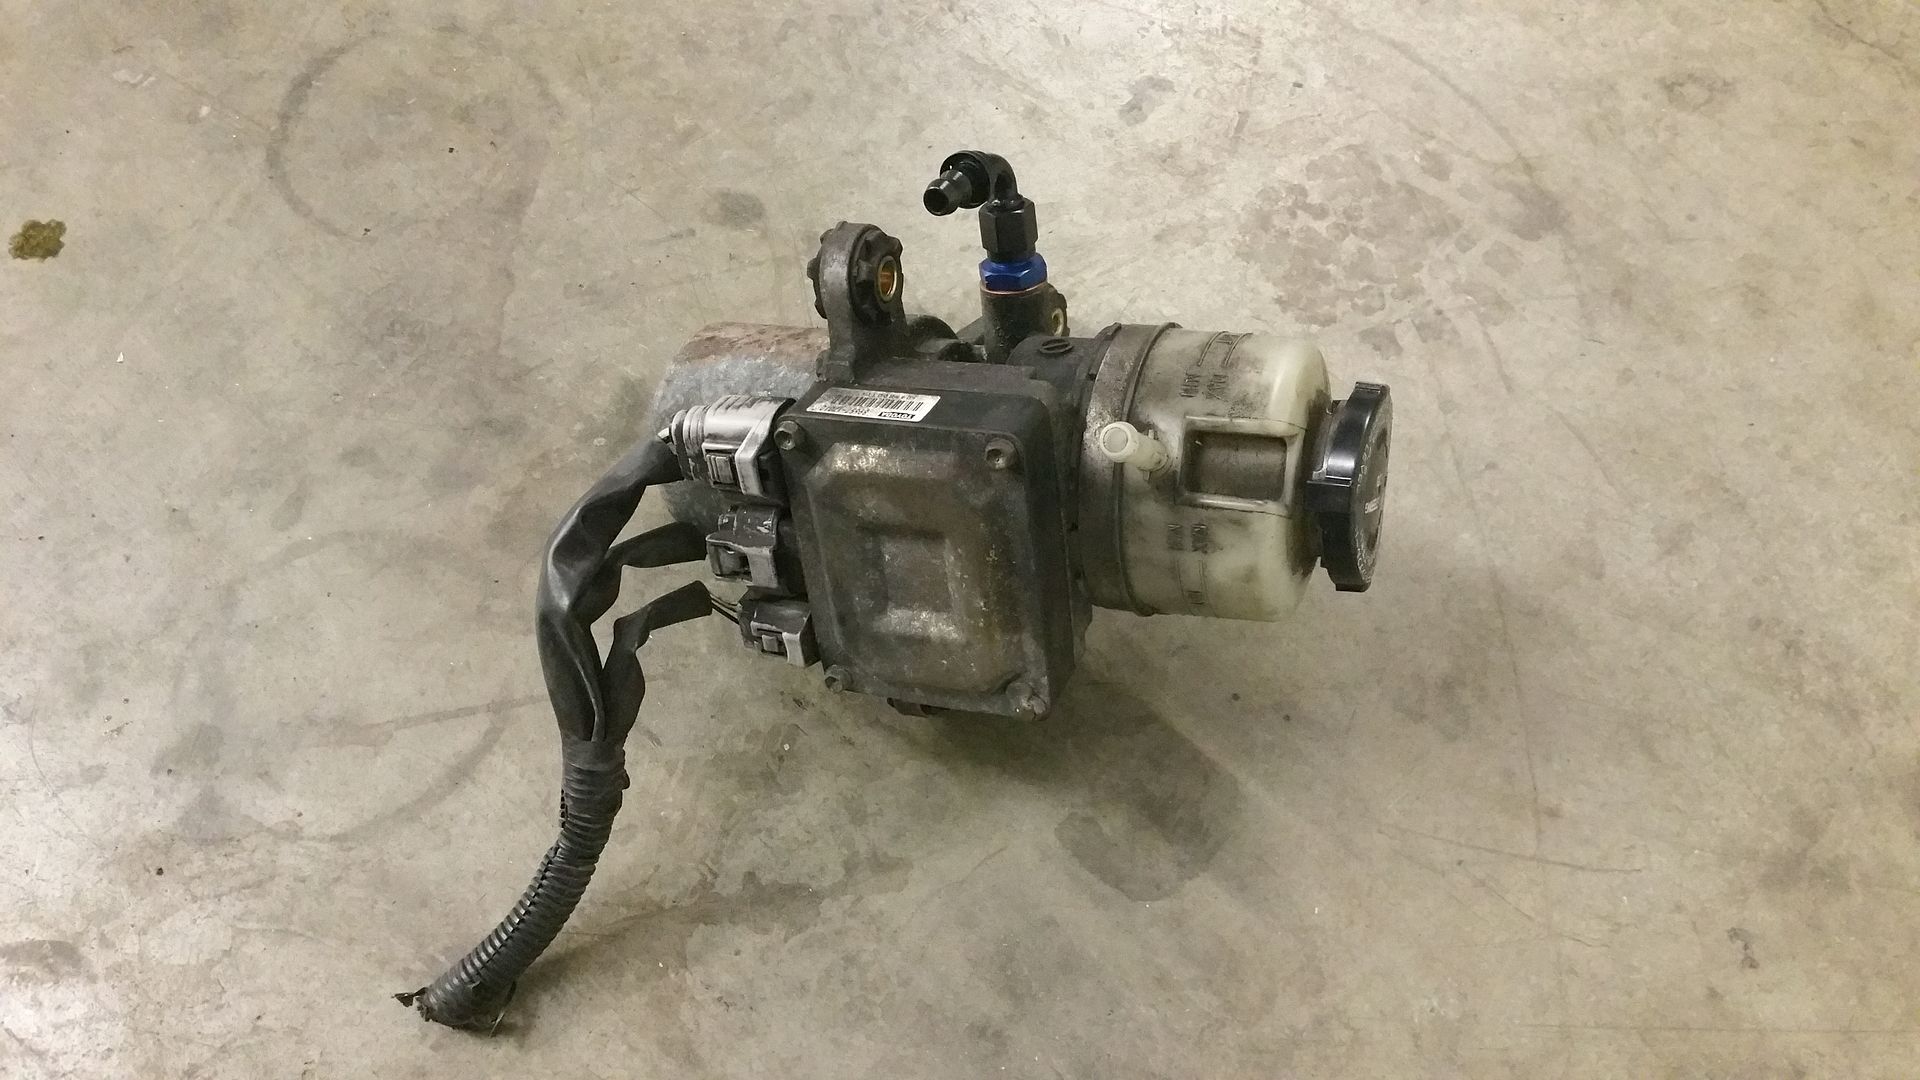 Grot fixed and pump in place (but not finished) 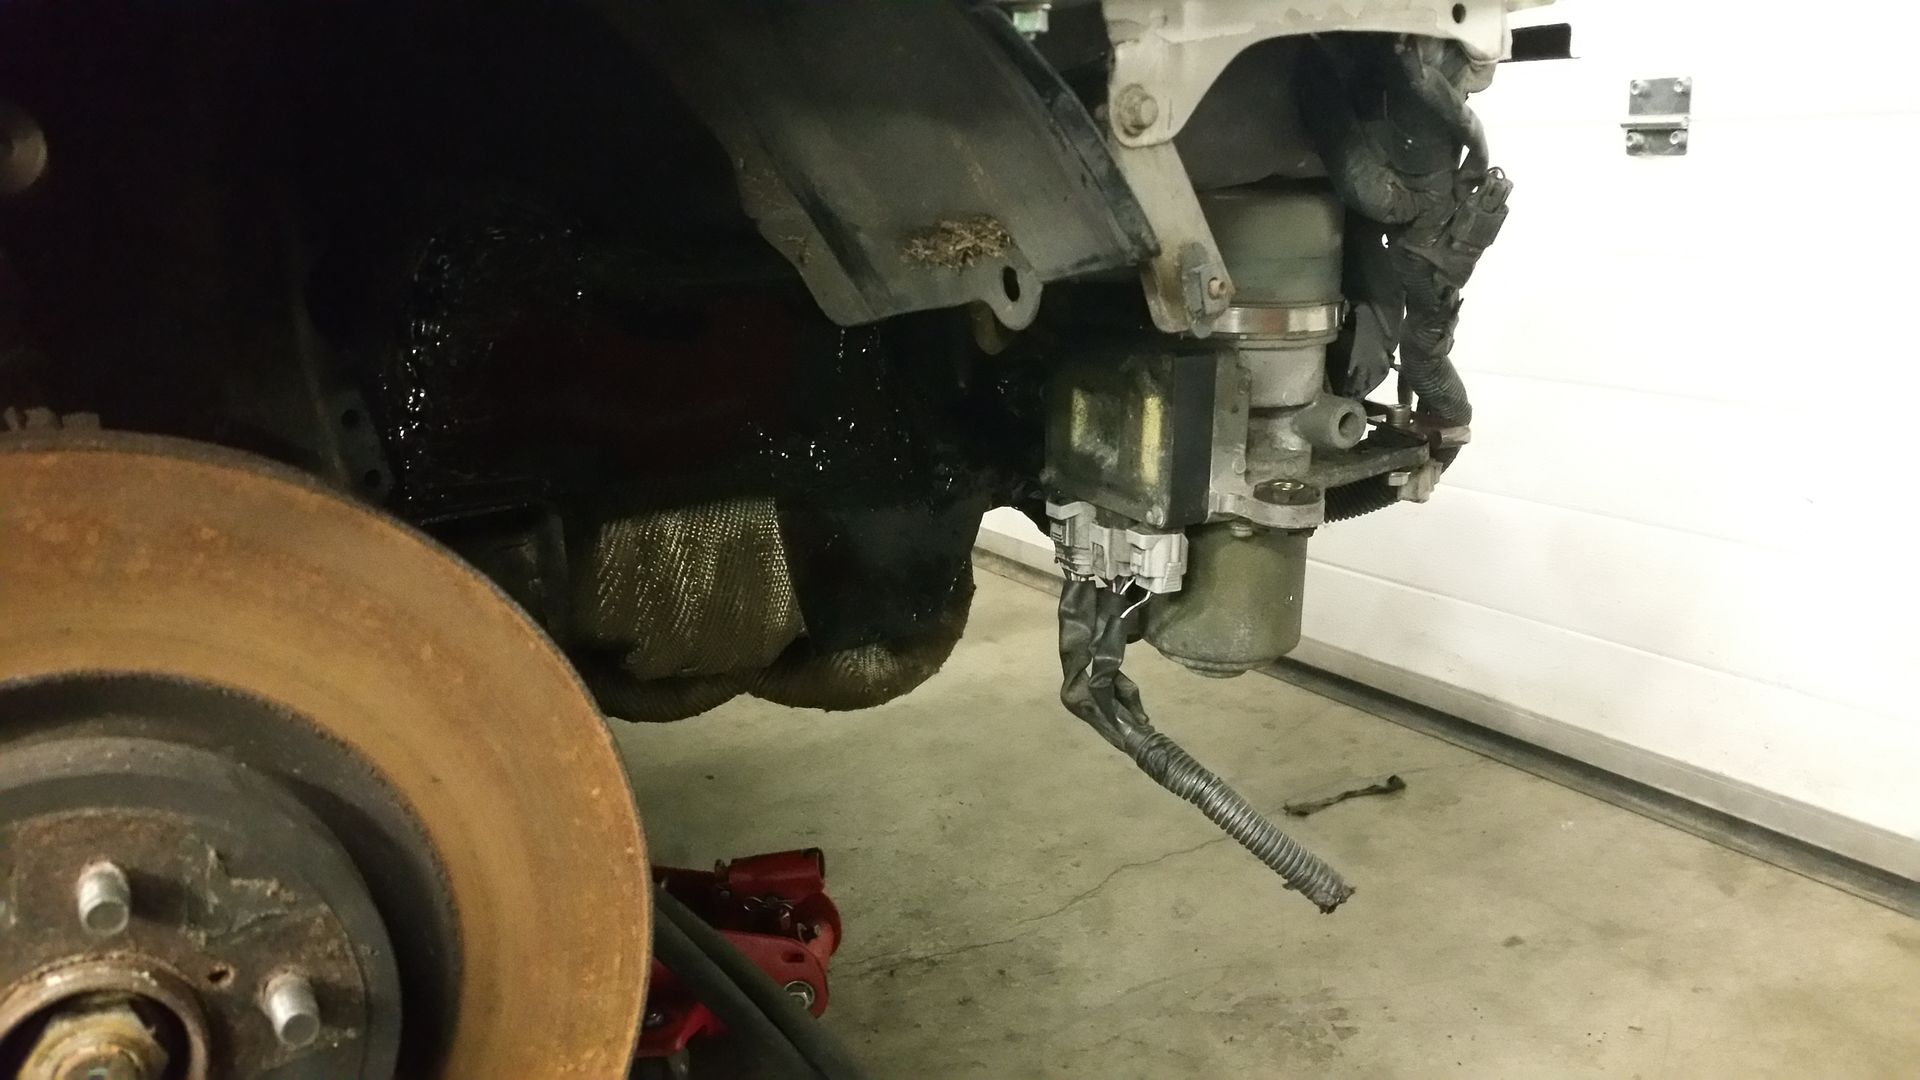
|
|
#80
|
|||
|
|||
|
So added some extra support to the power steering brace. It's now all ready for wiring. As it's sitting up in behind the front bumper I just mig'd it up a bit brashly. Does the job.
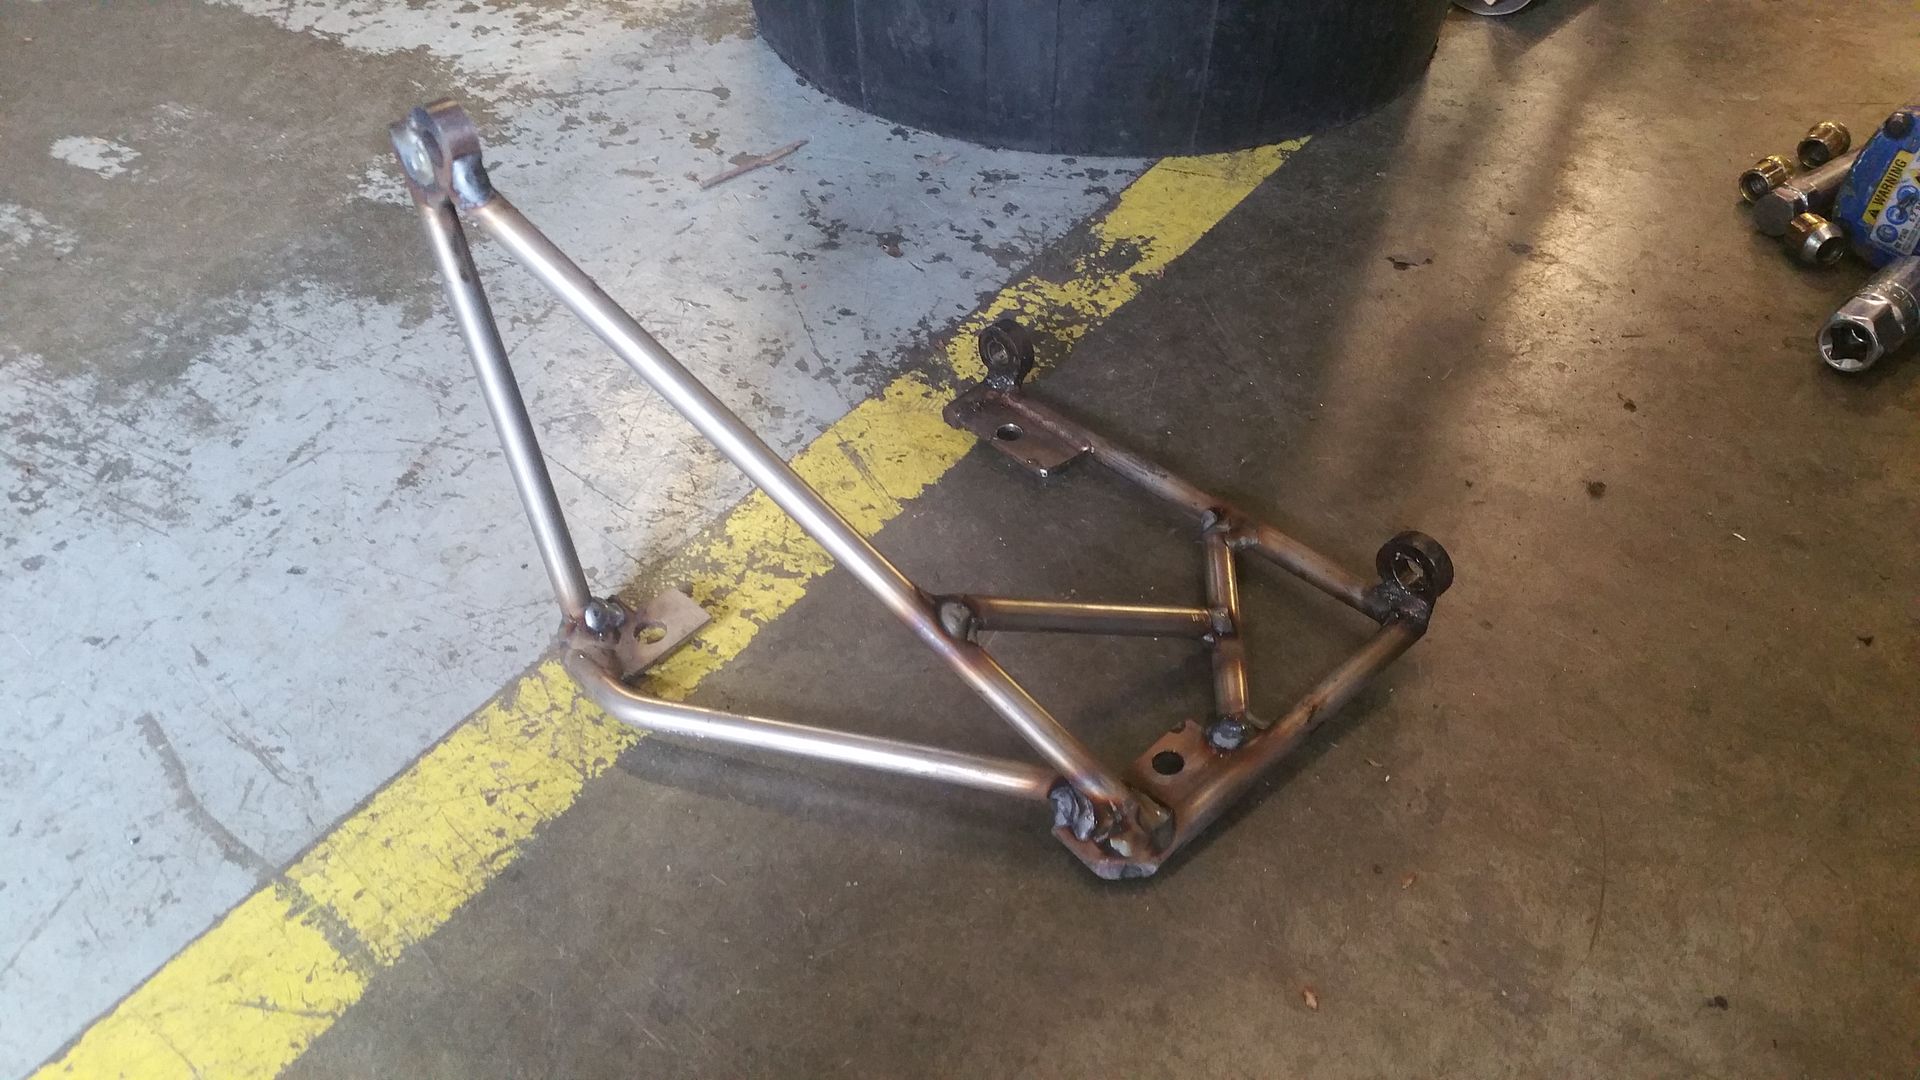 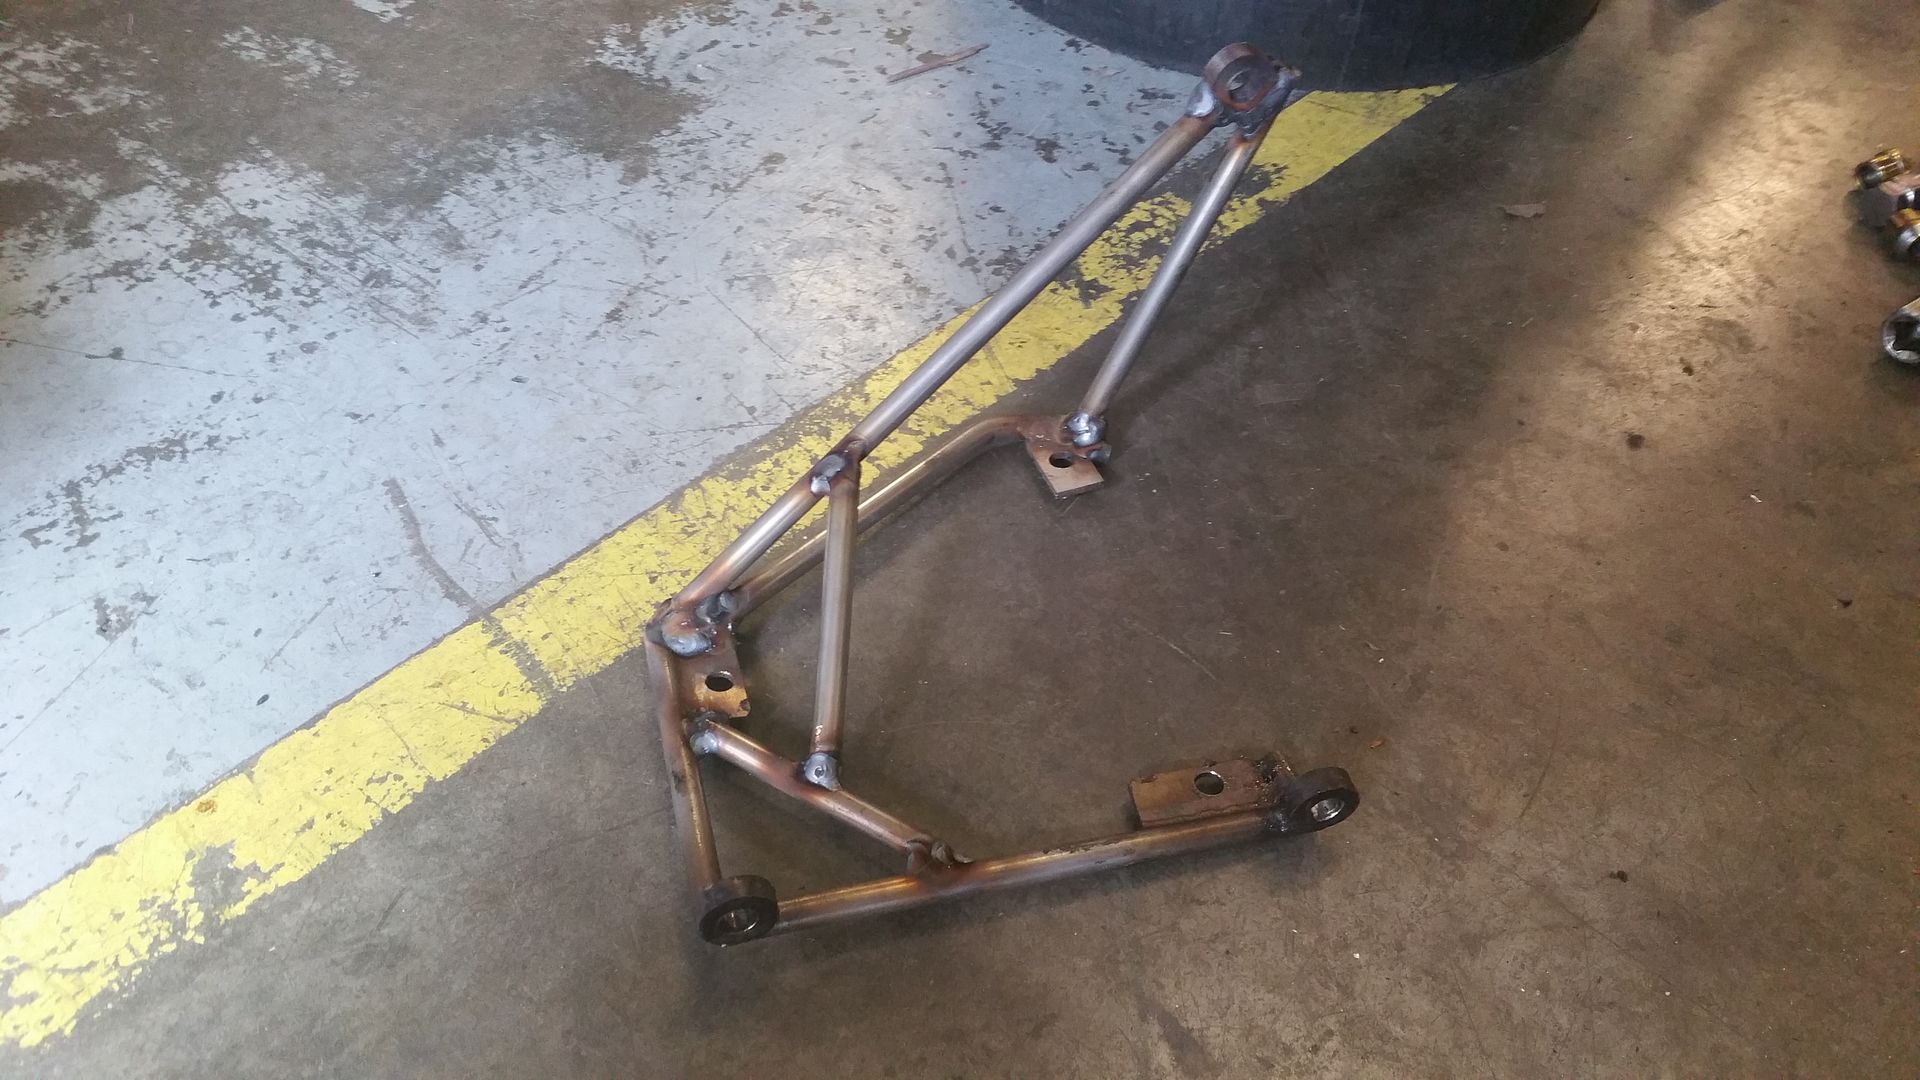 So that ended up down here like this 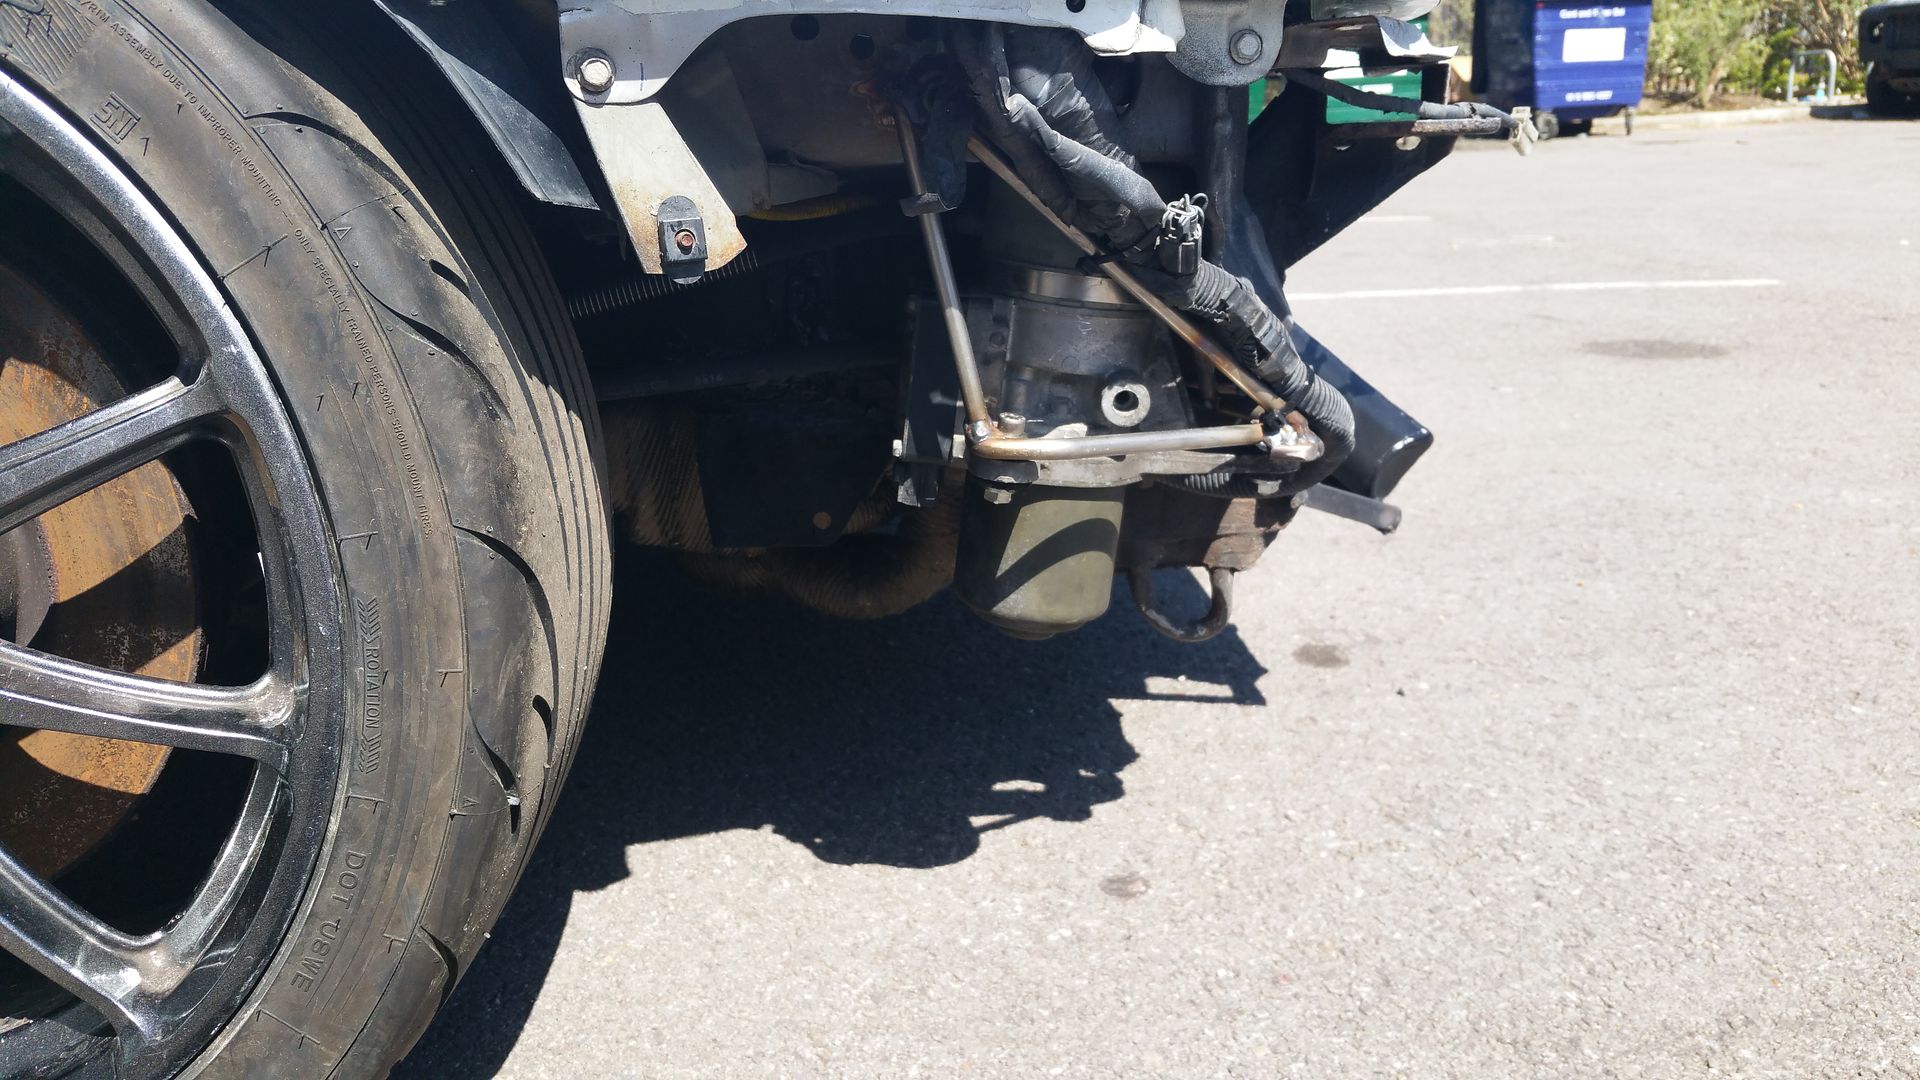 Now slight chance on the fueling front. I was going to run 8 injectors long term (still might) but in order to get a few more functions out of the Syvecs I have changed the 750cc RC injectors for some bigger Bosch units that I have 'borrowed' from the RX7 build. Just given how long I've had them I bought a refurb pack and gave the a bath 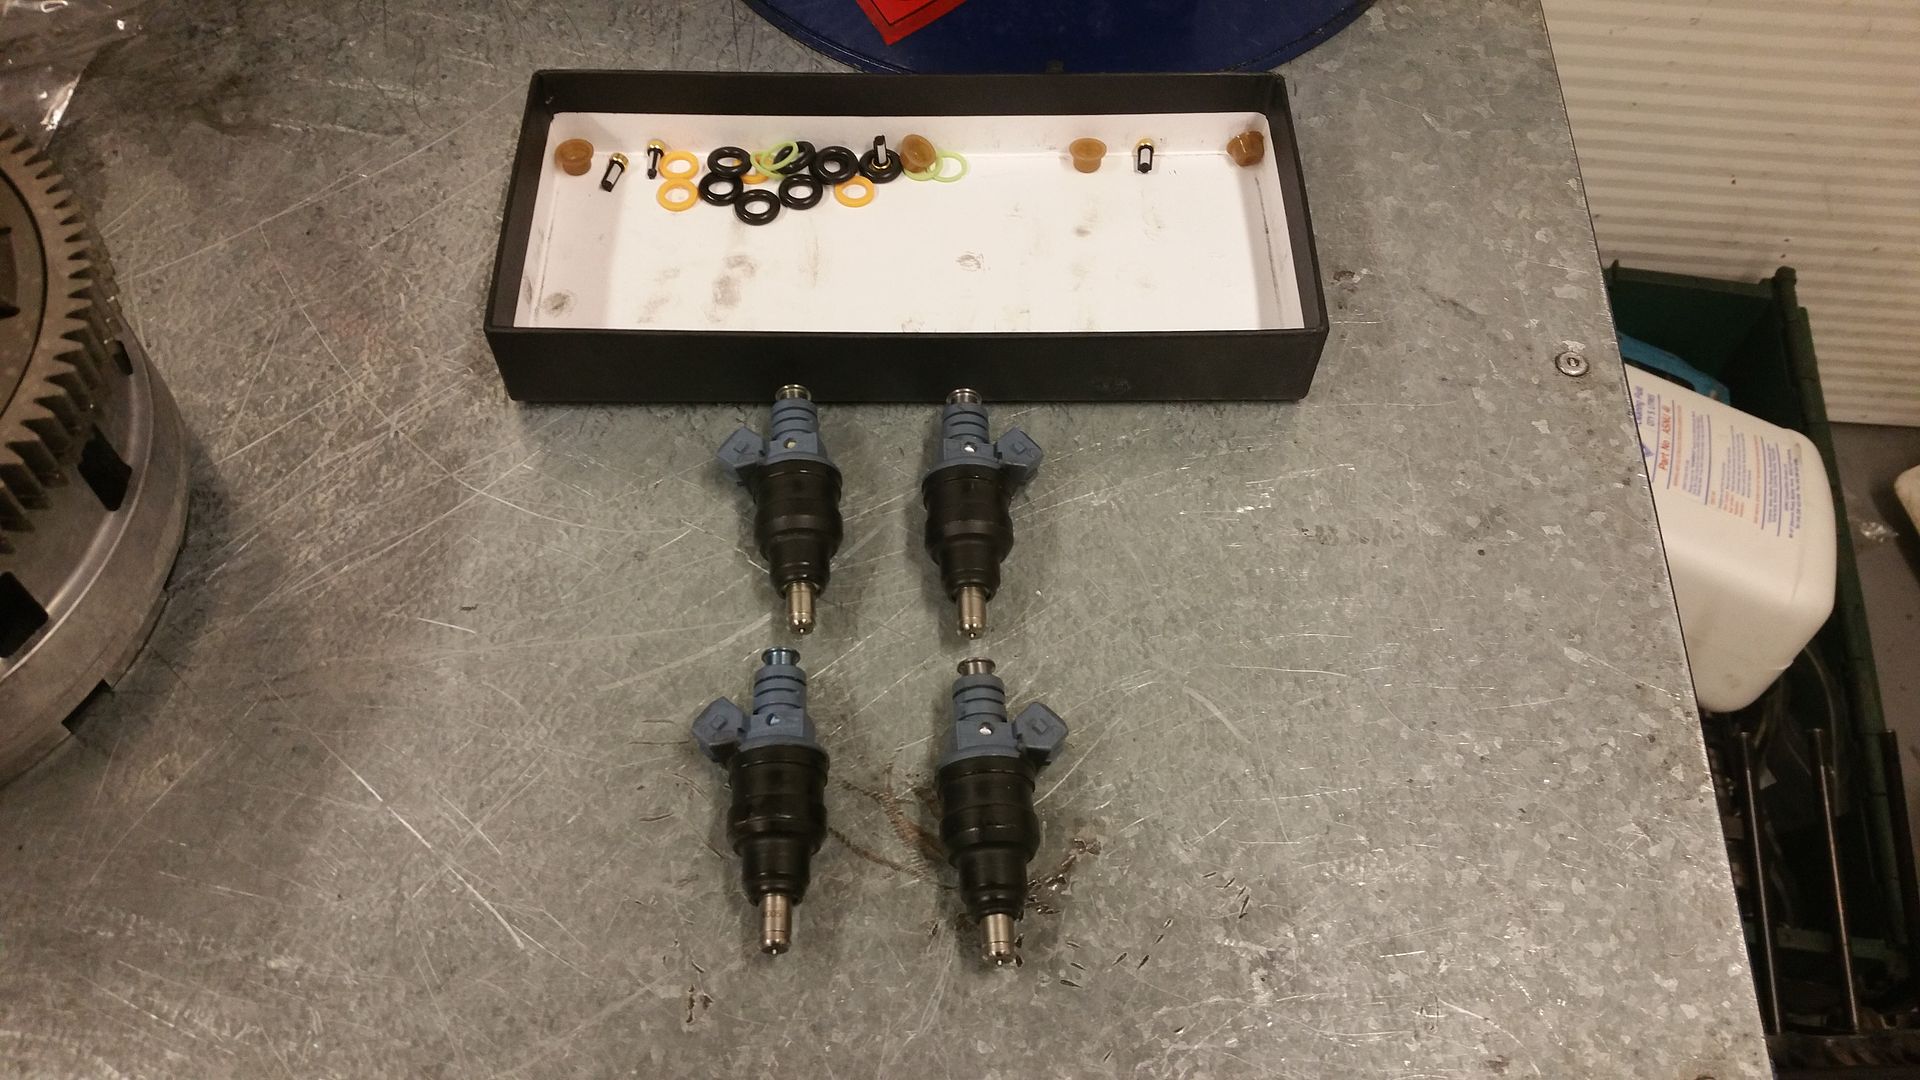 Mid cleaning 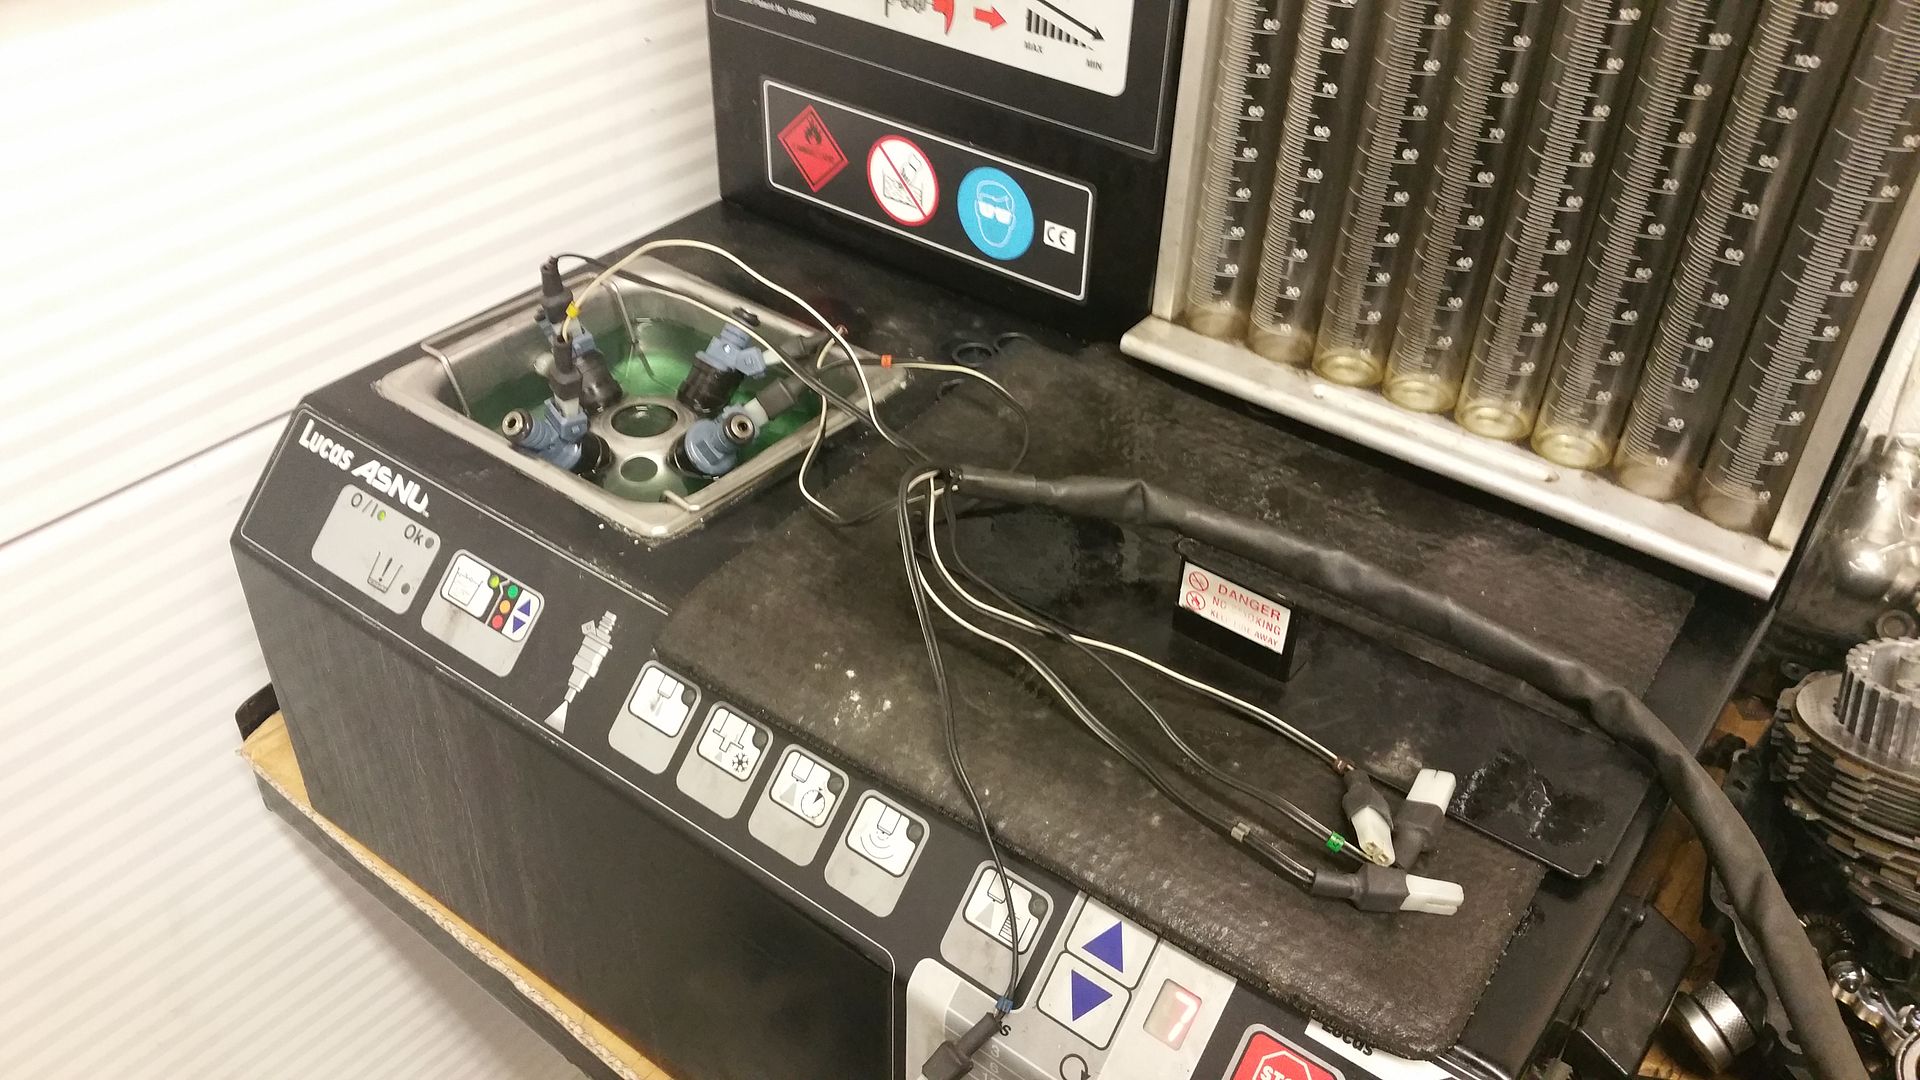 So onto the next job.... |
|
#81
|
|||
|
|||
|
Couple of trivial bits on the go while I'm sorting out the wiring loom plugs and pins etc...
First thing was to get a set of late model individual coils. Hopefully this should help with the performance and if nothing else makes for a nicer tidy engine bay in loosing the mid mounted coil pack and bright red HT leads! 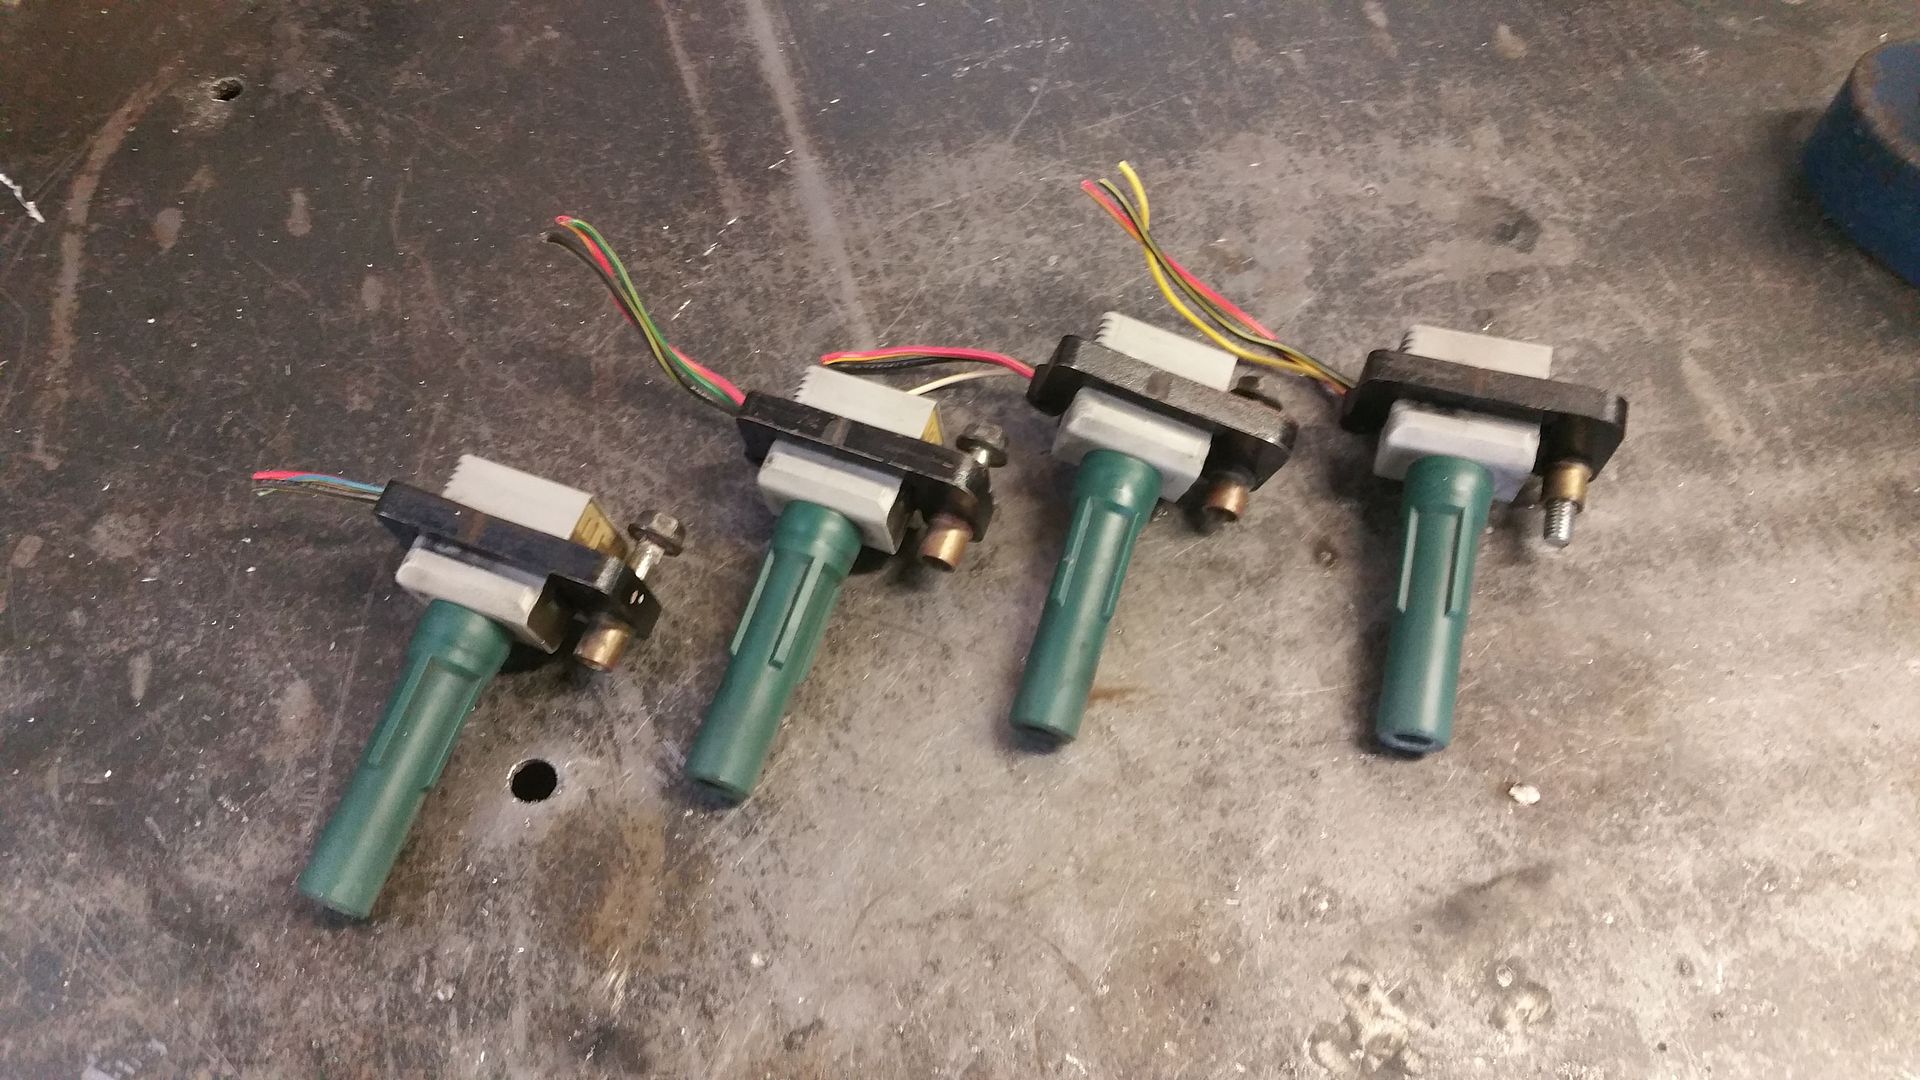 net result without the coil in there.... much neater 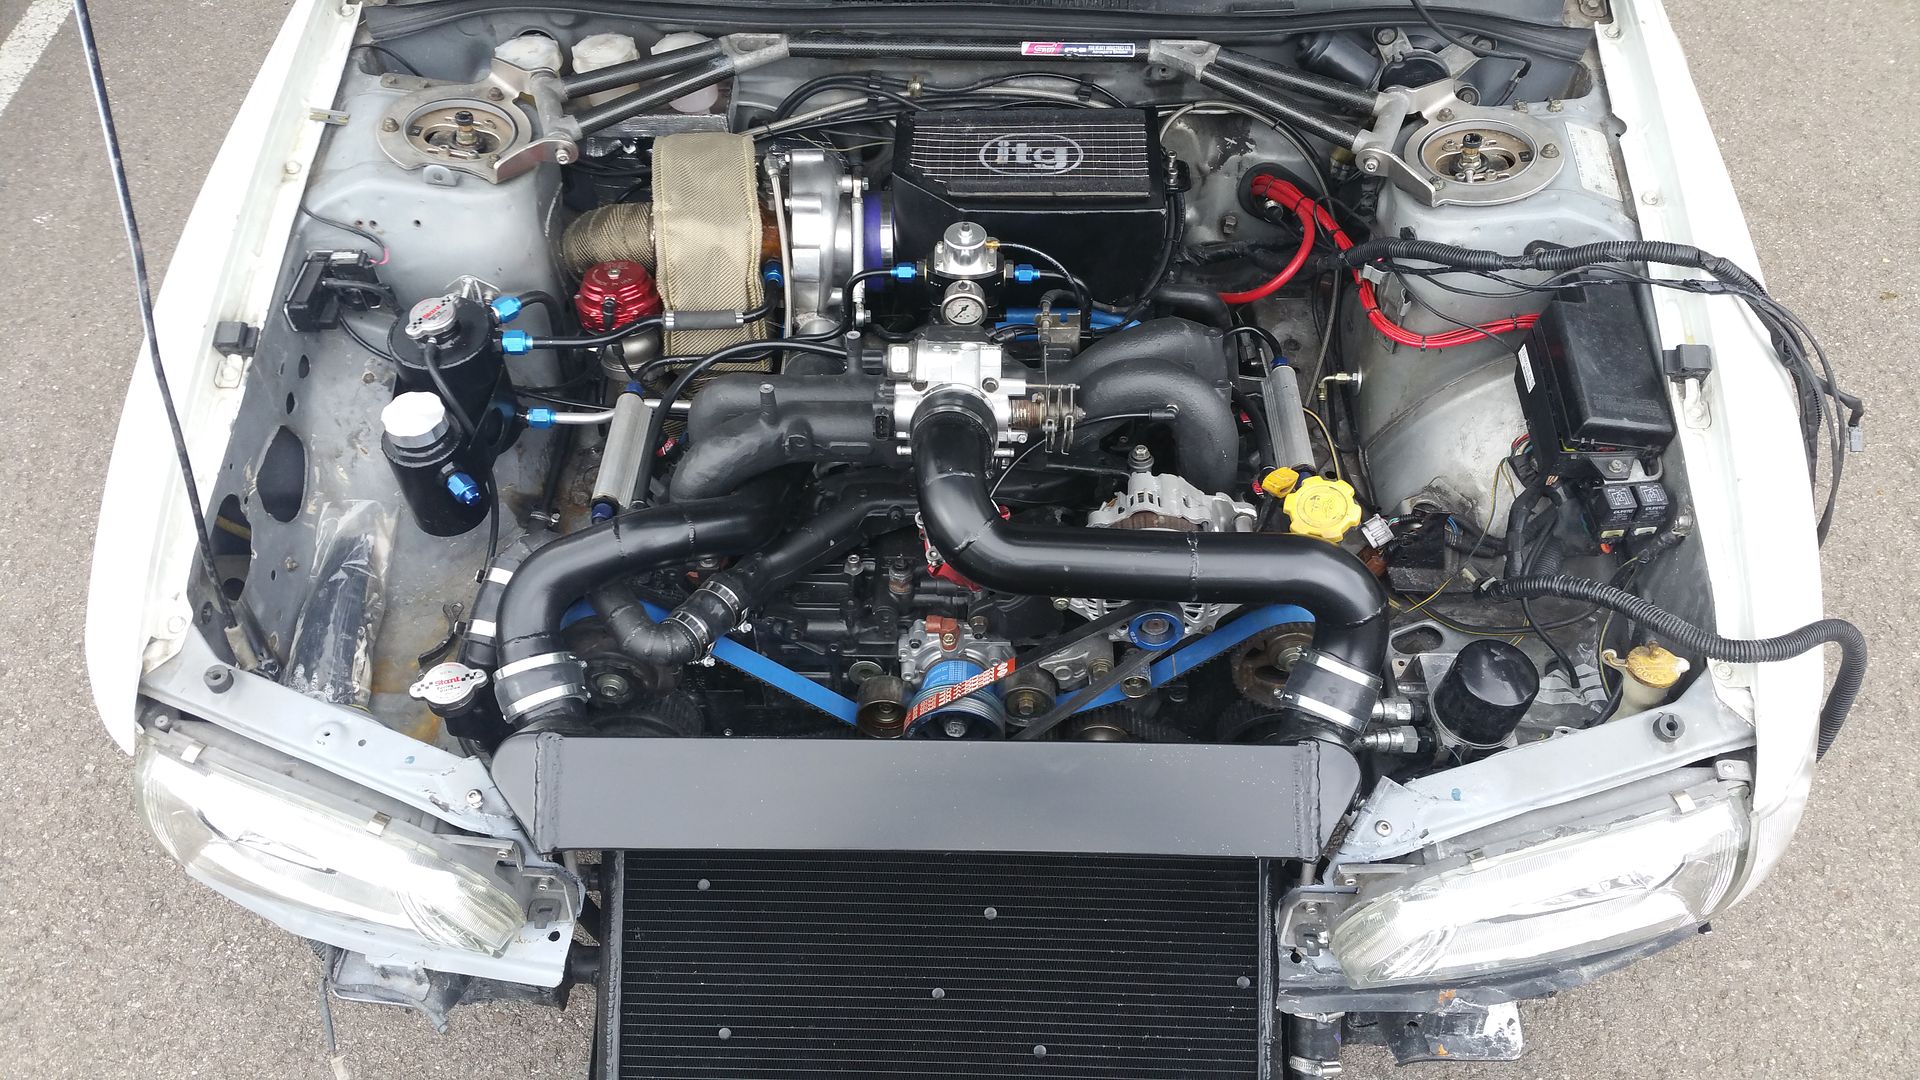 The other thing I have been poking around at is the lights. I have seen a couple of the version 5/6 cars with modded blacked headlights. I think it look very cool so I have set about doing mine. There was another small issue to tackle too. As I have the oil cooler one side of the front bumper and the power steeing pump the other I have removed the indicators and little black plastic infill from the bumper. My decision was to move LED indicators into the side light housing whilst blacking them. I used a set of LED bike indicators. Started with these: 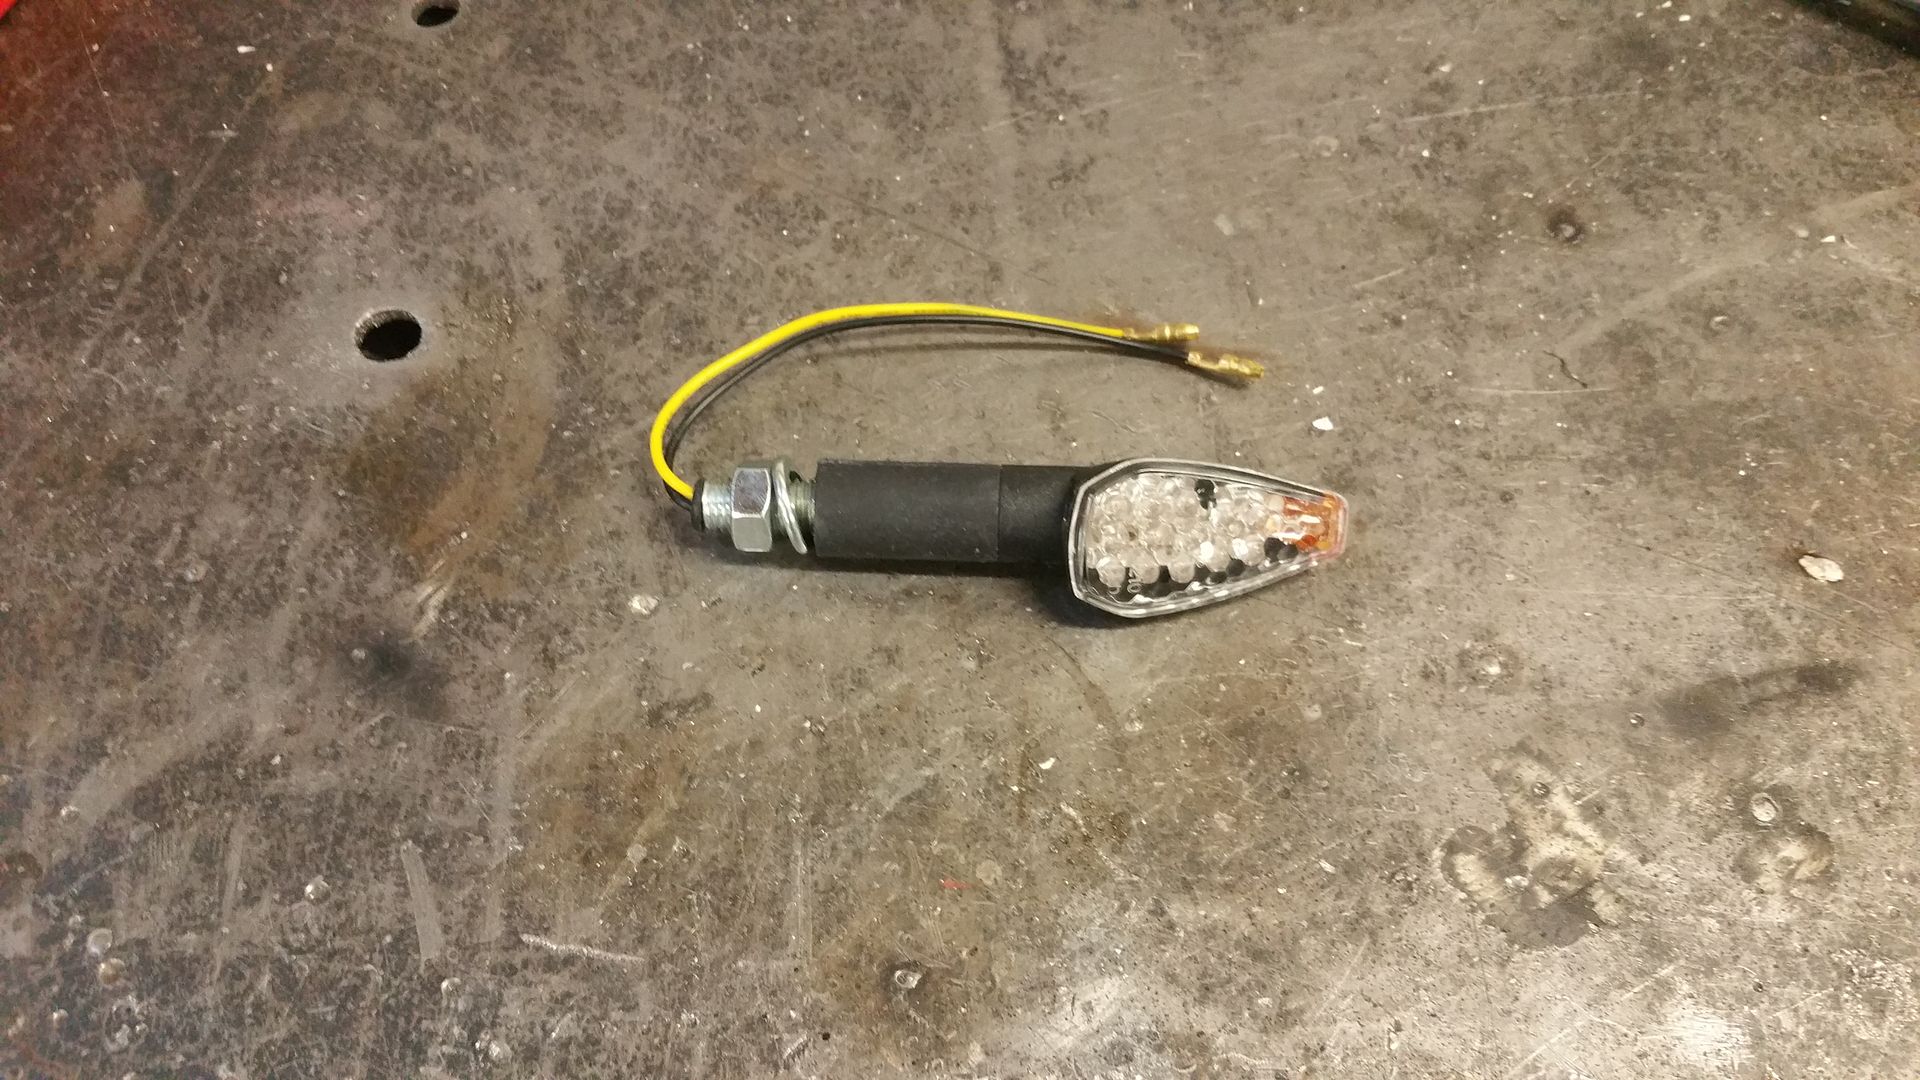 Then did this: 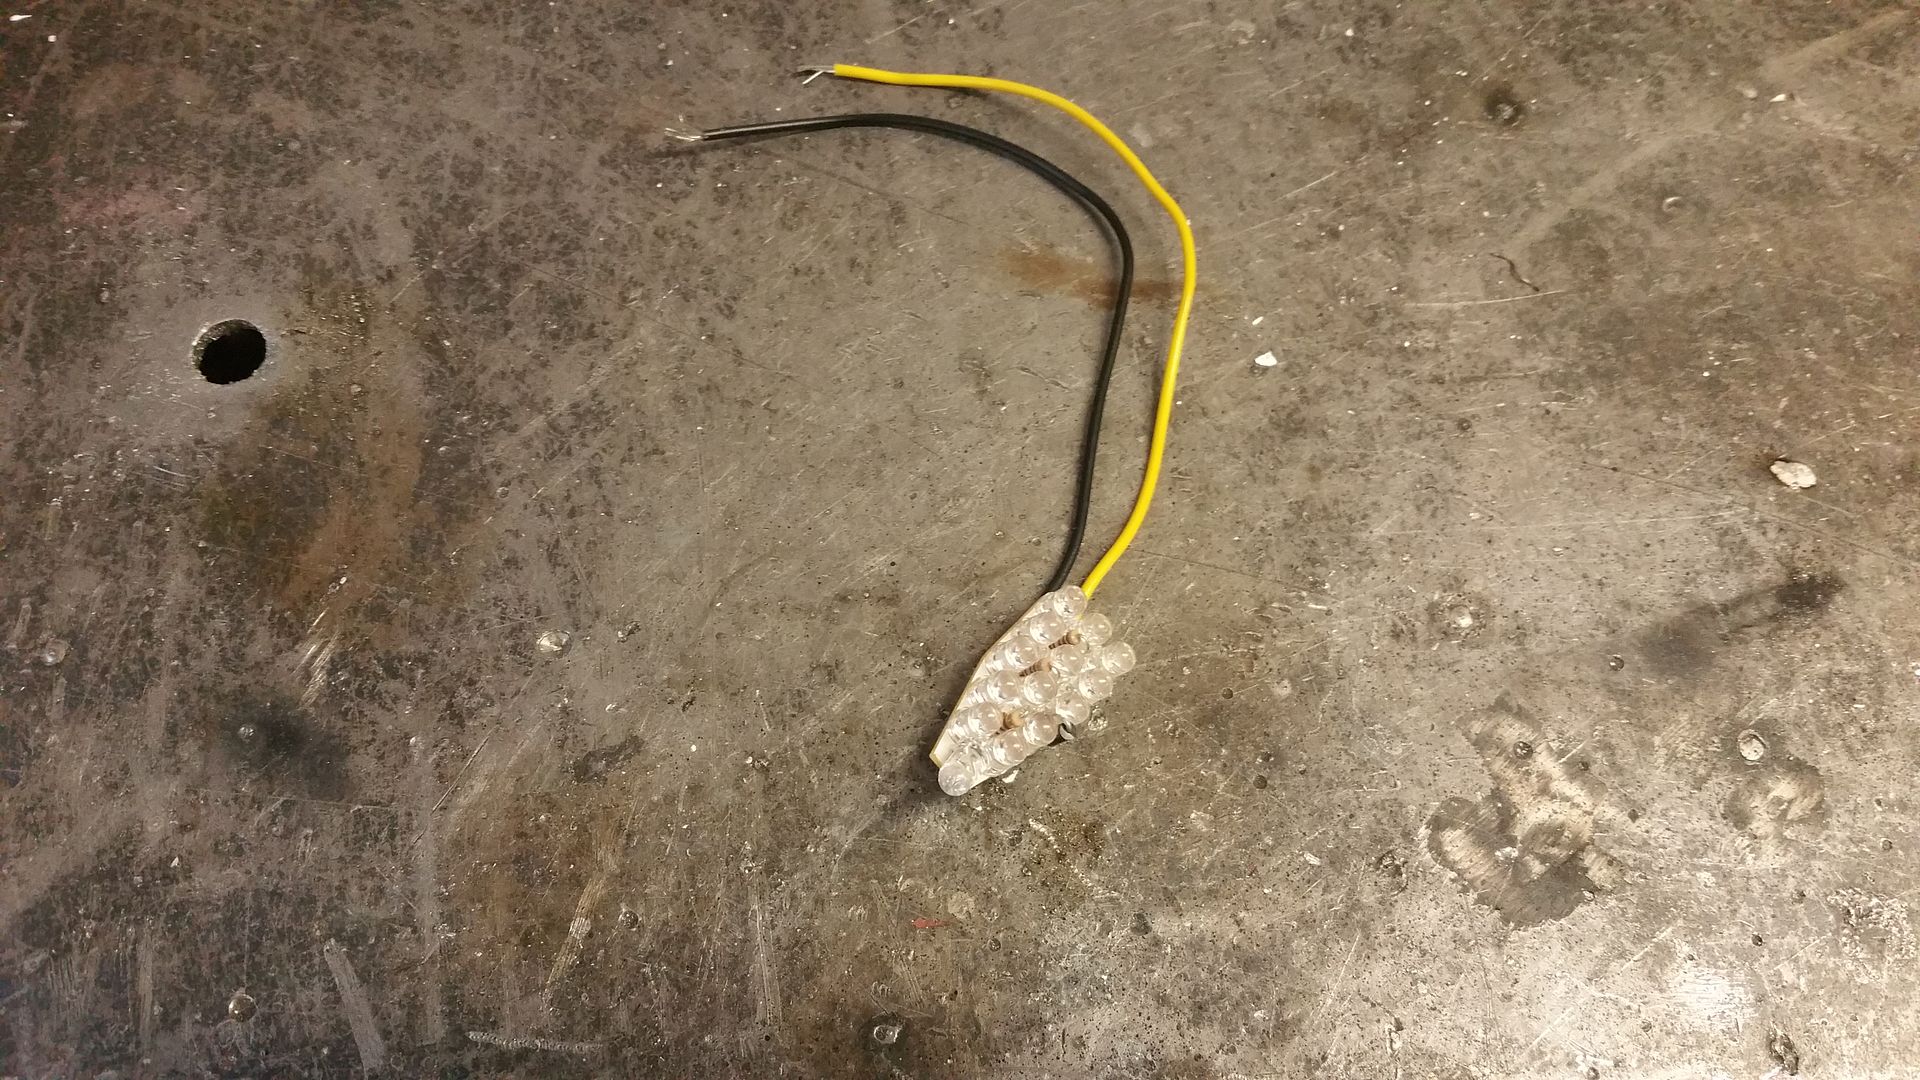 Threw them in here: 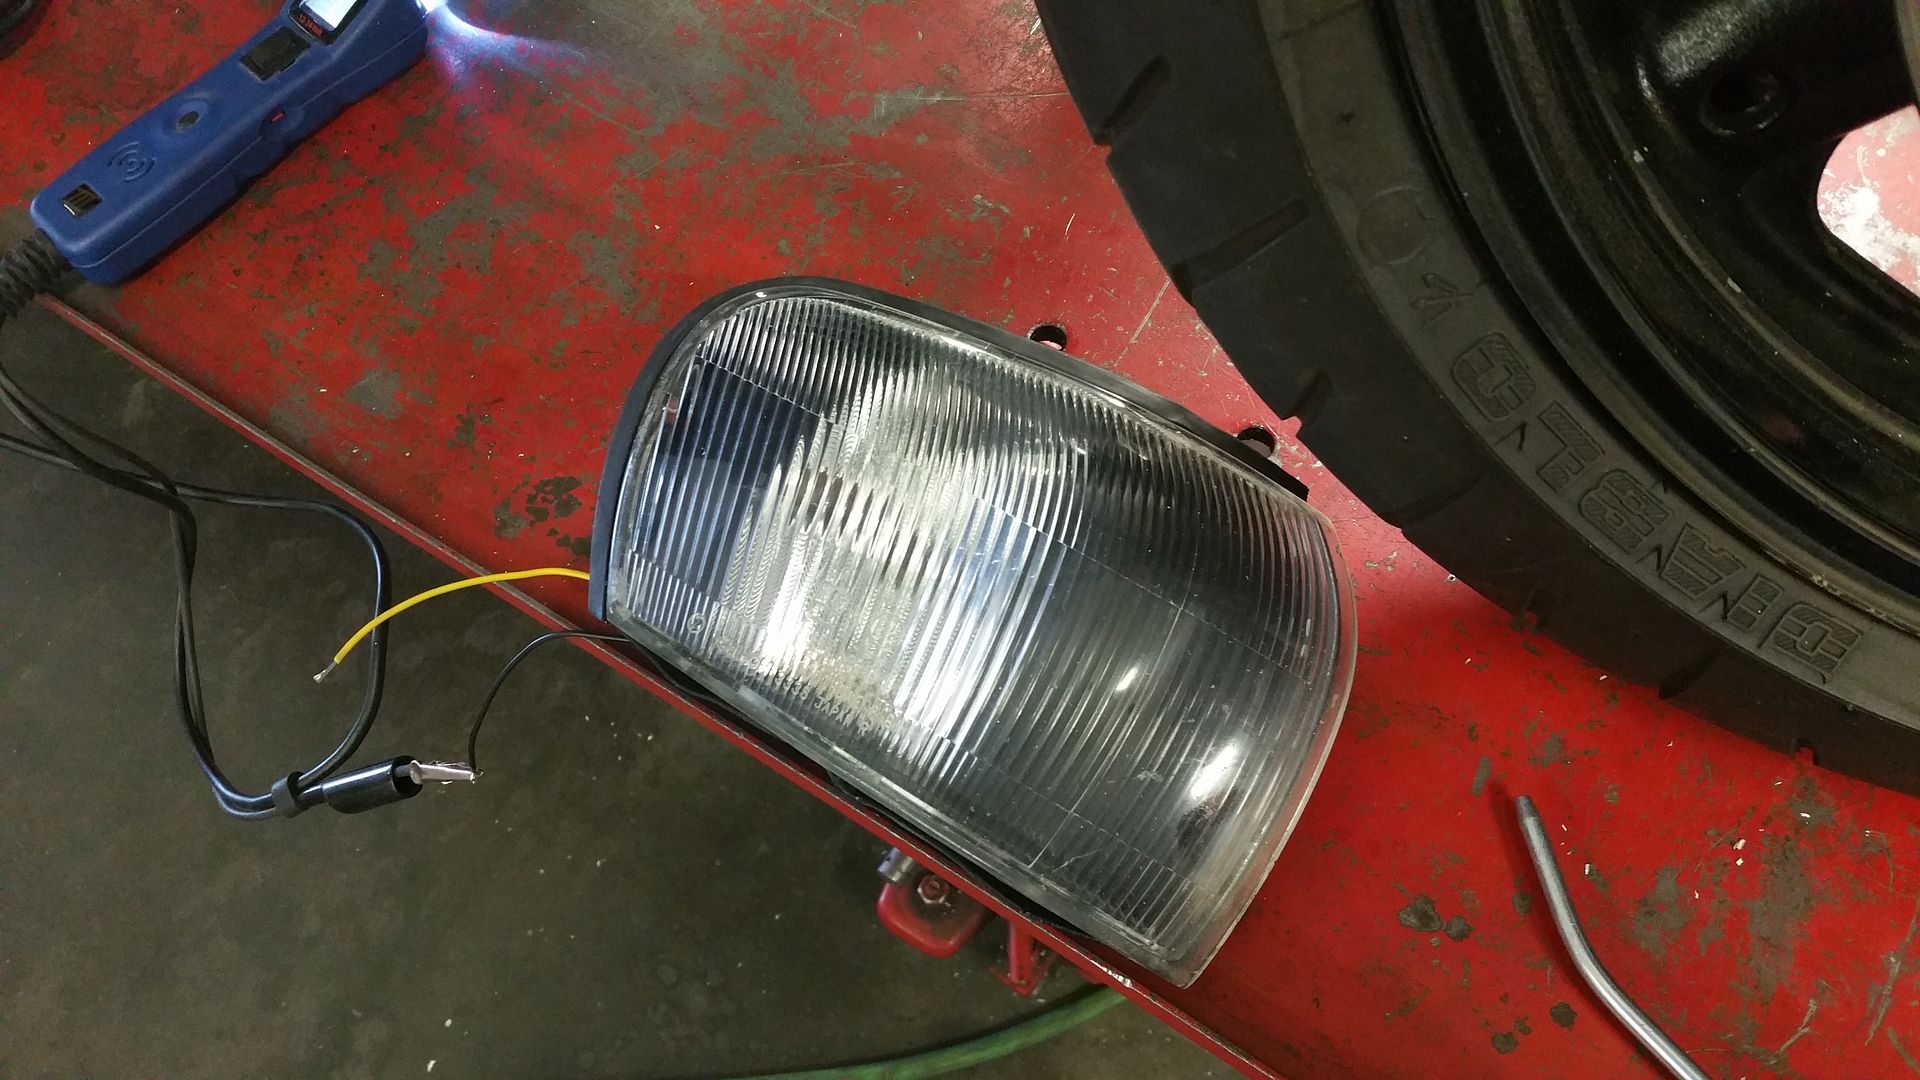 And wayhay: 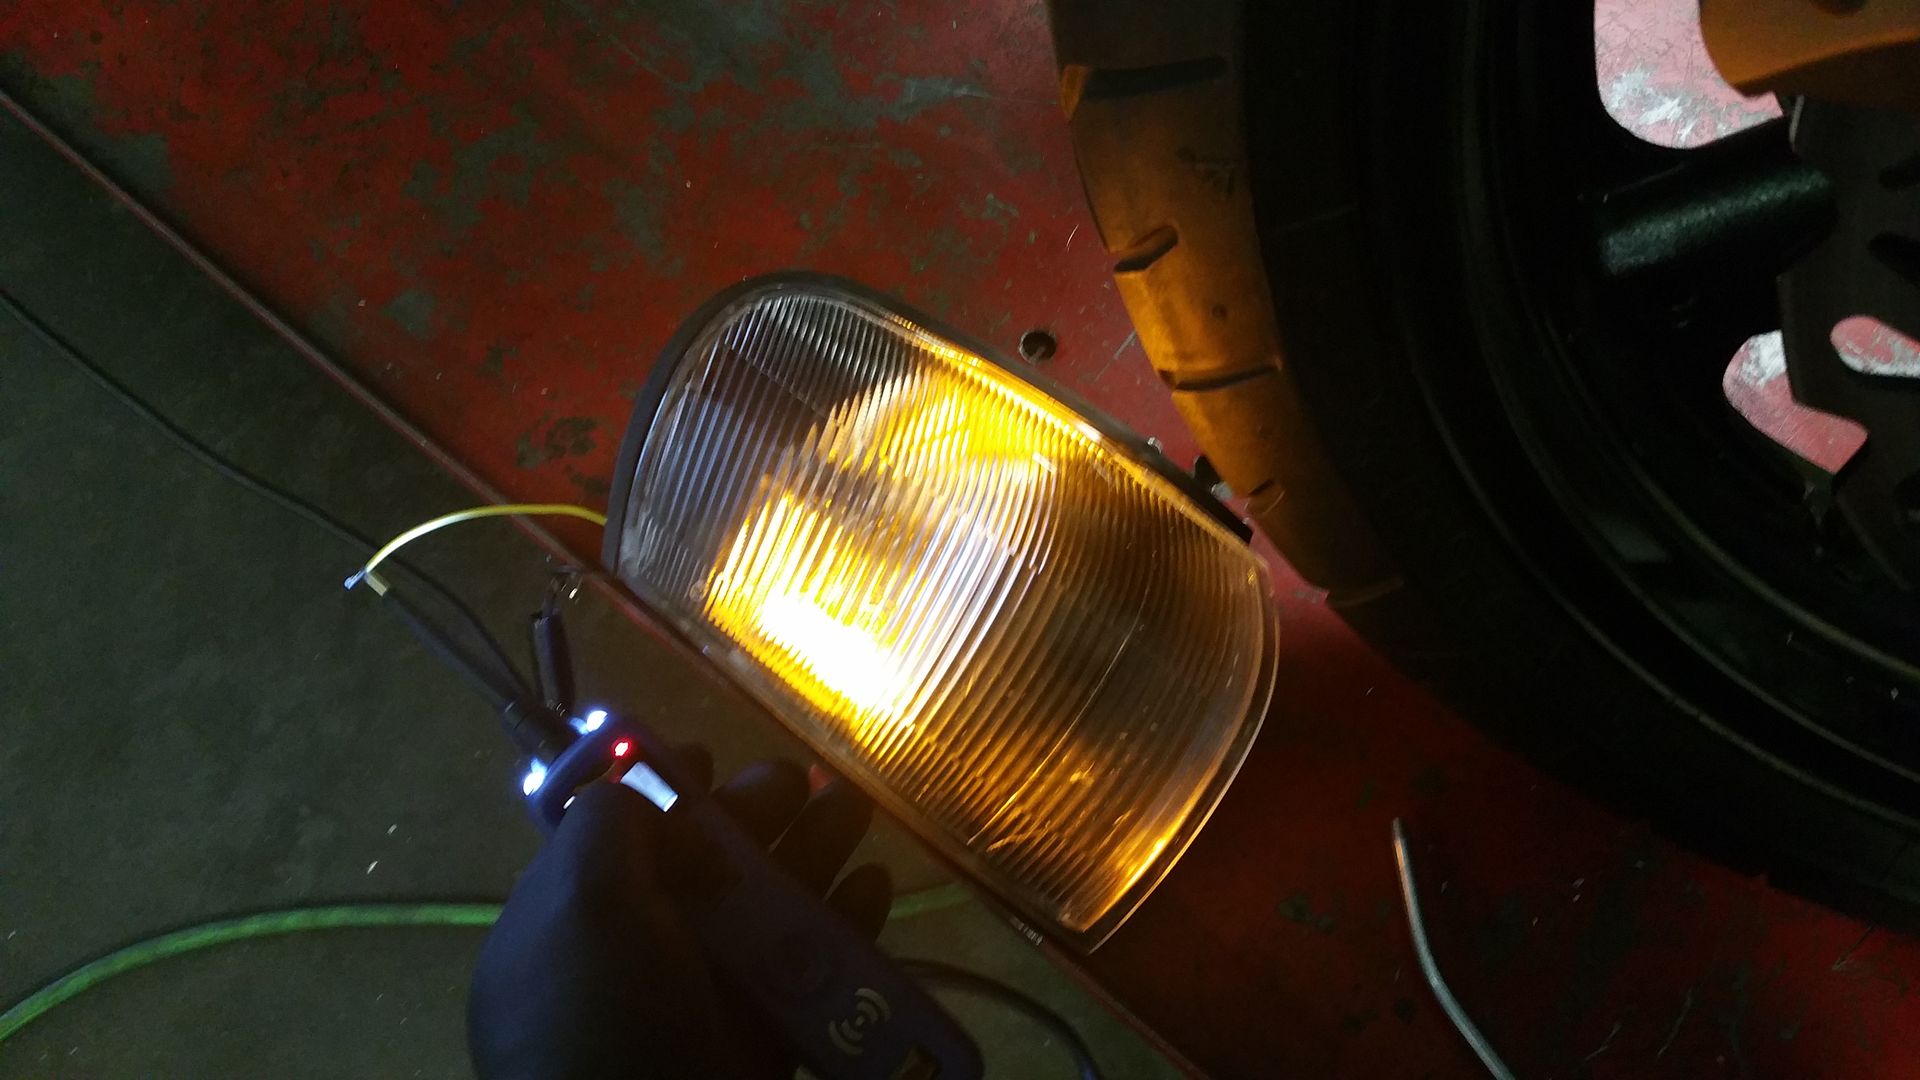 So with the indicstors and side lights in the one housing I can set about ducting the cooler and pump Oh and here is a painted pair next to the pair I'll be doing in the morning 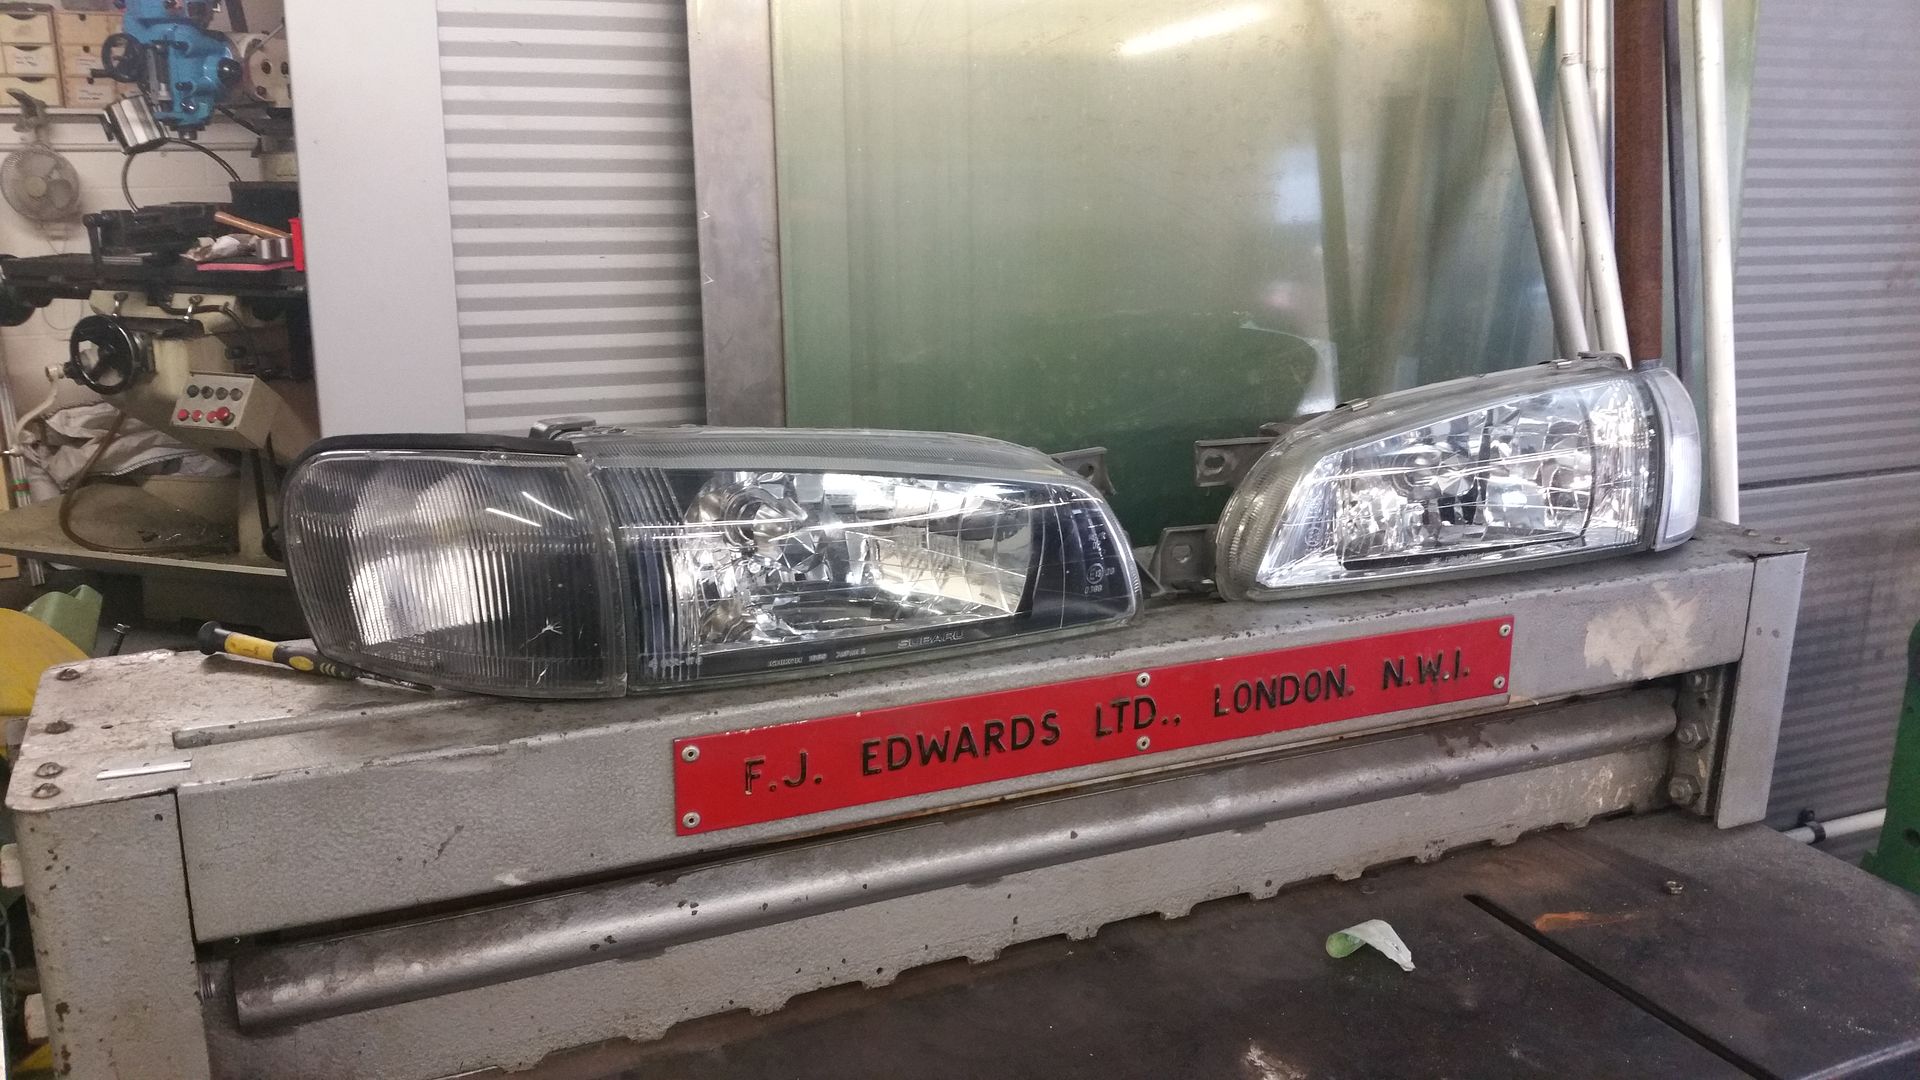
|
|
#82
|
||||
|
||||
|
Liking the indicator mod
__________________
Somewhere drinking Coffee Mapped and maintained by FBTuning 07595 493581. |
|
#83
|
|||
|
|||
|
I was fairly chuffed with the indicators to be honest. I was thinking for ages about the best way to get an LED strip in somewhere that would work and all that rubbish. Then when up stairs in the shop to get some fittings for a job and what's on the shelf. Set of cheap led bike lenses. All of a sudden it seemed so simple!
I like the black lights but I know it one of those things that splits people. I saw a US 2dr on the North American Scooby club in white with blacked lights and it just looked cracking. Whilst my main headlights are in very good nik the side lights are looking old. I'll keep my eyes out for a good condition pair as of and when. I'll pop some pics up once the grill and bumper are painted and back on. |
|
#84
|
||||
|
||||
|
Well I take it you never notice mine then I forgot you were to busy ogling my wheels lol .
__________________
Maintained by Hypertech and Mapped by Andy Forrest 1998 UK Turbo , 1998 Terzo , 1997 JDM Type R the money pit , 2004 black WRX STI Type UK , 2004 blue FSTI |
|
#85
|
||||
|
||||
|
Quote:
__________________
Maintained by Hypertech and Mapped by Andy Forrest 1998 UK Turbo , 1998 Terzo , 1997 JDM Type R the money pit , 2004 black WRX STI Type UK , 2004 blue FSTI |
|
#86
|
||||
|
||||
|
Quote:
I spied them!
__________________
Somewhere drinking Coffee Mapped and maintained by FBTuning 07595 493581. |
|
#87
|
|||
|
|||
|
So waiting for some bits ti turn up and again.... I haven't been about to just leave the old girl alone.
Started playing with the intercooler pipe work. Because of the blue fittings on the fuel lines and headers tank I decided to accent them with titanium pipe work. All chopped and a test fit once it's all tacked up. 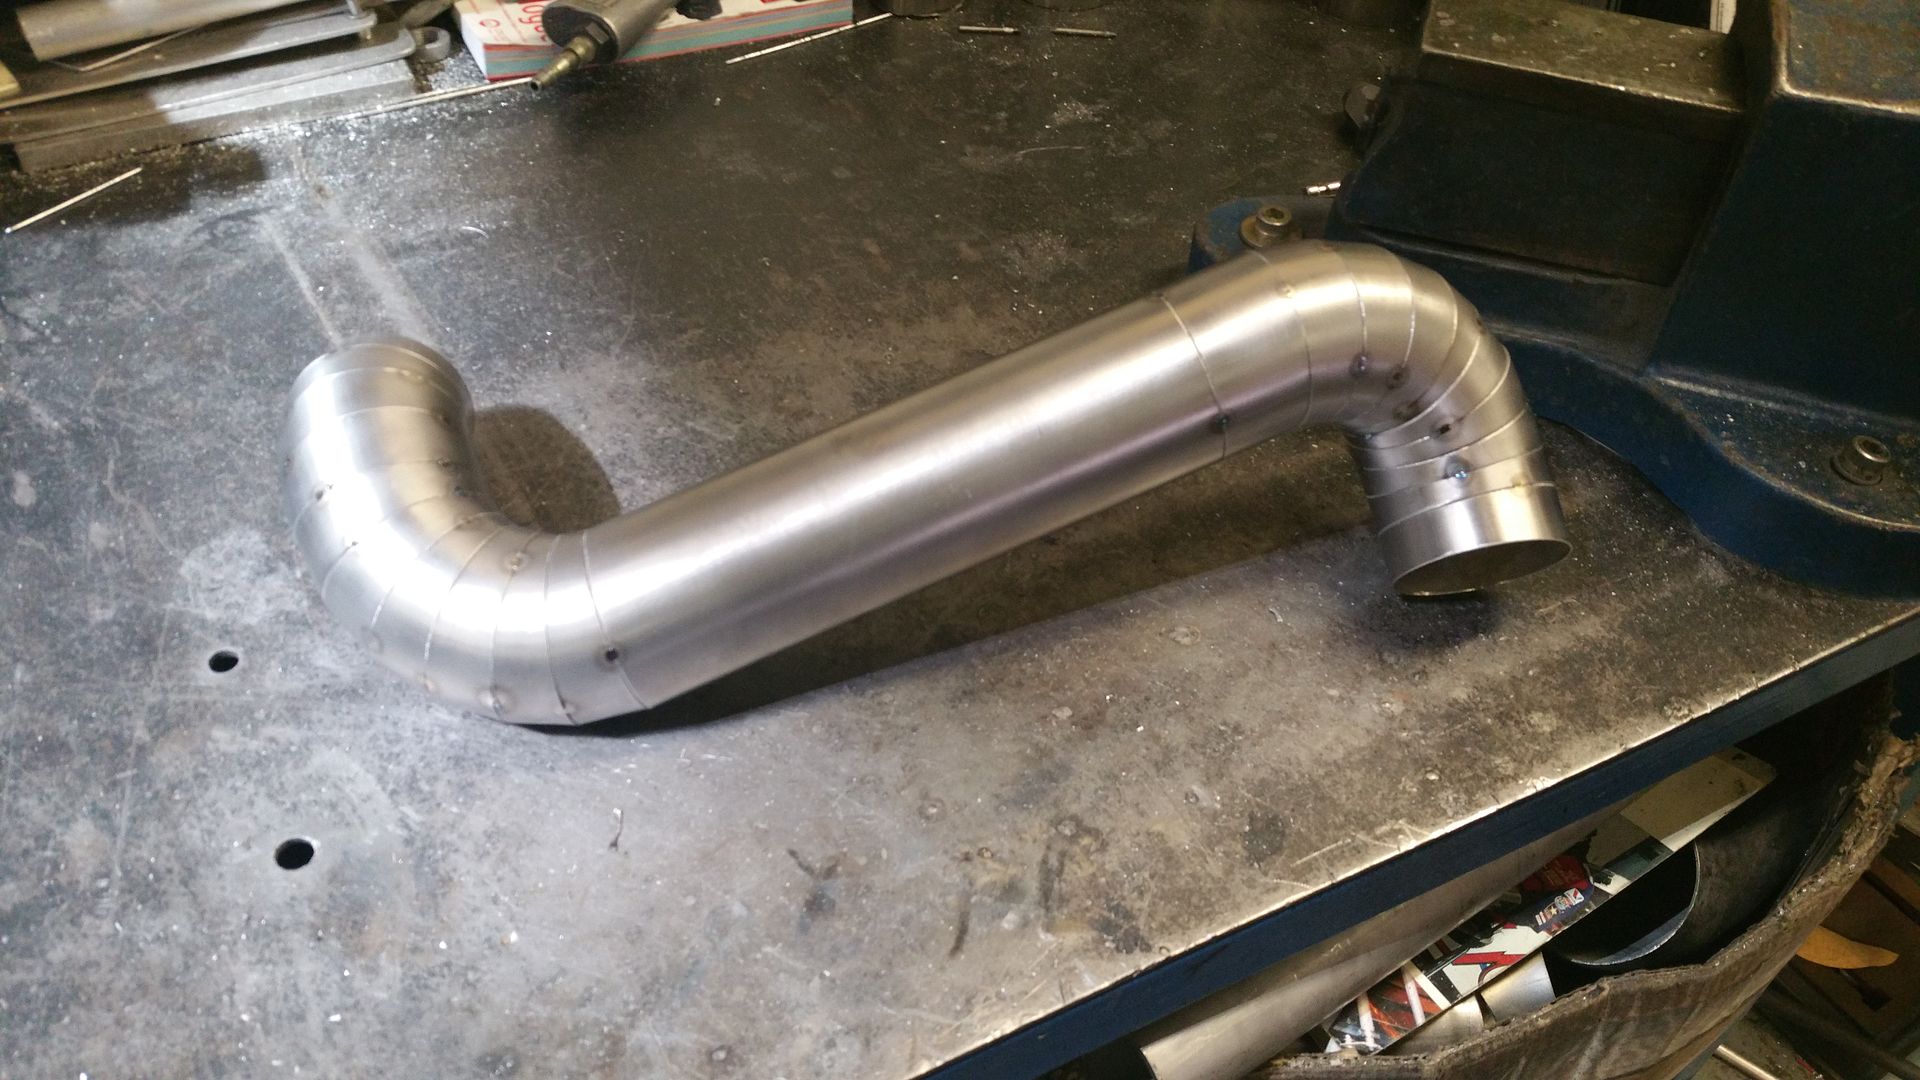 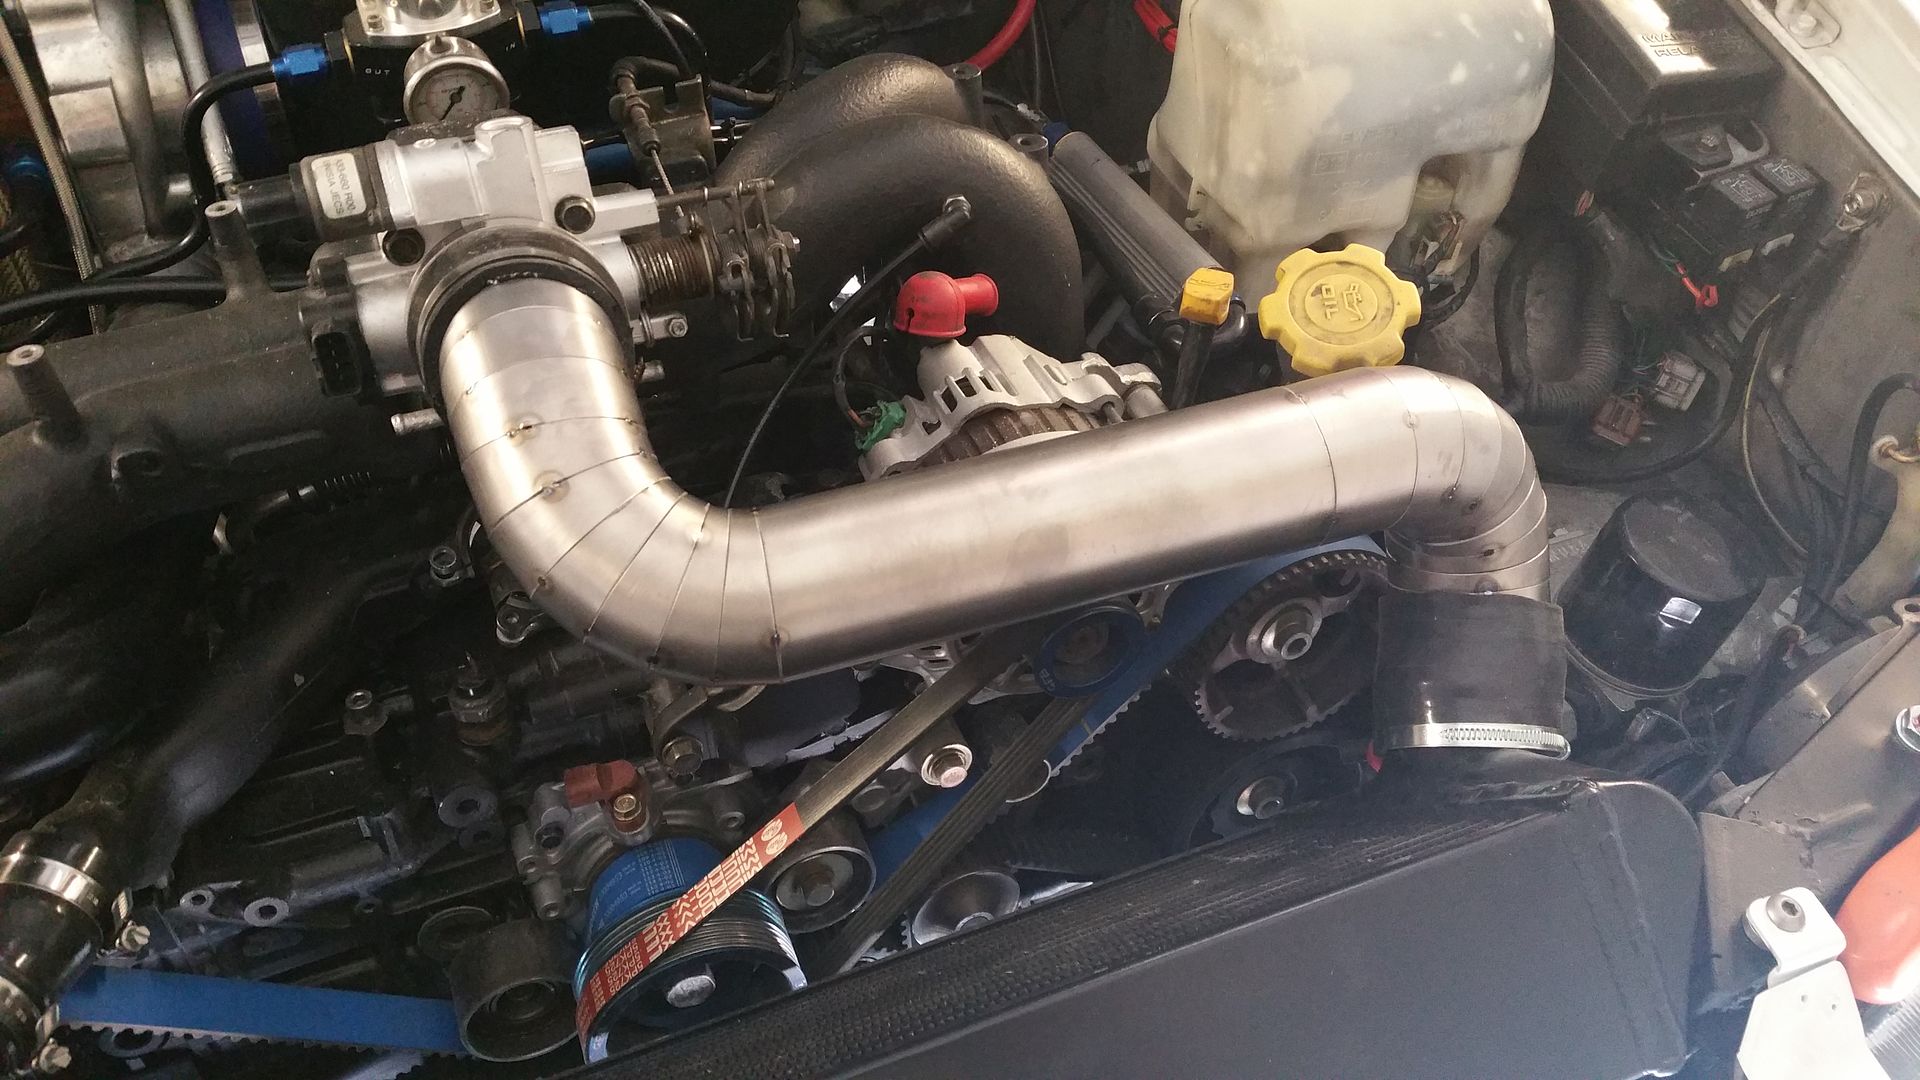 Then a bit of heat before welding to colour it... 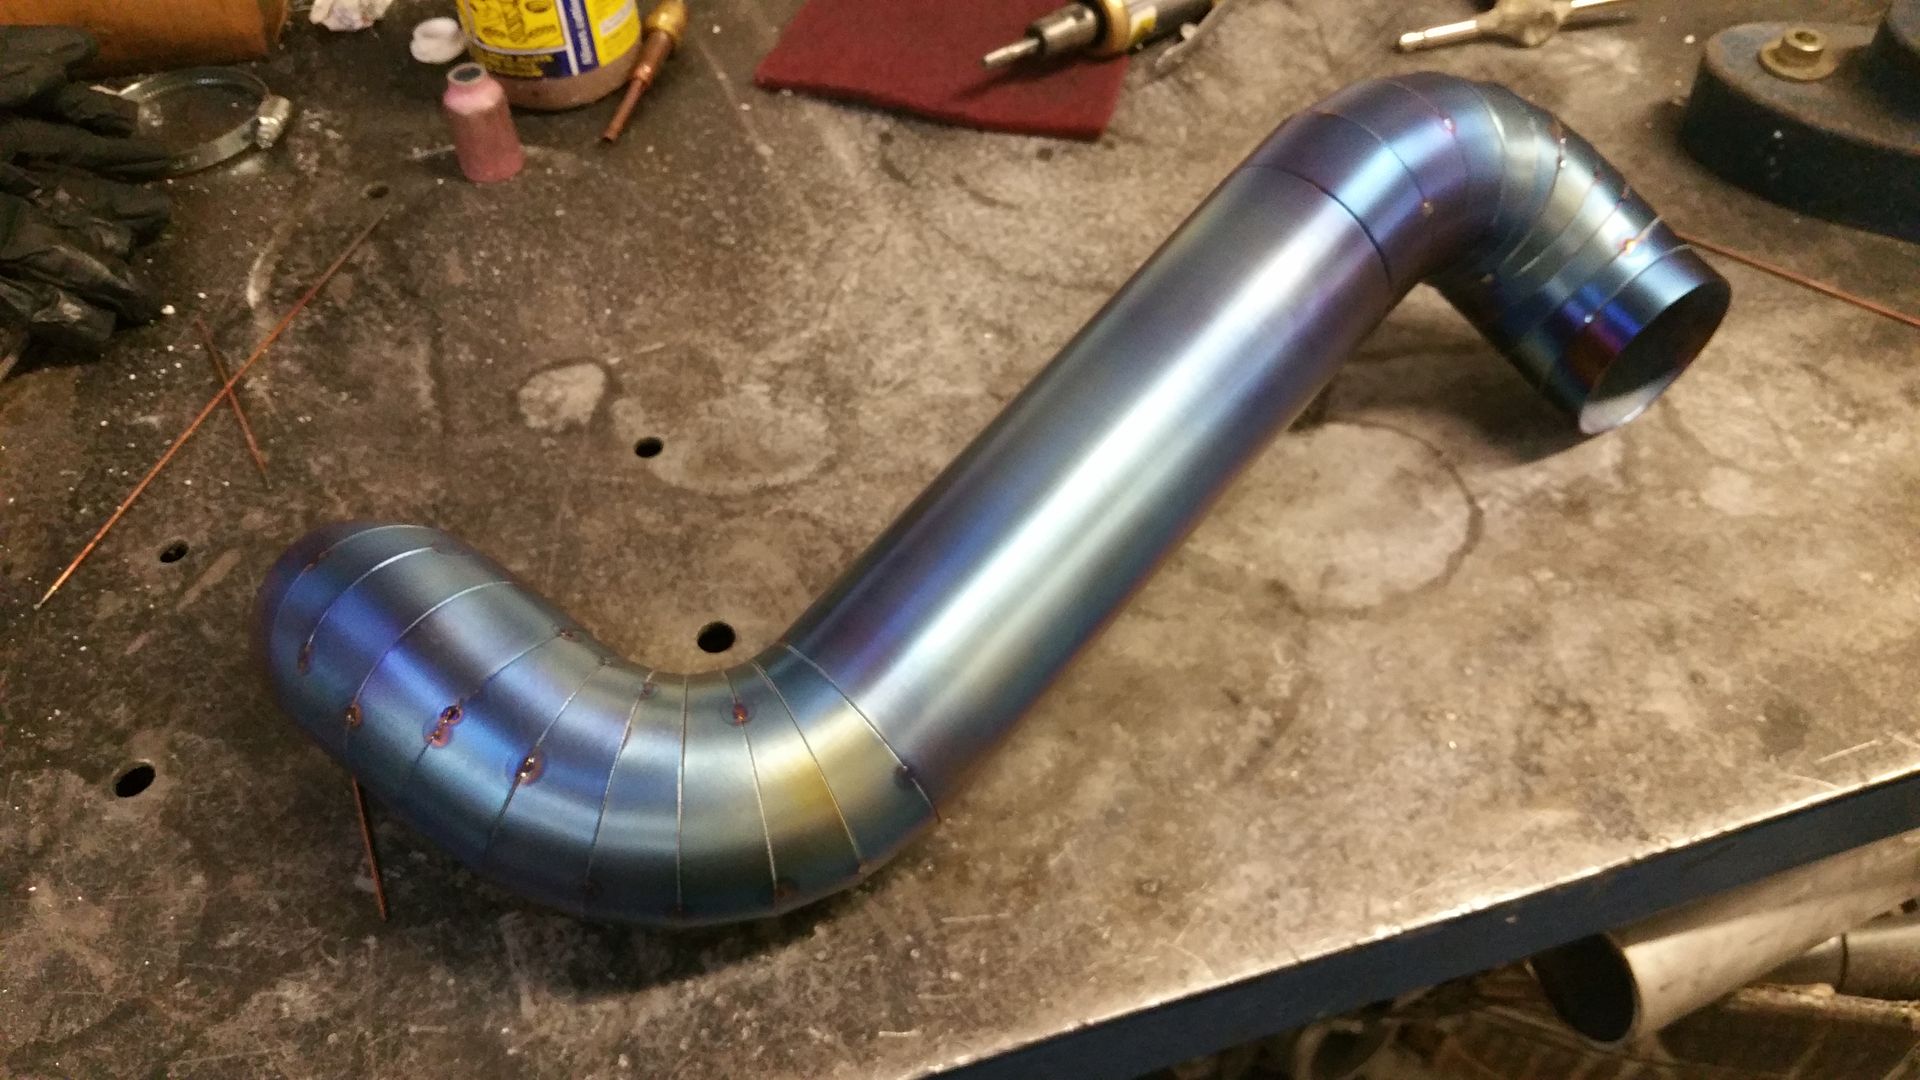 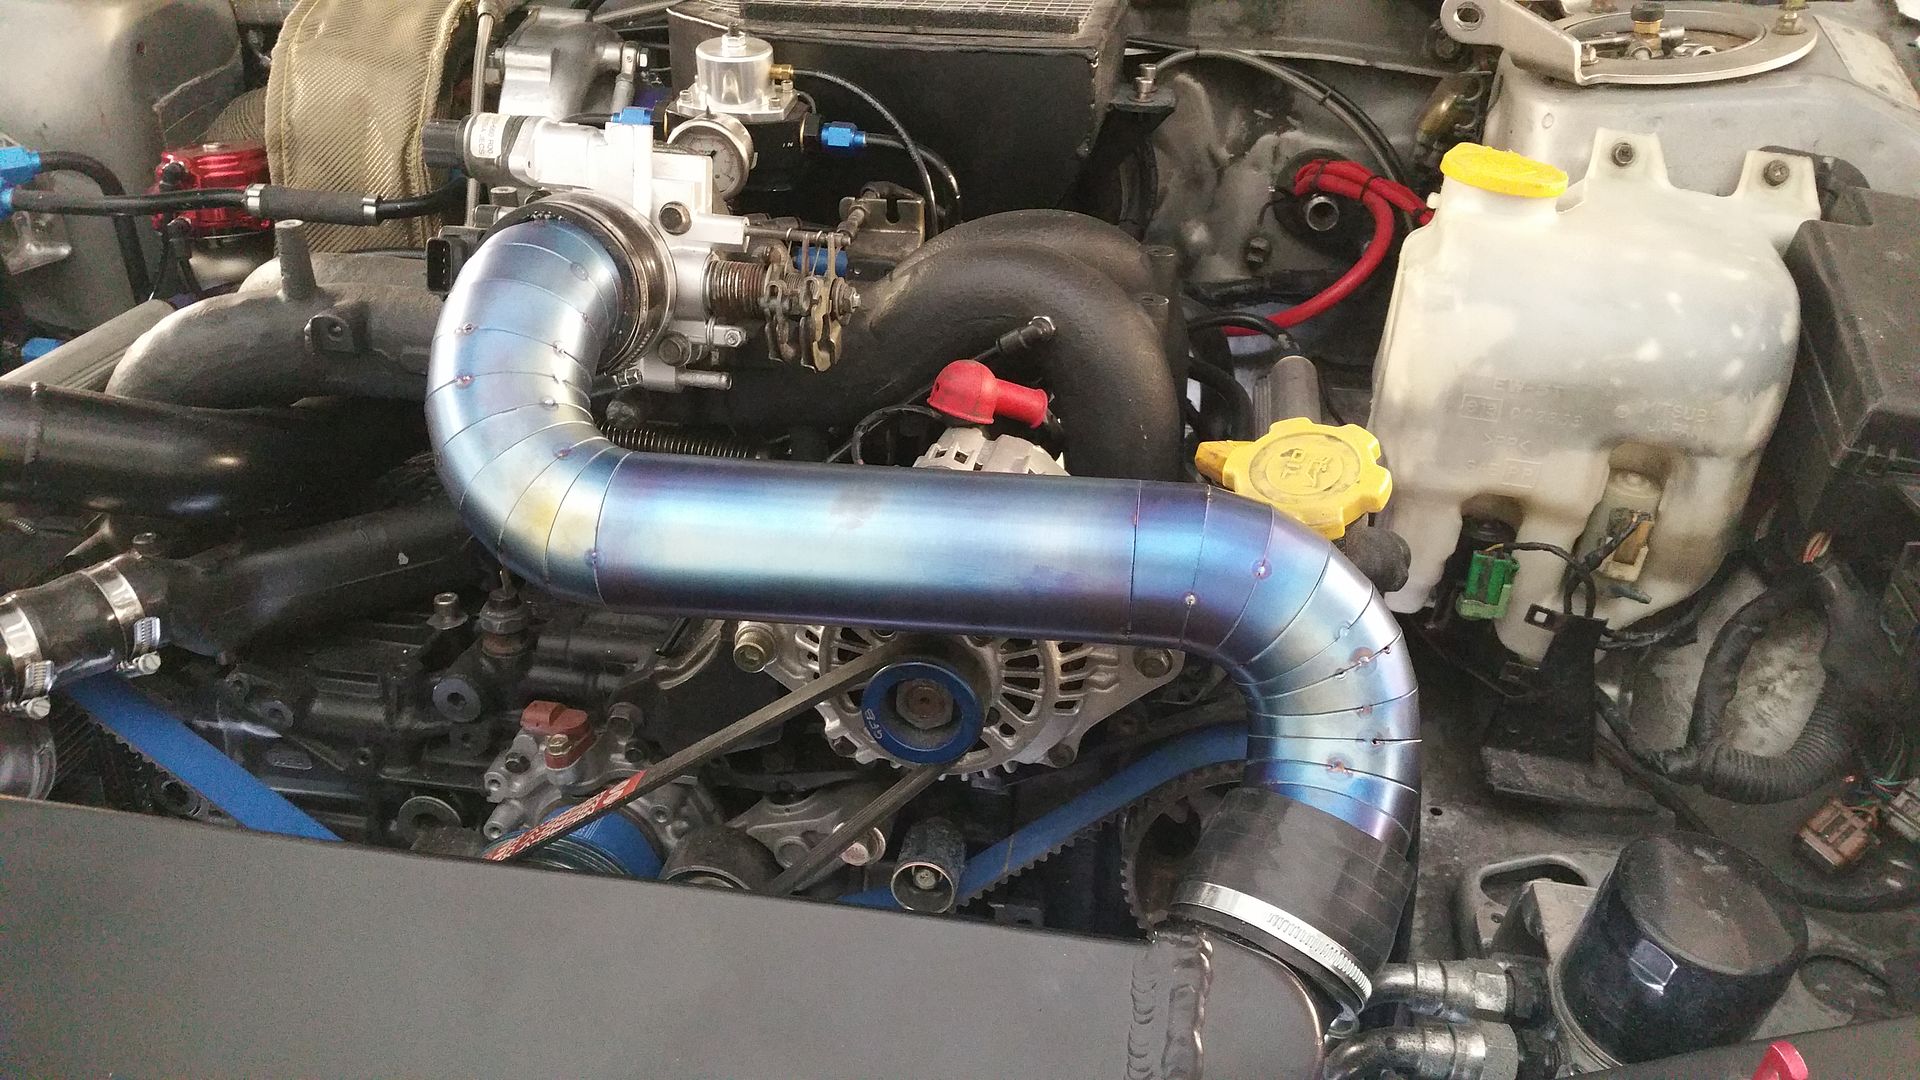 Oh..... And this happened. 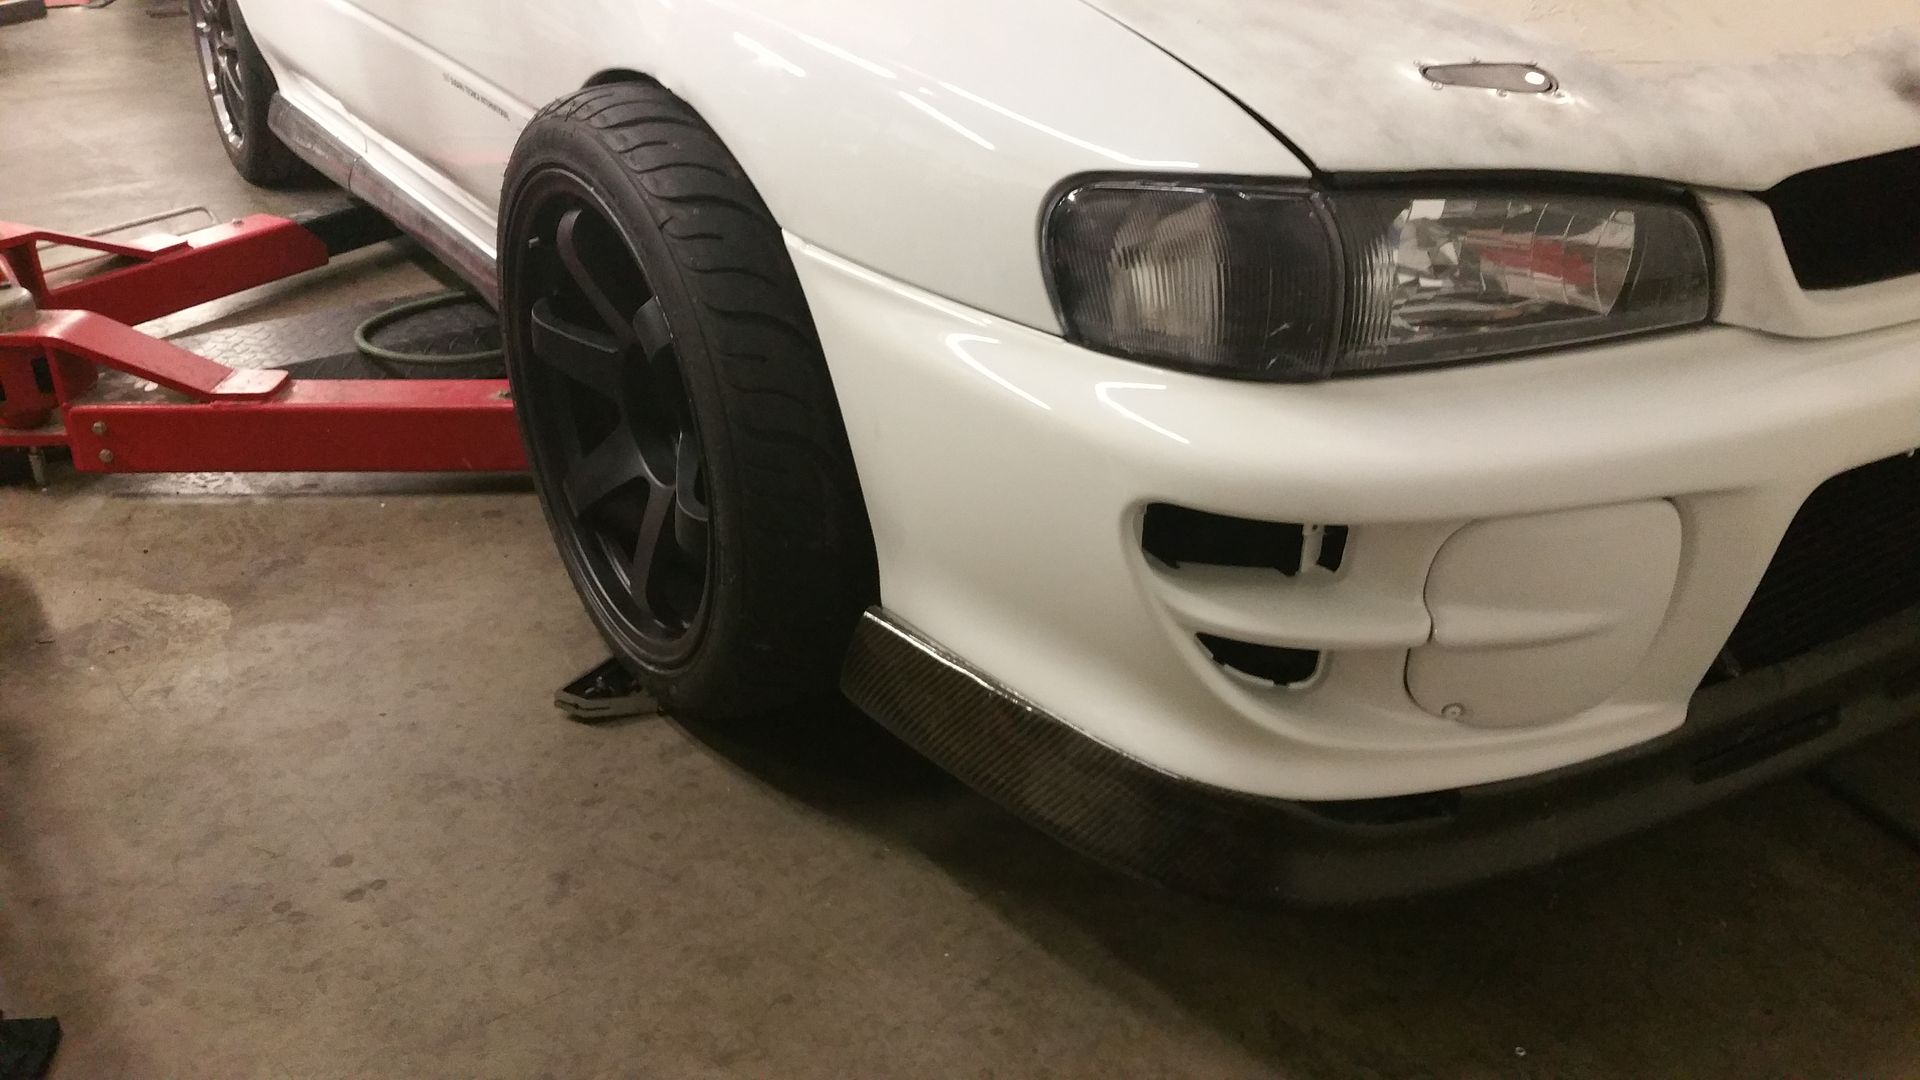
|
|
#88
|
|||
|
|||
|
Lots of welding and the second ic pipe to do.
Last edited by seventune; 16-06-2015 at 06:19 PM. |
|
#89
|
||||
|
||||
|
May be a lot of work but looks great

|
|
#90
|
||||
|
||||
|
I do like titanium!!
__________________
Somewhere drinking Coffee Mapped and maintained by FBTuning 07595 493581. |
|
#91
|
|||
|
|||
|
very interesting. looks really good
|
|
#92
|
|||
|
|||
|
|
|
#93
|
|||
|
|||
|
wow!! like the colour of them wheels
|
|
#94
|
|||
|
|||
|
|
|
#95
|
|||
|
|||
|
Right. Scoob is leaving the workshop tomorrow to go home as I'm taking some time off work for a bit and it will give me something to keep me occupied
I have started really chomping away at the inner arches now to suite new wide arches. I've also a ordered a couple of bits off ABW that will need to be modded a bit to suite the wide arch width. Becuase everyone needs wide body impreza in their lives. Also ordered a few guages that turned up this morning. Oil pressure Boost pressure Air/fuel Oil temp Water temp Exhaust temp Also a dash pod to suite. Once these bits are in and body is done I'm going to do the loom and get it mapped. 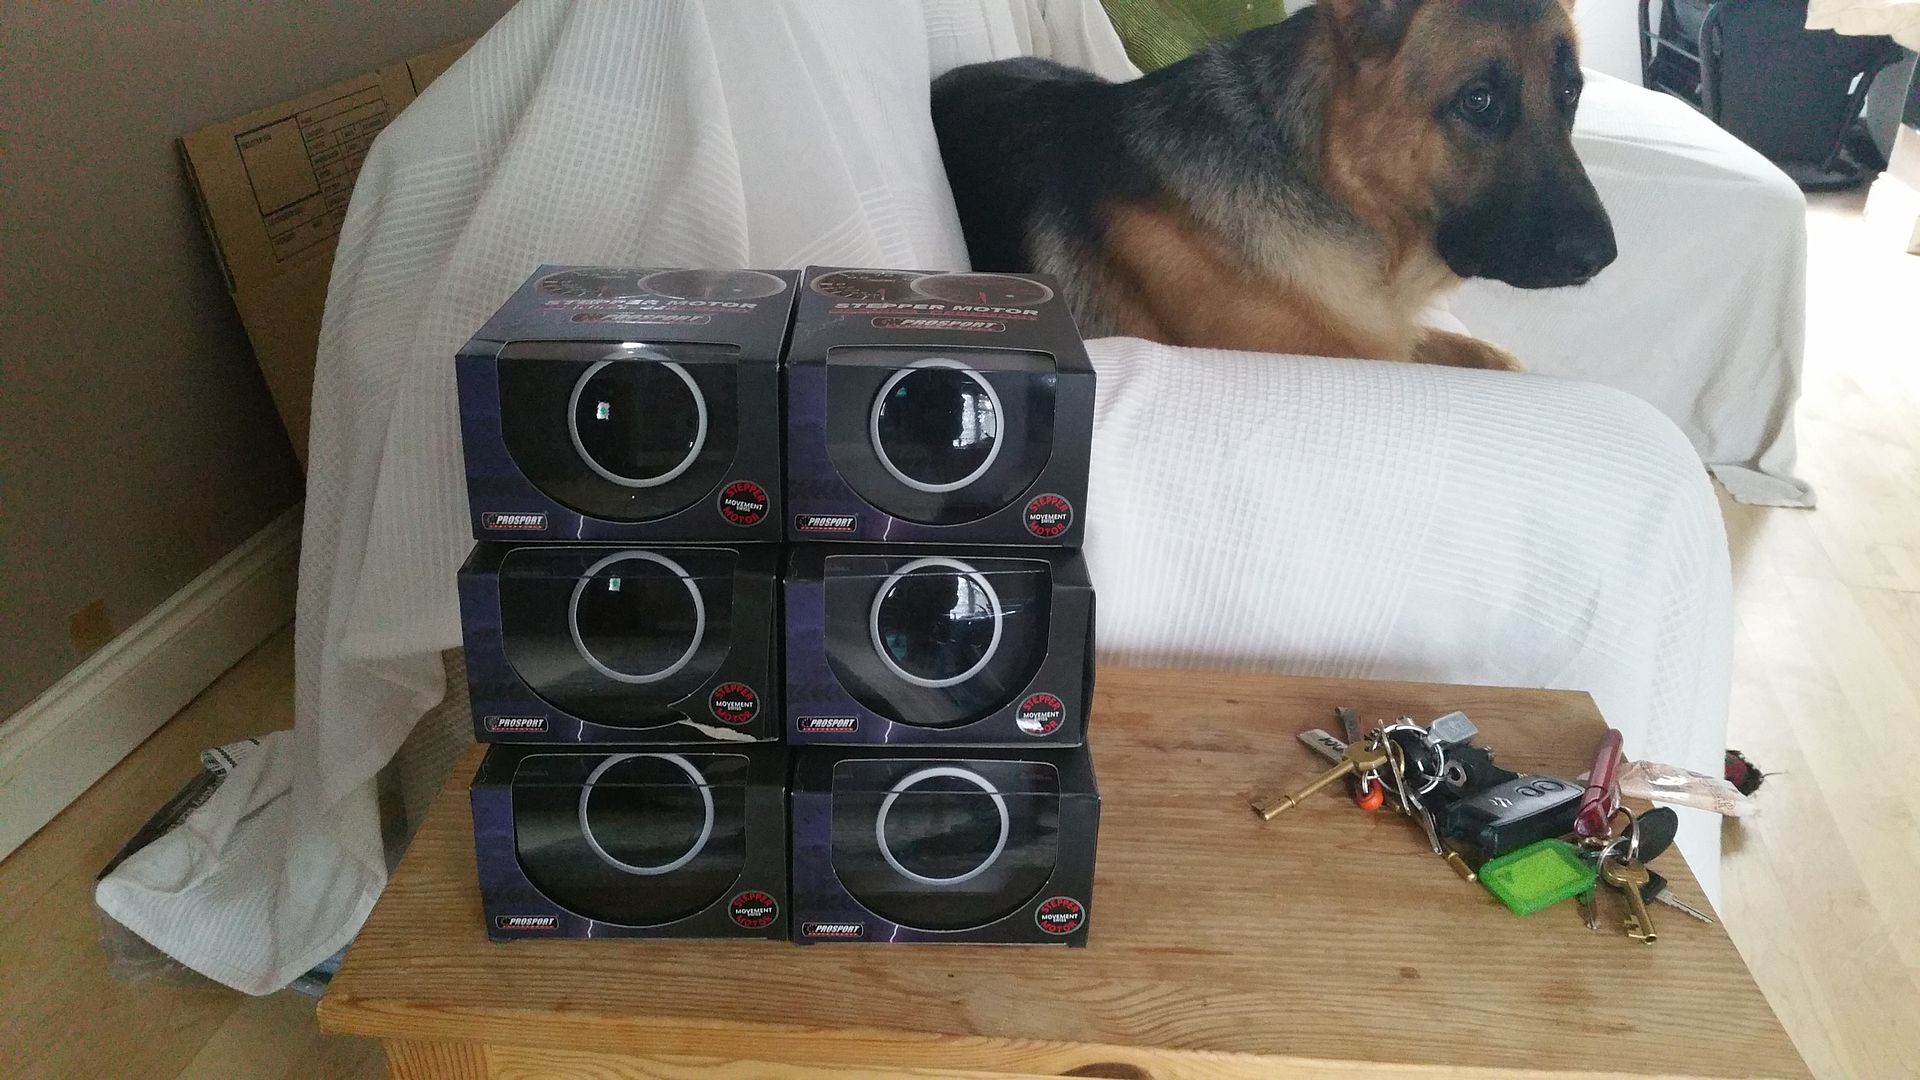 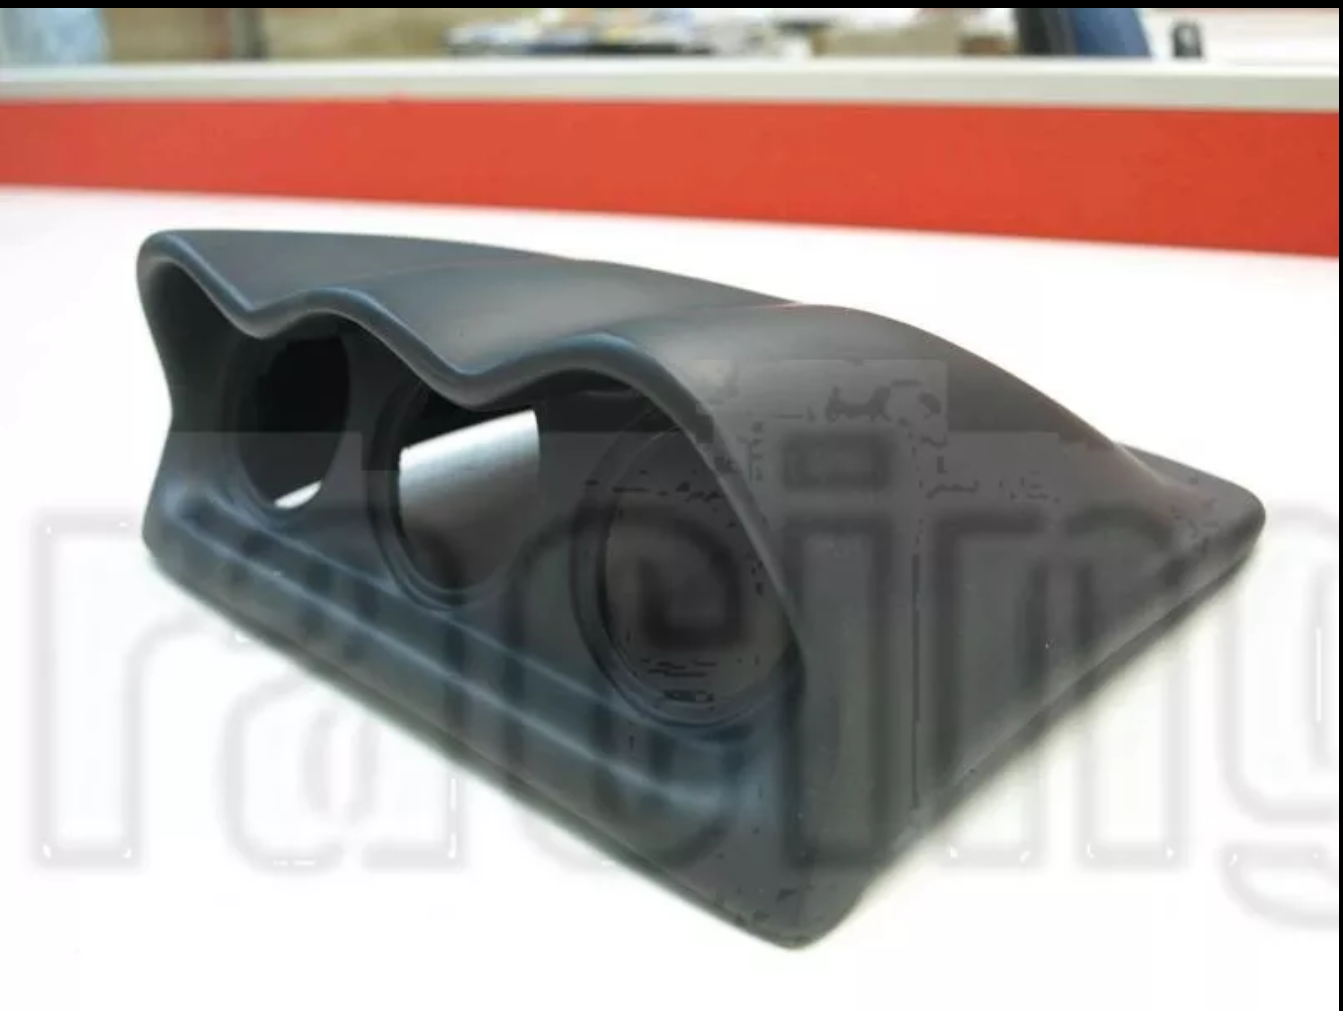
|
|
#96
|
|||
|
|||
|
Well. Can went on a transporter yesterday and found its way home so I could get cracking with the body. I hadn't finished the 2nd two wheel yet hence the yellow ones
On the transporter and off she goes: 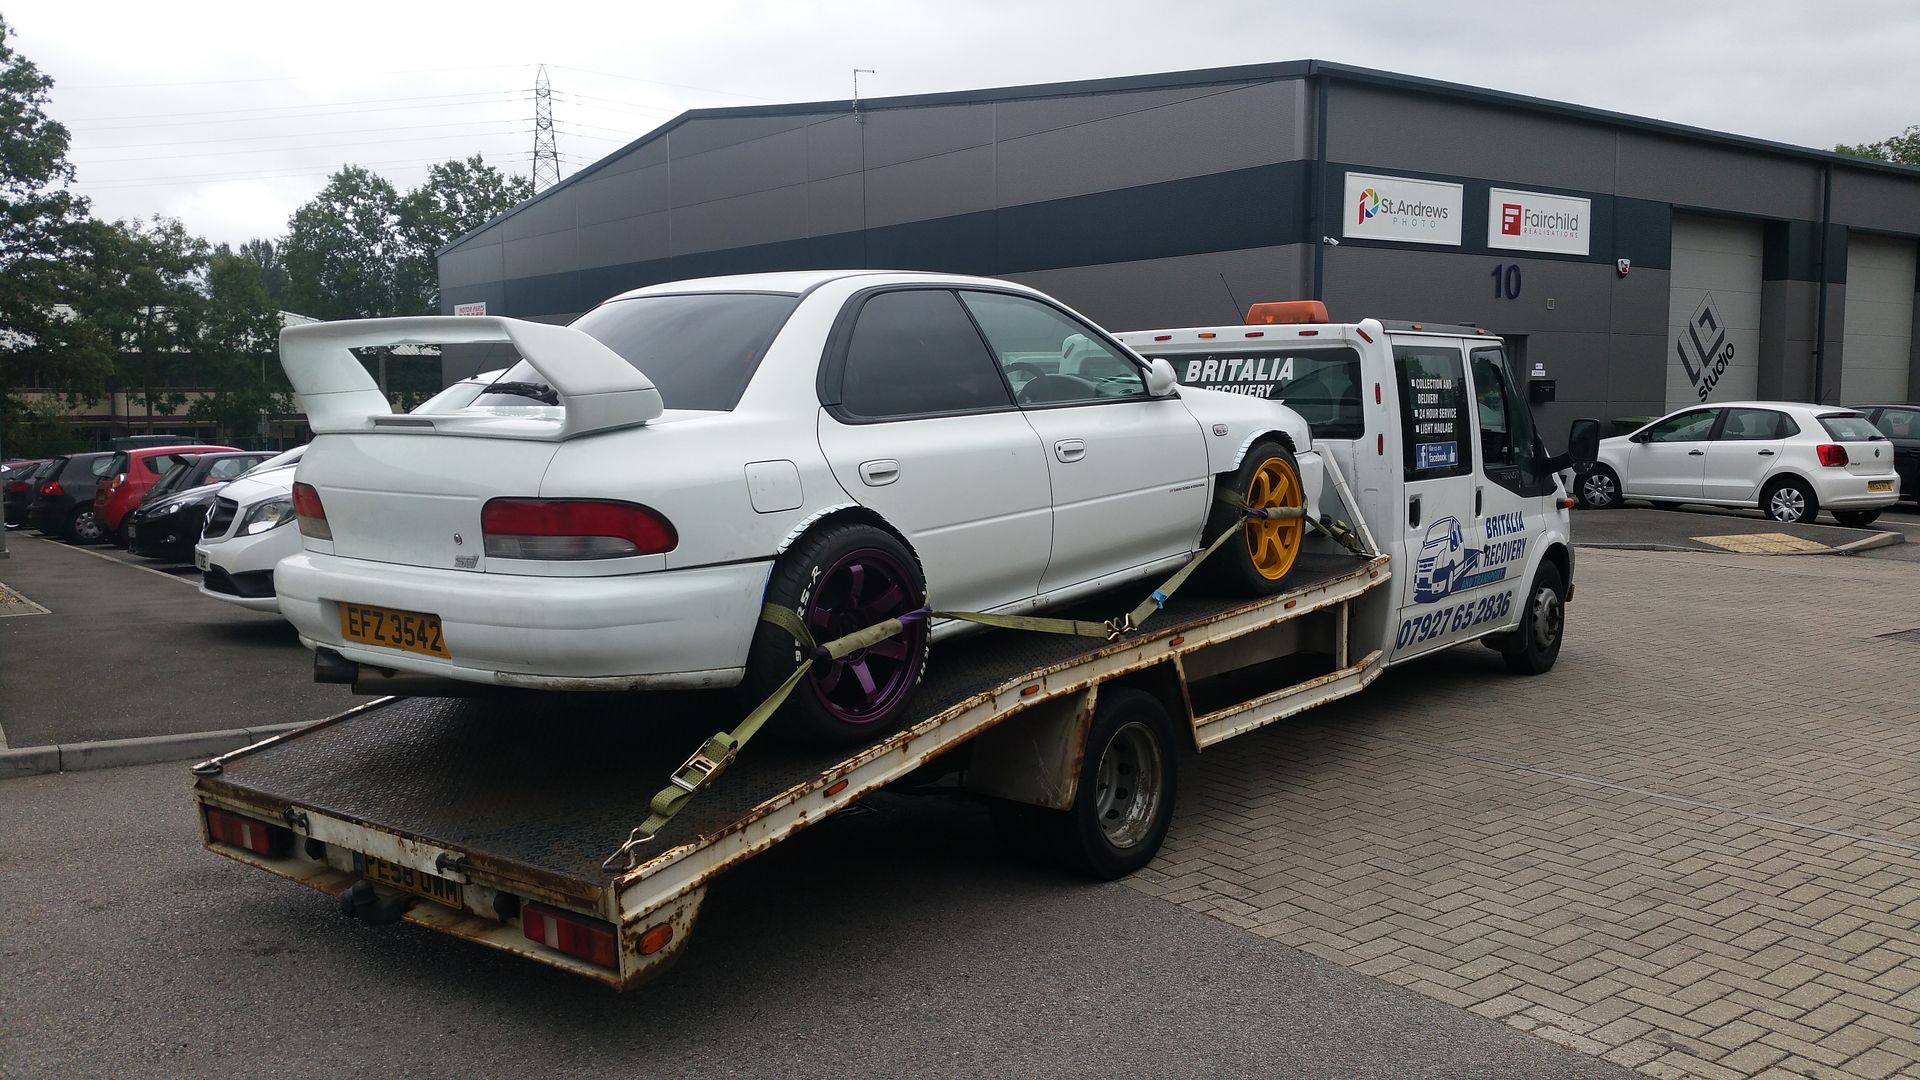 Hour later and the old girl is home; lots to do: 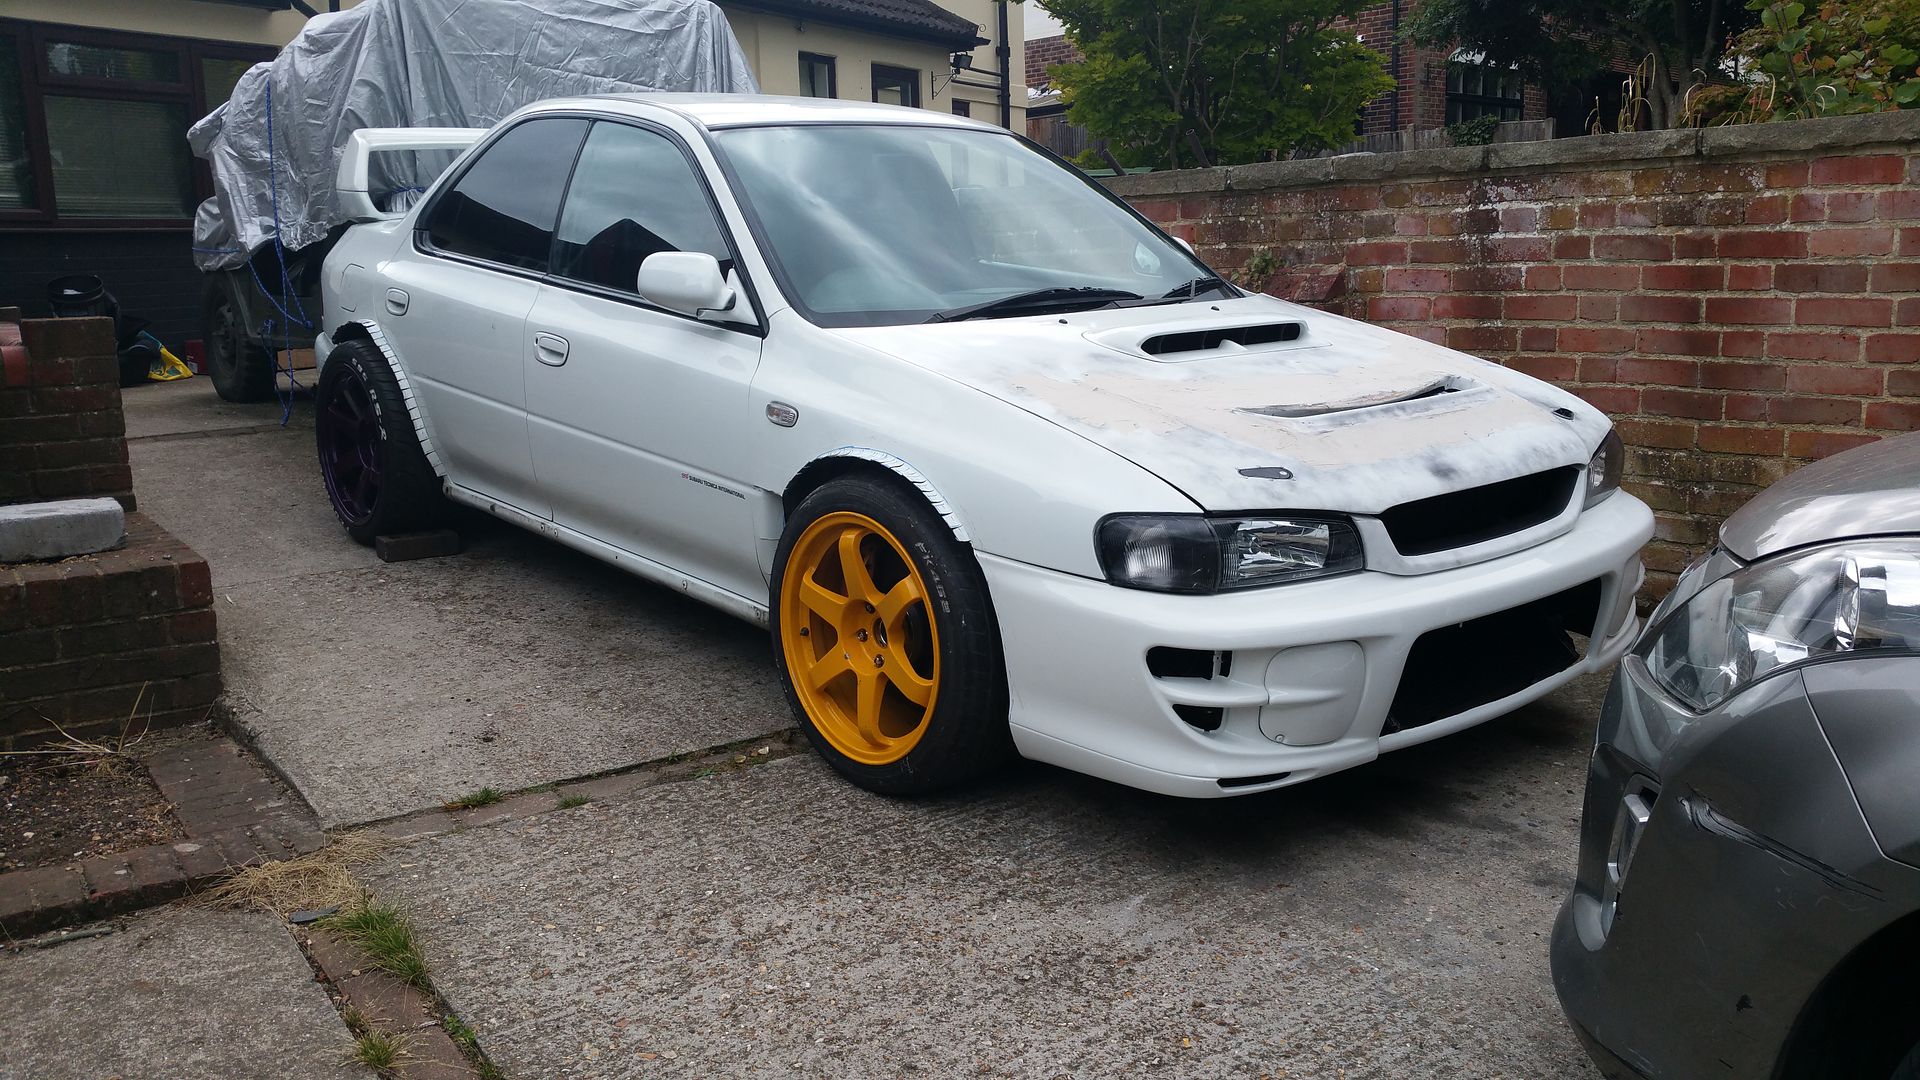 That was yesterday. Being off today I started setting about the arch work. There is a bit of shaping to do and I'm. Waiting on some bits from ABW. First off. 18x10s all round. 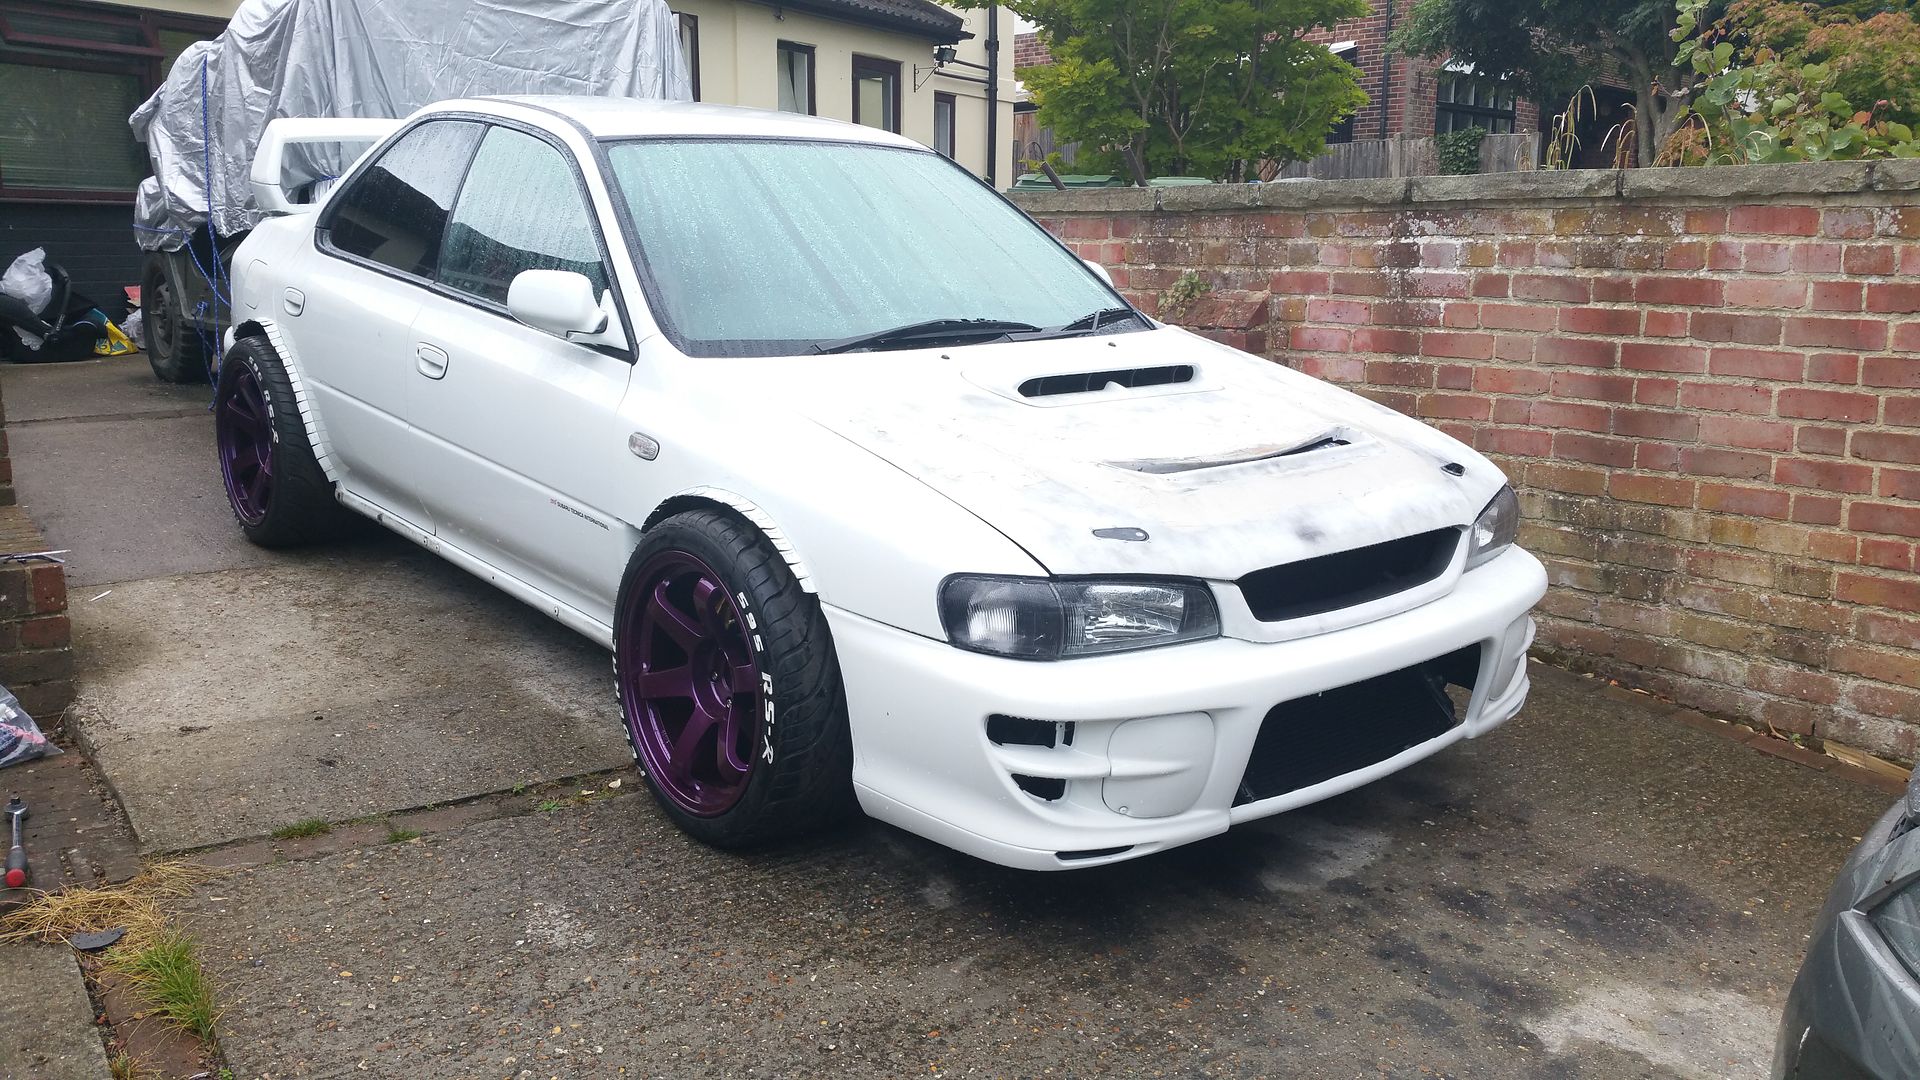 The some arches 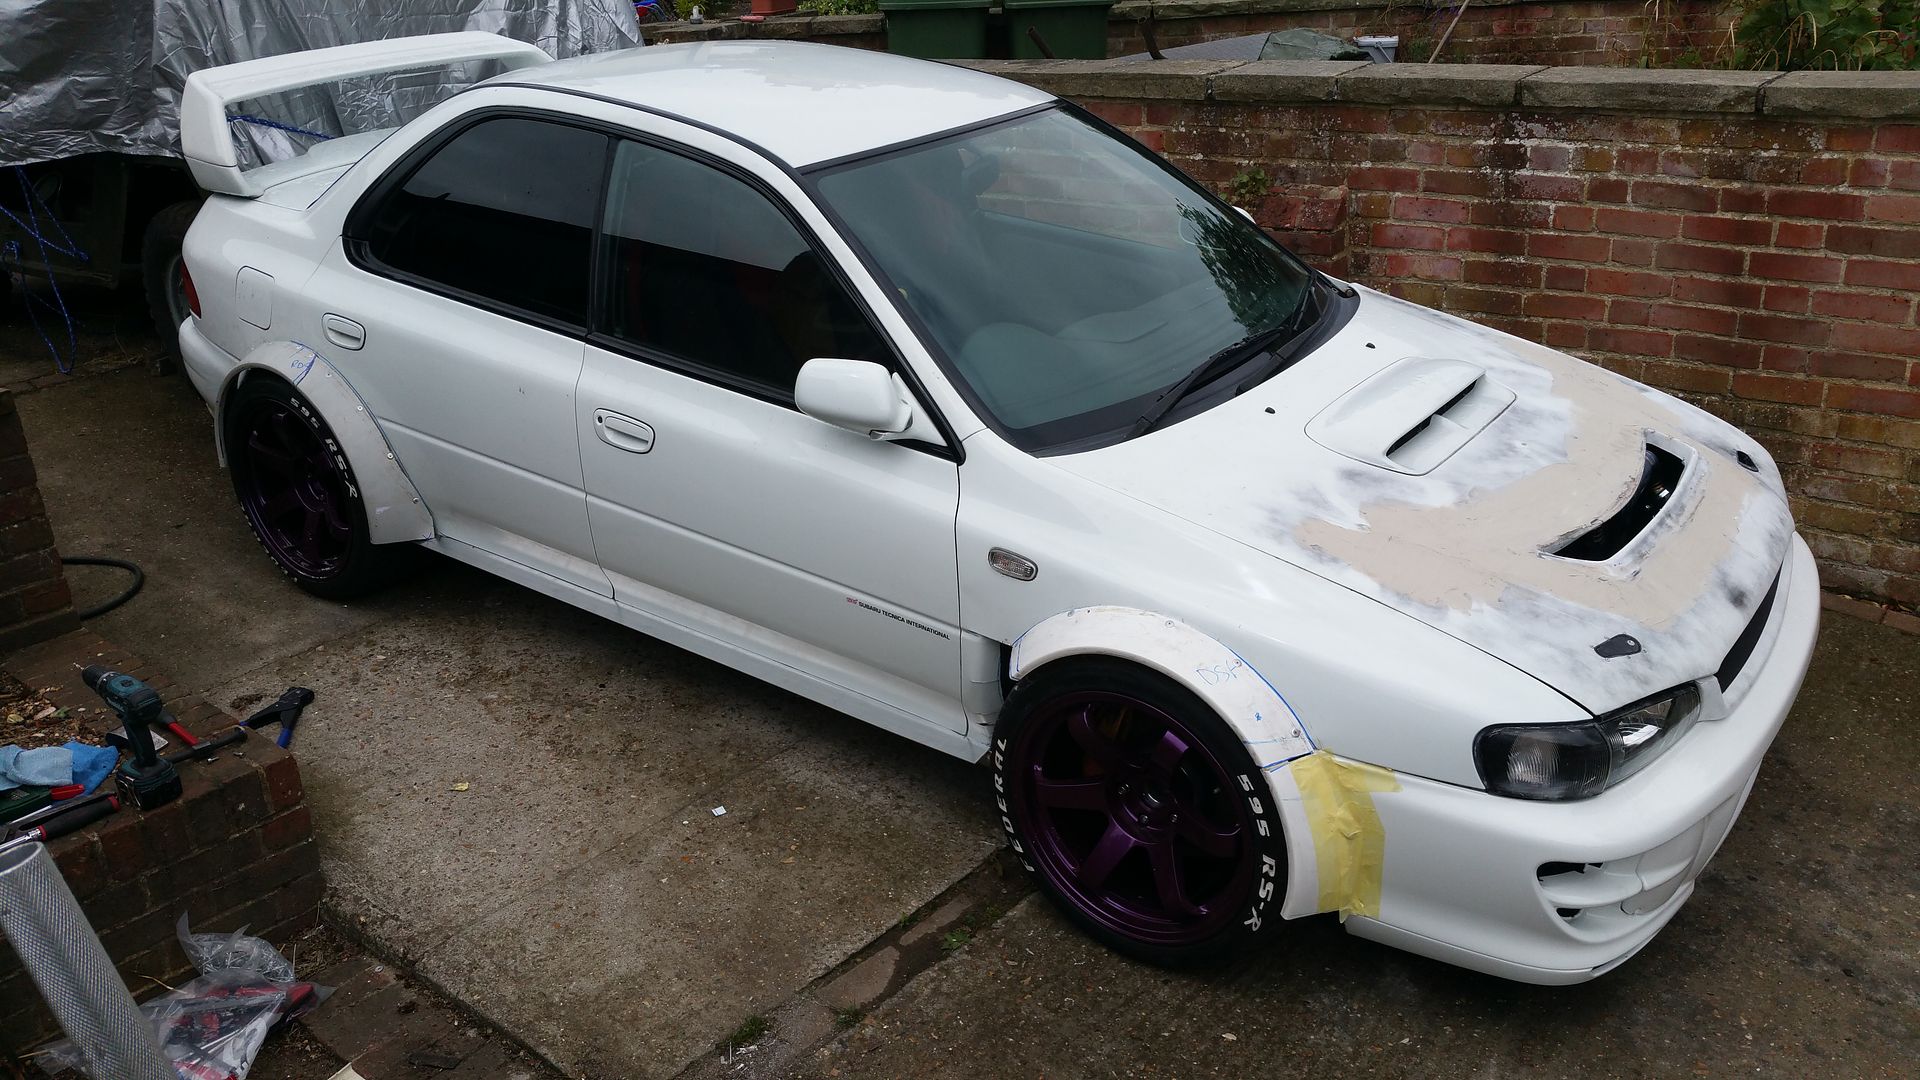 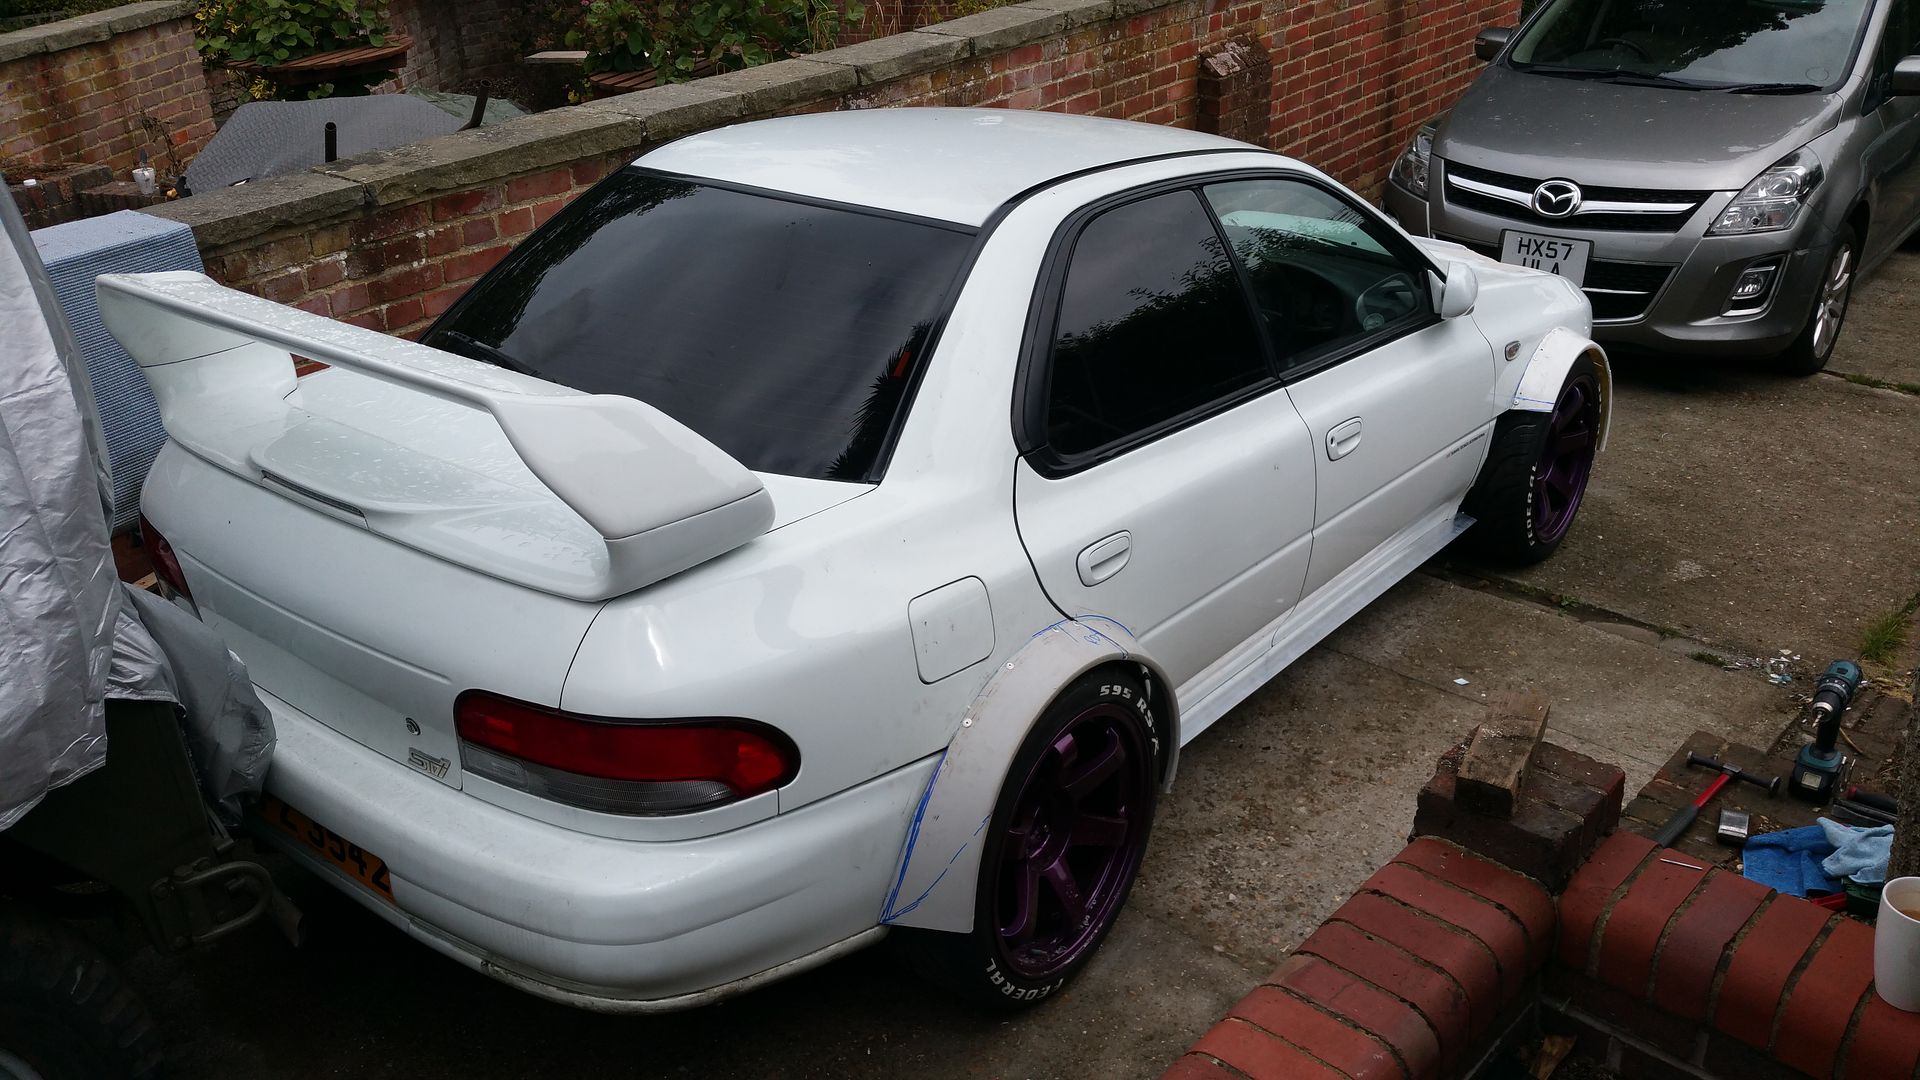
|
|
#97
|
||||
|
||||
|
Like the fact you've split the arch where it joins the front bumper, will you do the same on the rear ones?
|
|
#98
|
|||
|
|||
|
Yes I will. Not sure how I will shape the bottom of the arch Yet so just left it alone for now.
|
|
#99
|
|||
|
|||
|
|
|
#100
|
|||
|
|||
|
Smooth and phat.......... I like!

|
 |
| Currently Active Users Viewing This Thread: 4 (0 members and 4 guests) | |
|
|